


I’ve been using Unity3D to develop games for almost three years now, ever since Ludum Dare 26. With the recent announcement that Unreal Engine 4 is free for all developers, I decided to give it a try for this MiniLD #58. The theme for this jam is Pong, but it really isn’t an exciting game for one player, so I decided to make Breakout/Arkanoid game since I’ve never created a game of that type before. I am still implementing the ball and paddle mechanics of a standard Pong game.
The Unreal Engine puts some unnecessary screens on startup, since it requires the Epic Games Luncher to be started before running the Unreal Engine. It’s similar to the Blizzard Battle.net launcher for World of Warcraft, Starcraft and other games. I really just see this as a way of advertising their other games. That’s fine if I’m playing games, but I really don’t want to be reminded about the latest FPS from Epic whenever I’m starting my game project.
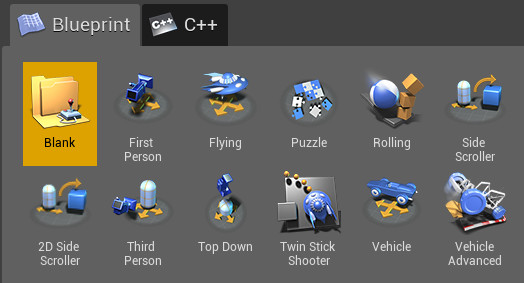
The Unreal Engine is very similar to the Unity Editor, and they actually have a really good guide for people coming from a Unity background. They also have many default bare-bones project templates that will get up you and running with a skeleton game of your choosing, such as first person, flying, puzzle, side scroller, and twin stick shooter. This reminded me a lot of the templates provided by Stencyl, which provides many common behaviors by default.
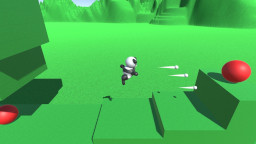
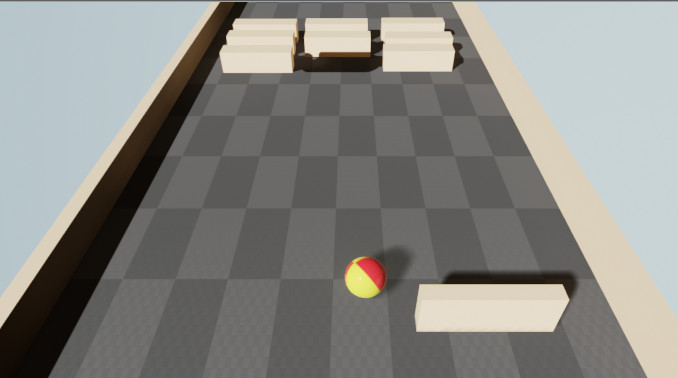
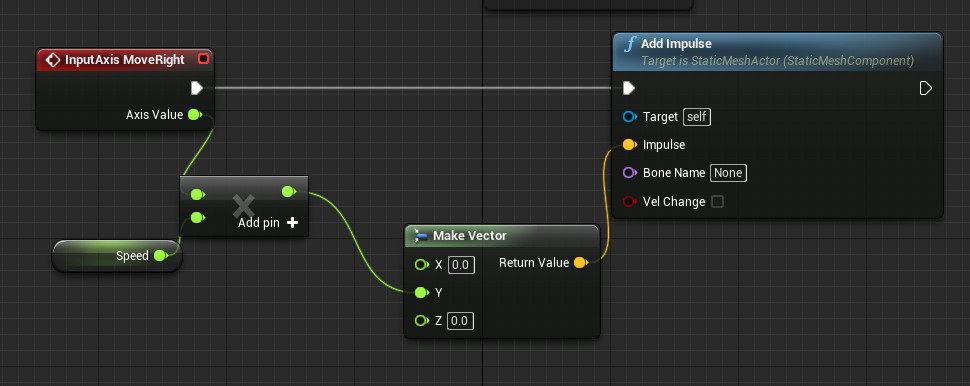
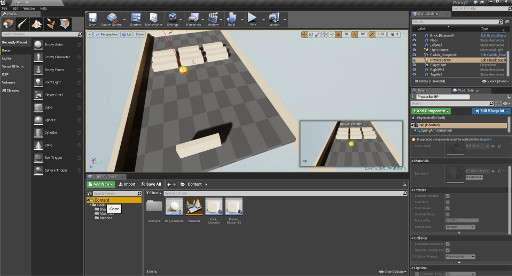
I chose the Rolling template, since it gave me a basic sphere that could be rolled around on a plane. I created three walls made out of stretched cubes, similar to the EarthBall game that I created some time ago. Then I made a paddle out of a cube. To add controls to the paddle, I had to edit the BluePrint, which is similar to PlayMaker’s FSM for Unity. You add various actions to your blueprint and connect them together according to the input and output types. Fortunately, Unreal Engine makes it easy to determine which type is required using a color coding system. Booleans are red, integers and green, vectors and yellow and so forth.
To move my paddle around, first I had to make my paddle aware of physics by enabling “Simulate Physics” under the Physics section on the details tab. This was fairly simplistic, and much easier than Unity’s method of using RigidBodies and trying to figure out the right collision type to use. Then in my BluePrint I created a state flow which responded to to InputAxis MoveRight which uses Add Impluse to move the paddle. This is analogous to Unity’s GetAxis(“Horizontal”) method and AddForce method. The Auto Receive Input property for the paddle also had to be set to the appropriate player (zero).
The paddle was now moving, but it would fall over when the ball hit it. Unreal Engine provides the option to lock an axis for an object, similar to how Unity allows a RigidBody to be constrained on the X, Y, and Z axises. Unfortunately, Unreal Engine only allows the object to be constrained on one axis, whereas I would like for my paddle to only have movement on one axis and locked on the other two. Another annoyance with the default project is that it sets everything up with the X axis going into the screen, which is very frustrating. The Z axis is up, which makes it similar to Blender, which is the tool that I use for creating most of my models.
Since the ball would just sit stationary without any force, I modified the ball BluePrint to apply a small force towards the paddle area on every frame. Unreal Engine provides a state called Event Tick which is executed on every frame. So connecting that state to an Add Impulse action made the ball move as needed. Unity has the ability to change the direction of gravity in the project settings, so making a force towards the paddle area can be achieved by simply increasing the gravity force towards the paddle. The magnitude of gravity can be changed in Unreal Engine using the Override World Gravity setting, but it only affects it directly upwards or downwards.
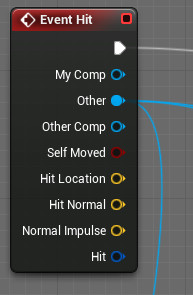
The next step was to detect a collision between the ball and the paddle, because the paddle does not apply any natural force to propel the ball away. In the ball’s BluePrint, there is a special action called Event Hit, which is activated whenever the ball collides with another object. This works in a similar fashion to Unity OnCollisionEnter method. You get a reference to the object that it collided with it as Other. I checked to see if the other object’s name was the name of the paddle BluePrint, and if it matches a force is applied away from the paddle. I’m not sure what the force scale is in Unreal Engine, but I had to apply a force of 2 million to get any noticeable effect. I also used a random value between -1 million and +1 million as a horizontal force, otherwise the ball would reflect straight outwards, perpendicular to the paddle, which would not be very exciting. I think in most ball and paddle games, the angle which the ball is reflected is based on the position on the paddle where the ball is hit. If I have the time, I will add that feature later.
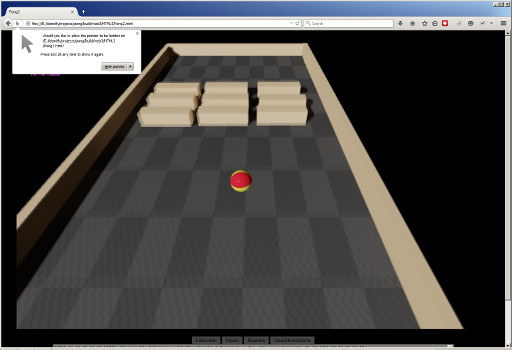
The next obstacle to tackle is bricks to be destroyed. I made a simple brick from a cube, which does nothing. Using the paddle collision process, I was able to destroy the brick when the ball collides with it. There is a Destroy Actor action which takes an object (the same one supplied as an output from Event Hit) which removes the object from the game. In Unreal Engine, GameObjects are called Actors, but some Actors may be Pawns. From what I understand, Pawns are just special actors that can be moved like the player’s character and enemies.
Next, I duplicated my brick multiple times, to give the player multiple targets to destroy with the ball. Unfortunately, the ball did not destroy the new bricks when it collided. This was because the GetName property of the brick returned a different name for every brick with a unique identifier applied at the end. I spent some time trying to get the tagging method to work, which is the way I would solve that problem in Unity. However, BluePrint doesn’t seem to recognize any of the tags set on an object in it’s details. It’s a shame because Unity only allows one tag to be defined for a GameObject. Unreal Engine lets you specify as many tags as you want, but they just don’t work with BluePrint which makes them essentially useless to me.

After some trial and error, I found that I could use the GetClass function in BluePrint and compare that with the Brick BluePrint, and then destroy the brick if it is a match. The Branch logic block is a nice feature of BluePrint, which is something that I wish was included in PlayMaker for Unity. Sometimes I just don’t want to create a whole new event for comparing two values.
As far as the camera goes, I’m still confused about how it works. In the template, it is a child of a SpringArm on the ball. The SpringArm is supposed to keep an object locked at a set distance from the object. I prefer having the camera as a separate object, and in Unity PlayMaker’s SmoothCameraFollow action always makes handling the camera a snap.
I do like the Kill Z in World Settings, which destroys any objects which fall below a certain Z value. This is something that has to be done manually for every GameObject in Unity.
When building the game, Unreal Engine provides options for creating Android, iOS, HTML, Linux, and Windows packages. However, most of these don’t work out of the box, and it only makes packages for Windows 64-bit. I’m not sure if I need a system running Windows 32-bit just to create a package for that platform.
There is a convoluted process for building an HTML5 app, which requires the installation of some tool called emscripten and Python 2.7, along with editing a configuration file. Their page lists the HTML5 build as experimental and only works with 64-bit browsers. The first time that I tried it my build died with an error before completion. I tried it again later, and it successfully created a folder with five Javascript files, some data files, and an HTML file. After about a half minute of loading, the game started playing in my FireFox web browser. This was running the web files from my local system. Subsequent attempts to load the game didn’t always work, but it seemed like pressing the ClearStoredGame button at the bottom of the page helped at times. If they work out the bugs, I would definitely consider using Unreal Engine for the full Ludum Dare, since web games are more accessible to players.
During my few hours of Unreal Engine development tonight, the program has crashed twice which is not a good sign. The editor does save your progress periodically, as you will see the notifications popup in the lower right corner. During the first crash, I had to Ctrl-Alt-Delete and kill the process in task manager, which required me to start over from scratch.
Overall, it feels like an Unreal Engine was specifically developed with first person shooters and similar games in mind. The collision detection actually feels really tight, whereas sometimes Unity has the problem of fast moving objects going though walls (even with continuous dynamic collision detection, which results in having to muck with physics skin properties). I like the BluePrint development interface, as long as I don’t have to get into the C++ code. I had to write C++ years ago, and it just was not a very elegant language in my opinion. That may be due to my learning Java first, and C Sharp is essentially Microsoft’s platform dependent version of Java. There is an Unreal Marketplace option available, but I haven’t had the chance to check it out yet. I’m guessing that it is similar to Unity’s Asset store, where you can buy models, effects, and other assets for your game.