Sliding Socket

Updated ResistorKit to detect LT and RT presses.  These triggers are different than other buttons, because they return a value representing how far the trigger is pulled, instead of an pressed/not pressed value like the other buttons.  It functions similarly to one axis of the thumbstick, by returning a float between 0.0 and 1.0.  Methods for trigger pressed and trigger released for both triggers were added to the RessitorKit screen class.  Therefore, I had to update all of the classes in the game to implement those four methods.  I also added a property in the ResistorKit menu to draw the text with a small drop shadow.

With the LT and RT now implemented, I was able to update the gun shoot code to allow the player to aim up and aim down.  When aiming up, the player will shoot their gun at a 45 degree angle upward in the direction that they are facing.  The same goes for aiming down, except that they are shooting at a 45 degree angle downward.  Holding both LT and RT will cause the player to shoot directly upward.  One issue that I’ve noticed is that if the player is standing next to a block  on the right and shoots upward, then the projectile will immediately collide with the block.  So to fix this I moved the starting position of the projectile to the center of the player horizontally.  Now shooting upward will not collide with blocks to the left or right.

For the Health sockets, I noticed that it was only using the lowest equipped health socket.    This is because the lowest health socket was being checked first in the if/else/elseif statement.  I reversed the order of the health socket check so now it looks for the highest socket first.  This also prevents stacking of the health sockets, but stacking could be implemented by keeping a counter of the sum of the values of the health sockets.  Ideally, there will be a  warning message that will prevent the player from equipping more than one health socket.  It would warn the player that any other health socket will be removed if a health socket is already equipped.

screen061

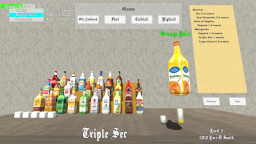
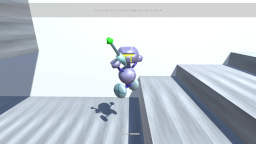
Added new sockets to the game, which are the sliding sockets.  The player can no longer slide by default, so they now have to equip one of the sliding sockets to get into areas only one block high.  The higher level sliding sockets will allow the player to slide longer.  There may be obstacles such as overhead spikes which will require the player to slide longer to pass.  The text next to the “A” display has also been update to not display if the player can not slide.

Noticed a few issues with some of the sockets.  The level 3 fire socket didn’t work properly, which was due to an incorrect socket ID used in the shoot gun code.  The radiant plus 4 socket didn’t work, because I had not added that level yet.  Also, the weapon list would not populate the first the the player goes to the equipment menu.  This is because the setPlayer method was being set after the activeScreen method is called on the Equipment screen.  Moving the setPlayer before fixed this problem, which ensures that the EquipmentScreen has a reference to the Player to access the Player’s weapons.


Socketable Weapons

Today, I created a new model in Blender which will represent a collectible socket.  The model is basically a sphere with objects rotating around it.  The rotating objects were created with a circle, which was extruded out.  Then the edges for every other segment were removed.  Then I added four bones that point outwards from the center.  Next, I set the animation to 20 frames, and I rotated the armature half way at the end of the animation.  Since the model is symmetrical, I didn’t need to do a full 360 degree rotation.  Like the other models, I exported the animation frames and then used Gimp to touch up the images.

43 

Similar to the Weapon and Armor collectibles, I created a CollectableSocket class.  Also in the same way, I added a List of sockets that the player has collected in the Player class.  I added all of the Sockets to the EquipmentCatalog, and added methods for returning a socket and generating a random socket.  On the equipment screen, I now display the list of all sockets the player has collected.

I realized that my existing collectibles had 30 frames in the animation.  This value was set as a constant in my collectible class, so I removed the const declaration and changed the variable to protected.  In the constructor of the CollectibleSocket class, I set the number of frames in the animation to 20.  This was a fairly simplistic change, which would had been much more painful if I hadn’t used good object oriented programming style.

screen058 

The Armor and Weapon classes have been updated to include a List of Sockets and an integer which represents the maximum number of sockets for that item.  To equip a socket, for now I have made it so that pressing the action button (X) will set a boolean to go into select socket mode.  This may need to be extracted into another screen later.  This sets the select socket menu to active.  Pressing the confirm button while in select socket mode will add the selected socket to the socket list of the currently selected weapon.  Currently, no checking is done to determine if the socket is of the right type (body location or gun).

When in socket selection mode, pressing the confirm (A) button will add the socket at the index of the socket menu to the player’s weapon at the index of the weapon menu.  Again as with the weapon menu, I am assuming that the socket menu is aligned with the player’s acquired sockets.  I went ahead and added another property to the Socket class, which is a code string.  This code will used when displaying the socket on a weapon or armor, since printing the name for each socket on the weapon would take up too much space.  For now, I am just listing the socket codes to the right of each weapon, or “X” if the socket location is empty.  Pressing the cancel button (B) will switch the sockect selection flag back to false, otherwise the player will always be in socket selection mode.

screen060

In the player class, I wrote a method that returns if a socket is active.  It takes a socket ID as a parameter, and returns true if it is equipped on a weapon.  In the near future, I will expand this to armor as well.  I also updated all of the code in the Player class which checks for sockets in the EquppedSocket class to use the socket active method.  Now the EquippedSocket class is obsolete, so I went ahead and removed it from the game.

One additional change is that I changed the initial amount of health the player receives to 60 points, which is the same as three bars.  I found that the original amount was way too much, so lowering it should make the game more of a challenge.

Weapon Damage

http://www.youtube.com/watch?v=U6Wwk8NJk14

Added a new Weapon instance variable to the Player that is the equipped weapon, which is just a pointer to a weapon in the player’s acquired weapon list.  The equipped weapon is initially set to null, which means the player does not have a weapon equipped.

When the equipment screen is displayed, a new ResistorKit menu is created which takes the Player’s acquired weapon names as parameters.  This is a little wasteful, since memory used for the menu object has to be allocated each time the screen is displayed, so there is some room for optimization later.  I’ve also added the damage values as a part of the menu item, so it’s easy to tell how much damage the weapon does for testing.  One enhancement I could make is to automatically sort the weapons by damage value.

Equipment screen now allows weapon selection.

I commented out all of my socket code for now, and now the confirm button just sets the player’s equipped weapon to the object in the acquired weapons list at the index of the index of the currently selected menu item.  I think it’s safe to say that the menu items and the acquired weapons list will always be in sync, because it is not possible to add or remove weapons from the list on the equipment screen.  Ideally, I should make the menu accept a pointer to the acquired weapons list as a parameter, and then have a toString type message display the weapon name and damage.  However, I would then lose some of the portability of the ResistorKit libraries, because not all games will have Weapon objects especially not defined the same way as mine.

At the bottom of the screen I now display the equipped weapon in yellow.  I’ll probably end up making the equipment display and equipment select screens separate, but for simplicity I will leave both on the same screen for now.  I still display the list of armor now with defense value, but defense has not been implemented yet.

Static weapon added since the player starts with no weapon equipped.

Now that the player has a way to equip a weapon, I have to apply that value to the projectile.  Thankfully, I already added a damage instance variable to the projectile class.  Therefore, I just have to assign the weapon’s damage to the projectile when it is fired.  One problem is that the player does not start with any weapons, which means the player is unable to shoot.  However, there is a chicken and egg problem here, because enemies don’t drop weapons until they are shot and defeated.  Therefore, I programmatically added a weapon drop to the first room so that the player can equip it to defeat enemies.  This was easily accomplished by calling the dropItem method when the first room is instantiated, passing the first weapon ID and the x,y coordinates as parameters.  In the future I would like to have static items placed by the level editor, which would require the player to open or shoot a treasure chest.  Additionally, I also had to add a check on the equipment screen to ensure that the selected weapon is in the bounds of the acquired weapon list, because index 0 in a zero sized list out of bounds and causes a crash.

One more slight glitch to fix.  If the player is running and then the Start button is pressed to go to the equipment screen, then they will continue to run after returning to the game even if the directional controls are not pressed.