
![]()
![]()
![]()
![]()
Released
Dream Build Play – Enemy Movement and Level Data
I spent about an hour and a half working on my new Unity game for Dream Build Play 2017. It’s been a few weeks since I last touched it, since I’ve been busy with updating the web site and other game jams. A few days ago I decided to change the title of the game to Myriad of Legends, which keeps the “My” of Mystic and “Ad” of Adventure. Then I thought the title was too long and sounds too much like League of Legends, so I decided to change the title to just Myriad, which I think sounds better. The only problem is that just a one word title will make it harder to find with search engines.

This time I worked on enemy movements. I made the Enemy Movement a separate script that is assigned to my Enemy prefab. I really wanted to keep things like movement countdowns separated from the core enemy attributes like health points. I keep an angle float variable, which holds which way the enemy should be facing, and I update the rotation on every frame using Quaternion.AngleAxis, using the angle and Vector3.up as parameters. This is to ensure that the enemy keeps facing the same way, since the rotation can be affected by the physics engine. Alternatively, I suppose I could have locked the Y rotation on the enemy RigidBody. I have a function called setRandomDirection, which sets the enemy angle to either 0, 90, 180, or 270. This is done by generating a random integer from 0 to 4 (exclusive), then multiplying by 90. I have a countdown which calls the setRandomDirection every two seconds. Also, if the enemy collides with another enemy, I add 180 to the rotation to both enemies so that they don’t continually bump into each other.
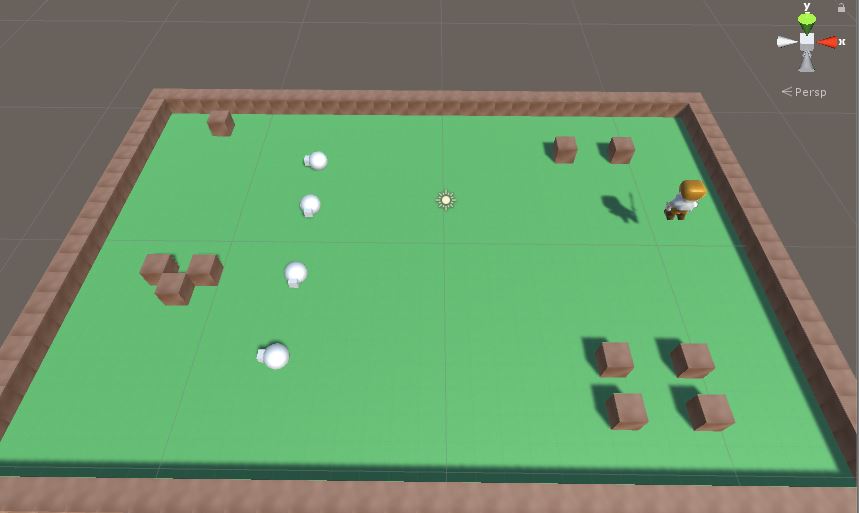
 I also created a rock object, which is currently just a cube that I texture mapped in Blender. I populate the rocks in the game world according to a text file. This is the same process that I used for Ancient Adventrue and some of my other games. The text file has pound signs (#) to represent the rocks. I have the text file stored in the Resources folder in my Unity Assets folder. Then I assign the text file to a TextAsset object in the LevelManager script that I created. I can access the contents of the TextAsset using the .text property. Then I use the Split method passing a new line (\n) as a parameter to get each row, and use .ToCharArray to get the character data for each line. It’s a quick and simple way to design levels. Later, I may convert this to something like the Tiled TMX format, which would allow me to store more information, but is a little more difficult to parse. I also added enemies, which are signified by the letter ‘E’. I set the enemy movement so that 180 is added to the rotation if it collides with a rock. Occasionally, there is a bug where the enemy will continually rotate, which I believe is caused by the enemy colliding with two rock objects at once. I need to fix it so that it will only rotate once per frame and per collision. As I found out with some of my previous games, a collision can occur over multiple frames (Update calls), and it isn’t finished until OnCollisionExit is called.
I still had the problem with the sword collision box continually colliding with the player capsule collider. To fix this, I just made the sword collision box a trigger, so that it is not affected by physics. I think I could have put the sword and enemies on a separate physics layer, but that could make things much more complex. When the enemy gets an OnTriggerEnter event where the colliding object is a Sword, then the enemy is destroyed. Probably in the next update, I will make it so that it takes away health points, and only destroy the enemy if their health falls below zero.
Finally, I got rid of the huge ground plane, and added a new ground prefab. It is the same width and depth as as the rock, one unit in both directions. However, it’s anchor point is on top of the model, instead of on the bottom like the rock. This way, if I instantiate a rock and ground at the same position, the rock will sit perfectly in line on top of the ground. The ground is instantiated for all spaces in the text file, and with rock and enemy positions.
Dream Build Play, Five Years Later
It w as a little more than five years ago when I participated in my first Dream Build Play game development competition. I created an electronics puzzle game called Resistor, using the XNA game development framework. That was the first time that I developed a game for a competition, which I eventually released on the XBox 360 console.
Recently, Microsoft announced that they are bringing back the Dream Build Play competition, which runs through the end of 2017. This time, we are free to use any game development environment, as long as our game targets either the Windows 10 or XBox One platforms. I have quite a bit of experience with Unity, and it can create builds for both platforms. Therefore, Unity is my choice for game development engine for this competition. I’ve been creating games in Unity since April 2013, when I entered my first Ludum Dare competition. Since then, I’ve participated in game jams on a monthly basis.
I 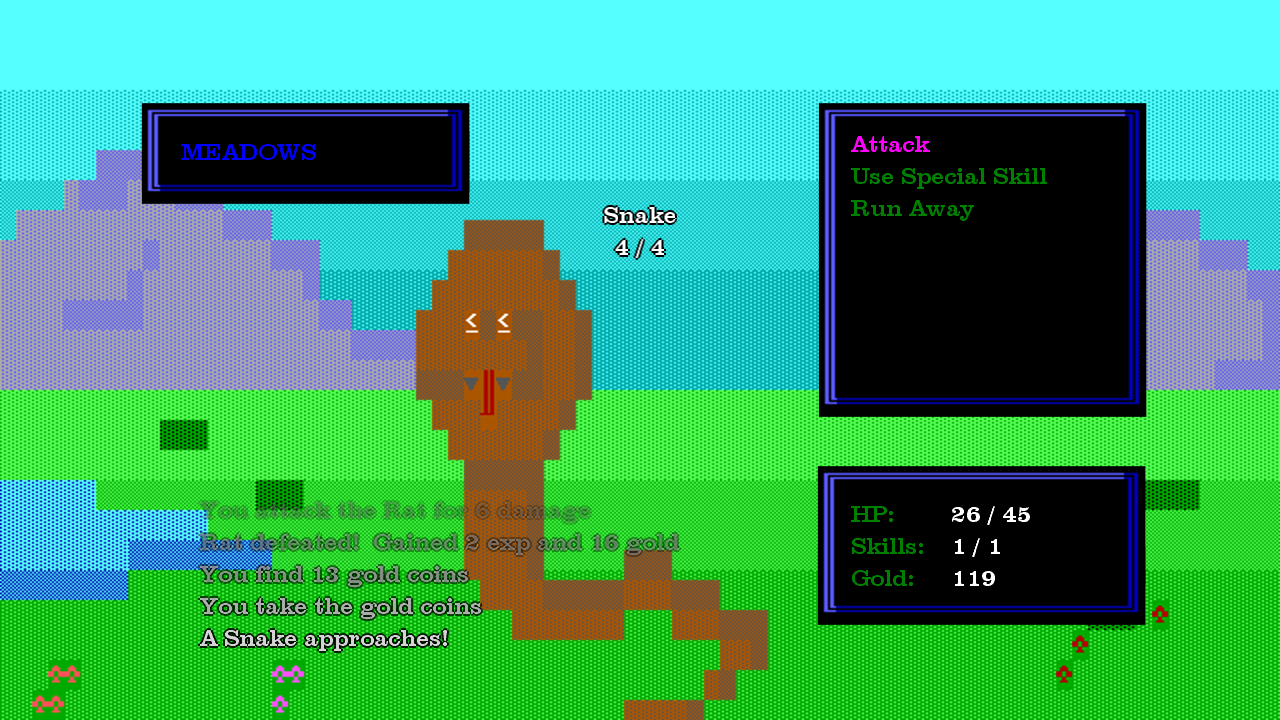 always wanted to make a sequel to my TTY GFX ADVNTR game, which was the last game that I published on XBLIG for the XBox 360 console. It was the first game that I actually sold on a major marketplace and it made a small profit. The game was a menu driven RPG, where the player would battle various monsters and slay the dragon to rescue the princess.
Since this game will be targeting both PC and console, I decided to create an action RPG, instead of doing a menu driven game again. I can still use a lot of RPG concepts, while making the game more than just navigating menus. This style of game was popular in the 80’s and 90’s, but I think there has been a lack of games in this genre lately. I will probably use a lot of the concepts that I learned while developing Ancient Adventure, which was an action RPG that I developed for Ludum Dare 36.
 I started working on this game last month. I was able to model a simple character in Blender. The character currently has three animations, which are standing, walking, and attack. I store the left thumbstick in a Vector3 variable, which I use to translate the character in the game world. If the magnitude is greater than zero, then the walking animation is played, otherwise the standing animation is played. Based on the x and z values, I determine the rotation of the player. I decided to make the character face only in four directions, similar to classic action RPGs. However, it seemed awkward to instantly snap between the 90 degree rotations, so I set rotation targets so the character now smoothly rotates between them.
When the attack button is pressed, I set an attack delay countdown value. While the countdown is active, the player is prevented from moving. The character material is also set to red for now, to show when the attack is active.
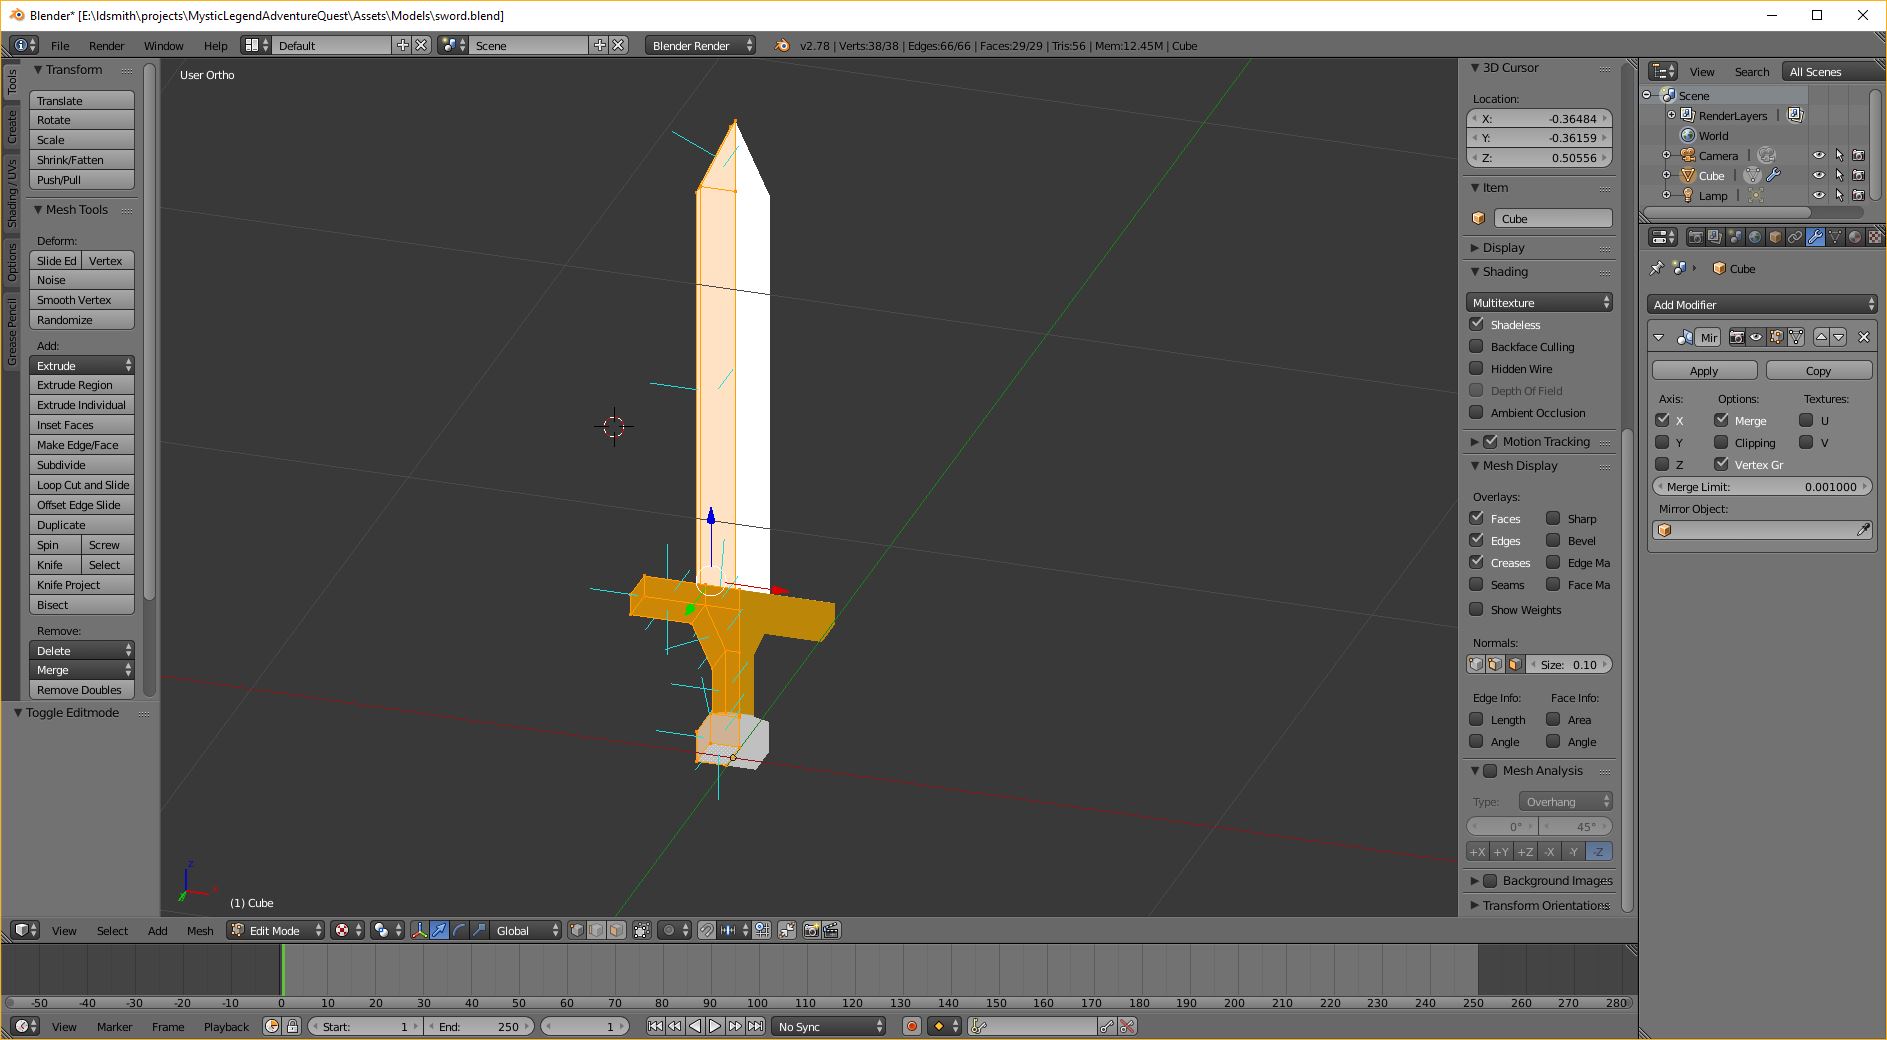 I also modeled a sword in Blender. I am keeping the sword as a separate game object, which I can instantiate and parent to a weapon holder bone in my character’s armature. I have a separate collider for the blade of the sword, which will eventually be used for determining collisions with enemies.
I have a lot of plans for this game, but I will probably not get around to implementing everything. I would like to have a generated world, which is stored in a SQLite database, similar to my Manifest Universe game. Since most of the games that I’ve developed over the past few years have been developed over a weekend for 48 hour game jams, I think Dream Build Play will give me a good opportunity to fully develop a game resulting in a better gaming experience.
Dream Build Play Live Streams