Winner Winner Chicken Dinner

Win State Added

Each time a piece is filled, the checkWinner method is called which loops through the board array, and returns true if all of the GamePieceLight objects are filled.  Learned that “is” is the equivalent of “instanceof” in Java, which I use to determine if the piece at a given cell is a GamePieceLight type.  Created method to return the number of pieces on the board.  The fewer pieces used, the higher the score.  Created method to return the luminosity of all lights on the board, which is the sum of  the Elex values of all the GamePieceLight objects in the board array.  The higher the value, the more points.  A perfect bonus is awarded if the luminosity value is sum of all the bust values of all the lights.  Added bust instance variable to the GamePieceLight object and added a getter method.  Created drawWinner method which displays the end of level statistics, which the player is graded upon.  I think I’ll just use the classic S, A, B, C leveling system for now, and I will need to set point values for each grade in each level.  The drawWinner method is only called if the hasWon variable is true.  Later, I will also add the level time as a third statistic which the player can earn points.  However, this may not be a good stat since time is somewhat related to the pieces used.

When the user has completed the level, a confirm button press will create a new GameLevel object instance, which will start a new level.  For now, it is just the same level, but in the future the level layouts will be different, and the GameLevel constructor will probably take an ID parameter that determines which level will be loaded.

For the first test, I set the bust values for all the lights to 8, which is the same value as the starting wire.  Therefore, I got a perfect score for just connecting all the lights without any resistors.  Next, I used a few resistors to lower the overall luminosity value.  It correctly returned the sum of the luminosity of all the lights which was 20 (6 for the first two lights, and 4 for the lower two lights), so I didn’t get a perfect luminosity score this time which required 32.

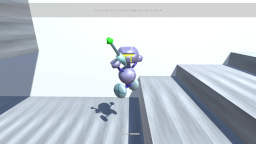
Luminosity and Bust values displayed

Added the bust numbers to the lights in red when the light is not filled.  When the light has filled, the number changes to its luminosity value and is displayed in blue.

What is Resistor for XBLIG?

The objective of Resistor is to build connections to carry electrical flow to activate LEDs (light emitting diodes). To avoid damaging these components, the flow level must be reduced using resistors. Each level is graded upon number of pieces used, the luminosity of the LEDs, and the time required to complete the level. This game teaches the basics of resistor color code values.

Each level has a power source with an electric flow level.  Use wires (A button) to connect this power source to all of the LEDs on the level.  Be careful to not connect a wire that has a higher electrical flow value than the number displayed on the LED, otherwise the LED will be destroyed and the game will end.  To lower the electrical flow, use a resistor (X button) to lower the electrical flow of the wire.  The target is to use a resistor that will lower the electrical flow just enough to activate the LED.  Lowering the electrical flow too much will still activate the LED, but the luminosity grade for the stage will be penalized.  After every ten levels, a new higher level resistor will be awarded.  The currently selected resistor can be changed using the bumper buttons (LB and RB).  Complete the levels as quickly as possible with the fewest number of pieces to get the best grade rankings.

http://www.youtube.com/watch?v=34Qp6-tC5CA

Week 7 Video Update

Level Editing Done

Finished the last ten stages of the game, which use the 10 battery with a maximum resistor of 9.  Went back and fixed the level design issues that I found during playtesting yesterday.  I still need to set the rank values for the last 30 stages.

The level 10 battery caused an issue, because it used block ID “20” in the array.  However, I had defined everything between 20 and 29 as LEDs.  I modified the battery range to use IDs 10 through 20, but the battery showed up as 0, because I was using modulo (%) 10 to get the battery value.  I went ahead and just wrote a special case for this to fix it for now.

Trailer Video Remake

I wasn’t happy with the audio in the trailer video, so I recaptured and re-edited the audio tonight.  However, I kept most of the video clips and edits made last night.  I don’t want to spoil my cheesy indie game song, so I’m keeping it under wraps until the contest is over.

Short Update video