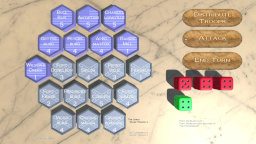
In this video, the world is one continuous loop. Each set of colored blocks represent one “room” in the game world, which are pieced together to form a continuous scrolling world.
Tile Size Change
Scaled down the tiles from 64×64 to 48×48. This allows 15 rows (previously 11) and 26 columns (previously 20) on the 1280×720 pixel screen at once.
Scrolling
Scrolling isn’t too difficult, but it really makes you think. First, set two constants which will be your left and right bounds. If the player walks right and their position is greater than the right bounds, then don’t move the player and scroll the level left. This can be accomplished by storing an X offset variable. Then, draw all the tiles using the X offset to shift the screen. I ended up setting these at 200 for the left bound and 1080 for the right bound, which gives 200 pixels of buffer on both sides of the screen.
Once the offset equals the size of the room minus the right bounds, then it means the player should be moved to the next room. I created a Level class which keeps track of all of the level’s rooms. Additionally, each room has a reference to the left and right room. When moving right to the next room, set the current room to the room to the right, and set the X offset to room size minus the right bounds. Be careful as well to only check for a right room flip whenever the player is at the right bounds, or a left room flip when the player is at the left bounds. Otherwise, the player will continually flip rooms, because the offset will be set to a value outside of the bounds at the other end. I’ll admit, this gave me a bit of a headache getting all of this straight. However, in the end this will work out much better than having one huge array. I had to draw out the transitions on paper first to get it straight in my head.
What made this more of a pain was the fact that my screen width (1280) isn’t a multiple of the tile size (48). Thefore, I only used 26 columns for a room, which left a small difference (32 pixels) between the room size and the screen size. Remembering when to use the screen size and when to use the room size was quite cumbersome, but in the long run I think this will allow rooms to be created of any size.
Setting the last room’s right room to the first room, and setting the first room’s left room to the last room turns it into a continuous scroller, similar to games like Magic Sword or Odin Sphere. I’m a big fan of those games, so I’m going to leave it that way for now.
After finding the hardware instancing example for XNA, I started working on making a library out of the code so that I could use it in my game. This wasn’t too difficult, because I just had create a ModelDisplayer class and added methods to pass the GraphicsDevice, data array (block locations), model, bones, and camera information. Finally, I added a Draw method which displays blocks according to the positions in the data array, using a DynamicVertexBuffer which accepts the Matrix coordinates in its SetData method. The code is flexible enough to accept any 2D array of row and column positions for the blocks.
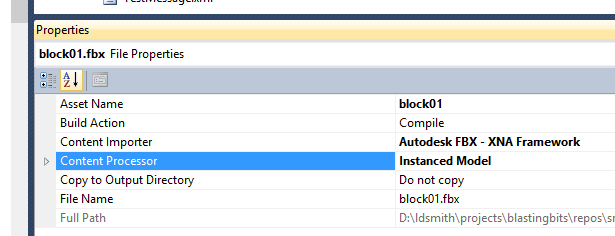
After building my new library, I would able to add a reference to it in my BlastingBits game and set my block to set the Instanced Model processor.
As with the SkinnedModelProcessor, it is necessary to build the library for both Windows and XBox 360. Otherwise, it will return an obscure framework warning which will prevent the library from being used.
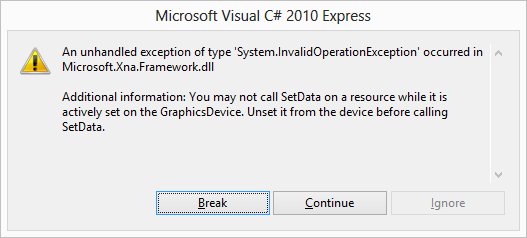
The new InstancedModel library seemed to work great in my initial tests, but I found two problems. First of all, only on the XBox 360 it would randomly throw an error on the SetData method. I don’t understand all of the technical details, but I did deduce that this error only occurred because I was calling the DrawModelHardwareInstancing method multiple times in my main Draw method. This was basically running the instance display code three times, once for the blocks in the current room and again for the blocks in the room to the left and right. Removing the call to display blocks in the adjacent rooms made the error go away on the XBox 360. Therefore, I combined the block arrays of all three rooms into one array, and then just called the hardware instance draw method only once.
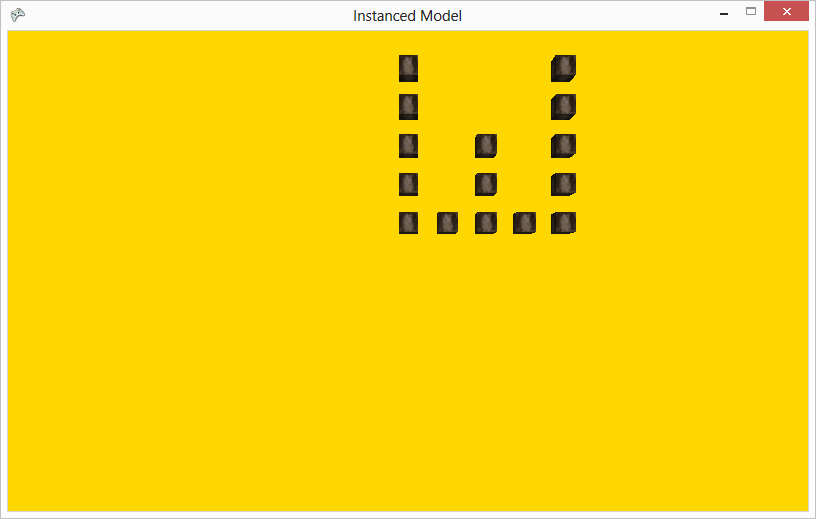
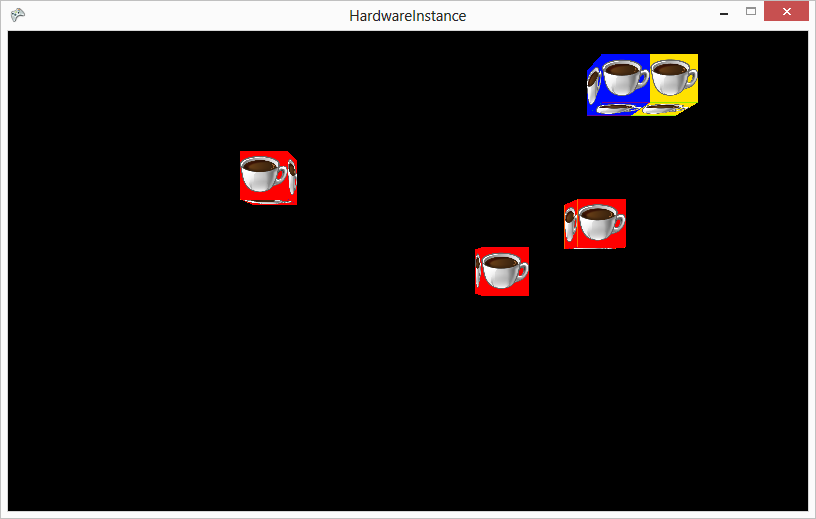
This seemed to work well, but it would not display my own block and texture when I imported my FBX model and PNG texture file. In the example, it uses an FBX model, but I could never find the associated texture. My only guess is that the texture is somehow built into the FBX file. However, I’ve never seen an example of how to load a packed texture from an FBX file generated by Blender, so I’ve always loaded the texture file separately into the Content project. Therefore, I was stuck with the example block model which had a texture of a cat mapped to it which is unchangeable.
Fortunately, I found a really great article at float 4×4 (no author listed) that explains a similar hardware instancing process called “texture atlas”. This is even better than the previous code, because it allows textures for a model to be changed at runtime, and it has all the benefits of hardware instancing to eliminate slowdown. It’s like palette swapping for a 3D model.
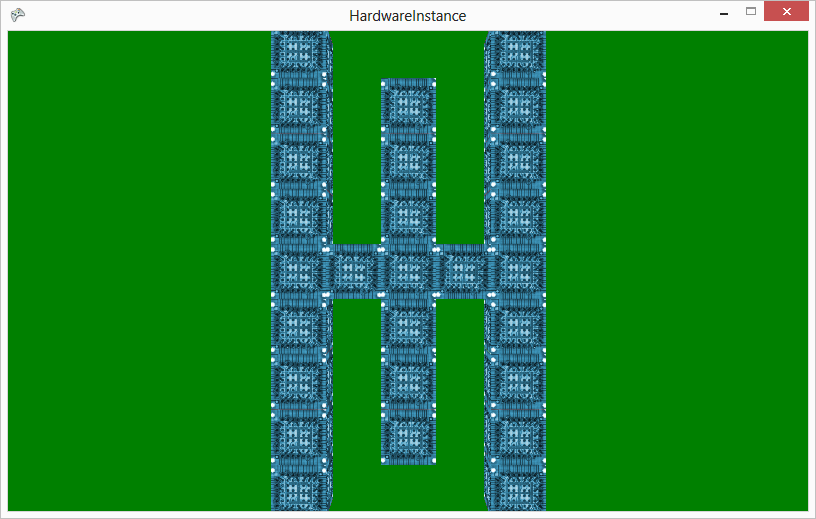
I modified the example code to eliminate the random zoom and spinning, so that it displays blocks at X/Y cells, similar to my game maps. It looks good, but it doesn’t do lighting so I will need to see if it is possible to add that.
As with the previous code, I extracted all of the code specific for rendering into its own library, so that I can link to it in the game. I only want to handle the loading of the textures in my main game code. This code does not import a model (just draws cubes), so there is no model processor. I manually updated the vertex location to make the blocks cubes with width, height, and depth of one (-0.5f to 0.5f) Similar to what I did the the previous example, I added a method which takes a 2D array as a parameter, so I can pass the block map to the AtlasDisplay to draw the blocks. The only thing I wasn’t able to include in the library is the FX Effect file, since it has to go into the content project. I’m not sure how to include that in the library, unless I create a second library just for that file, which is what I may do in the future.
I setup the new TextureAtlas, Effect, and Texture2D in my main game, and passed the instance of the TextureAtlas to the GameScreen3D class. I setup all the necessary calls, and eventually I got the new block display using the texture atlas to work. It now renders the blocks for all three rooms, and I am getting a solid 60 FPS on the XBox 360. One thing to watch out for is that the code has a variable containing the number of blocks to render, which I currently have set to 1000. For three rooms, the current maximum number of blocks is 1170 (390 * 3), but most rooms will probably never have more than half of the blocks filled in the room array. Overall, the update to use the texture atlas method for hardware instancing was quite a bit of work for little noticeable change, but it was better to go ahead and solve the slowness issue now so that it isn’t a problem once I begin designing the levels.
You play as Tex Oneman, who must gather the rewards for shooting the bandits (Evens, Odds, Fibonaccis, Squares). Each bandit has a numerical value associated to it, which determines if it is one that can be shot for a reward. The reward will change periodically to a new set of bandits. Shooting an incorrect bandit will result in Tex Oneman losing a life. When all of his lives are gone, the game is over.
Tex Oneman Post Mortem
Tex Oneman is my third official Ludum Dare entry, and it was my eleventh game developed for this site (including mini-LDs and warm-ups) since I registered in April 2013. I feel like I’ve learned a lot during that time, and these projects have definitely made me a better Unity developer. For this Ludum Dare, I knew I wanted to do something different.
After hearing the theme announced at our local Knoxville Game Design meetup, I knew I wanted to make the number “one” a central part of the game. Going with that approach, I decided to make the number “one” humanoid, since I knew how to quickly make meshes from text in Blender. I added eyes, arms, and legs, but the character was still sort of boring. I thought about some of the characters in my latest XBox Live Indie game TTY GFX ADVNTR, and remembered the character “Needles”, which is a humanoid cactus wearing a cowboy hat. Then I remembered playing the classic game GunSmoke at one of those 20-in-1 arcade machines not too long ago. There really haven’t been too many western themed games lately. Therefore, I gave my humanoid one a cowboy hat, boots, and a gun to shoot. I also went ahead and modeled a cactus in Blender as well as a background prop.
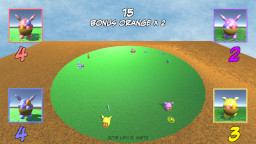
Tex Oneman gameplay
Another classic western game was Wild Gunman. I liked the Gunman name, so I decided to call this game “Tex Oneman”. The original name (One Gunman) was also sort of a play on the term “Lone Gunman”, which differs my game’s title name by just the leading “L”.
After creating the models, I got the main character imported into Blender and moving around. I also created some enemy boxes that moved around. Next, I implemented shooting projectiles. However, I quickly found that trying to aim on the X-Z plane with no lock-on could be quite difficult. Therefore, I limited the character to just being able to move left and right, and he is only able to shoot forward. This makes the game similar to other classic arcade shooters, except this game uses a third person view instead of a top-down birds eye view. Shooting enemies was fine, but it still seemed really boring.
Then I had the idea that Tex Oneman would shoot number sequences as the targets. For each enemy, I assigned a random digit value in the range of 2 through 9. First I decided to use evens and odds as the requirements. Once I got those working, I added a countdown so that the requirement would change periodically. I was really inspired by a game called Pig and Bullet, which makes the player switch between collecting red and blue bullets every few seconds. The problem with that game was that you never knew when the objective would change, so I added a visible countdown in my game. New objectives were added, such as Fibonaccis (2 3 5 8), Squares (4 9), and Perfects (6). I didn’t include 1 in the sequences, because that would mean that Tex Oneman would be wanted as well causing unneeded confusion. Each sequence also has a set reward associated with it, where the more complex sequences have higher reward values. For the lose condition, I made it so that the player lost a life if they run into a number or shoot an incorrect number. Finally, I rendered 3D numbers in Blender, which replaced the box enemy meshes in my game. I included statistics such as number of shots and accuracy percentage on the game over screen, which was inspired by other classic arcade shooters.
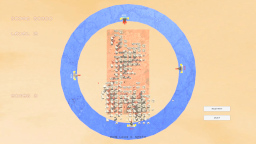
Since I had the core engine finished on the first day, I worked on polishing the game on the second day. A “WANTED” poster was added which displays the current objective in the lower right portion of the screen. The objective change countdown was converted into to a bar which shrinks as it nears zero. Like my previous entries, I used Garage Band on my laptop to make the music for the game. The piano and guitar sounds were primarily used to give the game a more western feel. Bxfr was used again for making the gunshot and other sound effects. Using my computer microphone, I recorded myself saying “Shoot X”, where X is the current objective. Then, the vocal recordings were modified a bit in Audacity to give it a better sound. The voice seems to really enhance gameplay, since it keeps the user’s attention on shooting the numbers, instead of looking at the Wanted poster. Finally, particle effects were added using a star texture that I made in Gimp. I tried changing the particle system color over time, but for some reason it just wasn’t working for me.
https://soundcloud.com/gatechgrad/sets/one-gunman
I learned a few lessons from this game. The first lesson is that people don’t like shooting at a perspective. I thought the controls were intuitive, but some people definitely found it difficult to shoot. The best I can explain the shooting controls is that it is similar to rolling a bowling ball on a bowling lane. The game could have included some additional visual cues to help line up the shots down range. I could have also used a top-down view, but then the player would not be able to see the details of the model that I had created. Using an orthographic projection may have helped as well, which would have kept the numbers and bullets traveling vertically on the monitor screen. Another option would be to highlight the number that the player is currently targeting, but I thought that may make the game too easy.
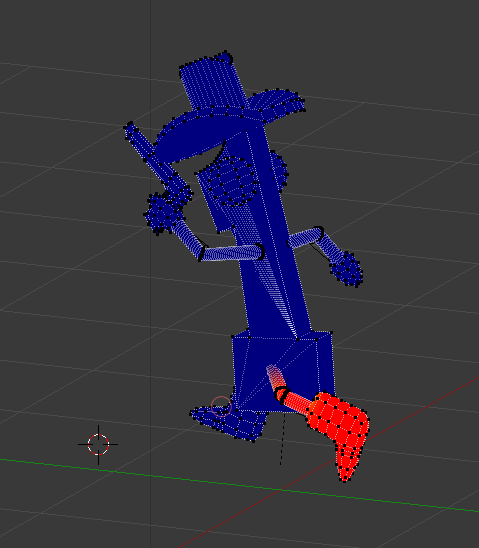
There was also some difficulty with getting the model moving correctly. When I assigned the armature, I used the default “with automatic weights” that I always use in Blender. However, since the arms and legs were so skinny, it didn’t properly weight paint all of the vertices. I’ve done manual weight painting before, but this model had some difficult to reach vertices. After some trail and error, I discovered that it is possible to pose the model while weight painting it. This made reaching some of the difficult to reach vertices much easier, and you can see the vertices snap into place while weight painting it.
Overall, I am satisfied with the game that I have created. I would have liked to made the other numbers humanoid as well, and I really needed to add more props to the environment. Things like buildings, dust, and tumbleweed could have really added to the environment. If I get the time to work on this game some more, I definitely think it could be turned into a great game.
Videos
MetroPulse Article
The MetroPluse entertainment paper interviewed me and other members of the Knoxville Game Design group during Ludum Dare 28. The article features my Tex Oneman entry.