Play it Again Sam

Wrapping Up Level Design

Created 20 new levels, which use the 7 and 8 resistors.  Now I have a total of 80 levels.  If each level takes 30 seconds to play, then it would make the total time to play through all the levels 40 minutes.  This is not counting the replay time, which I’m sure some people will want to do to get the best ranks in all the levels.

While playtesting, I noticed a few issues with some of the levels that I have noted:

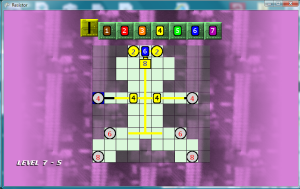
Level 7-5:  The 6 LEDs block the 8 LEDs, so the maximum luminosity can never be achieved.  Either remove the 6 LEDs, lower the 8  LEDs to 6 or below, or add tiles to make the 8 LEDs accessible without connecting to the 6 LEDs.

Level 7-8:  There is no way to activate the 1 LEDs without first lowering the 6 LEDs and 4 LEDs to one.  Again, this makes it impossible to get the maximum luminosity.

Level 7-9:  There is no way to activate the 5 LED without lowering it to four.

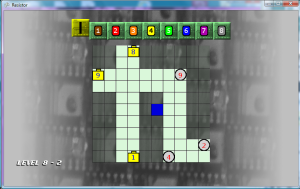
Level 8-2:  Accidentally added 8 and 1 batteries, when I intended for those to be LEDs.


Scales of Difficulty

I still feel like there needs to be something extra in the game.  I did have the idea to add capacitors, encoders, and logic gates, but it is too late now to make major changes in the game engine.  Those will have to wait for Resistor 2.  If I make any changes to the engine (even just moving the starting location of the cursor), then I will have to recalculate the time ranks for all of the stages, which is something I don’t want to do.  I think this is the right level of difficulty to reach the largest player base.  Most players probably make up their mind in about 10 seconds of first starting a game on whether or not the game is too difficult to play.  If the game isn’t easy to pick up, people will put the game in the “too hard” pile in their minds and give up on it.  On the other hand, I don’t want a game that is so easy that players will get bored with it.  This is definitely a delicate scale to balance, and that scale is different for each person.  I would rather error on the side of being too easy, because players may go ahead and play through the boring parts to see if there is something better coming.  If the game is too hard, then people will drop it and never play again.  However, there is a niche out there for very difficult games (Super Meat Boy, I Want to be the Guy), but that is only a very limited number of players compared to the overall pool of game players in the world.

Replay Option Added

One of the things that frustrated me while I was playtesting the game, was that if I did not get the best ranks on a stage then it would automatically send me to the next stage.  I really wanted to play the same stage again, so I could get the best ranks.  This made me have to quit, go back to the level select screen, and then scroll all the way back down to the level I was playing.  This was very aggravating, so on the GameWinScreen I added two options, “Replay” and “Next”.  Next is default, so the player still only has to press the confirm button to move to the next stage.  Pressing left will select “Replay”, which will just load the current stage again, so that the player can try to get better ranks.  These options don’t appear until the game win pause has expired (after all of the ranks have displayed).

This also sheds light on another problem, that on the Level Select screen it can take quite a while to scroll down to the later levels.  In a way, this is a good thing that there are so many levels to display, it takes some time to get to the bottom.  This reminds me of the game “You Don’t Know Jack” for the XBox 360, which had over 70 total episodes, so it took forever to select one of the later levels.  What I really need to do is have the trigger or bumper buttons jump up or down 10 levels on the level select screen.  The benefit of this is minimal, so I probably won’t take the time to implement that feature now.

Menu Backgrounds

Spent some time touching up the menu selector graphics.  This can really be a time drain, because I can spend hours on the graphics and it still not look perfect to me.   One reason I really don’t like doing graphics is because there is no right or wrong answer.  There’s just people’s preferences, which will be different for each person.  Added the bevel effect for all selectors.  I changed the main menu selector to a box, but I wasn’t happy with the color of the selector.  If it’s too light, then you can’t read the menu text.  If it’s too dark, then it contrasts too much with the rest of the screen, drawing attention away from the title graphics.  Fortunately, I can change the color programmatically, so I don’t have to change the graphic each time in Gimp.  Just as I was about to give up, I used a less saturated shade of green (selected from the scrolling background image), which looks fairly good as the selector color.


I went ahead and changed the font color for the 5 resistor to black, because white was a little hard to see.  Currently, only the 4, 5, and 9 resistors have black text.

Trailer Video

In order to submit this game to the contest, I have to submit a trailer video.  Therefore, I took a shot at making my first trailer video with its own cheesy indie game song.


Blog Cleanup

Went through all the posts in this blog and added categories, so that all of the posts related to Graphics, Engine, Game Saves, Level Design, and Audio can be quickly displayed and accessed.  A Video Update category was also added, to easily display all posts with video content.  Casual and Technical categories were added, so that the casual audience can view  posts targeted towards them.

Home Stretch

Small Glitch

Fixed an issue that actually only occurs on one frame of the fill animation.  This happens when a wire goes to the “filled” state, but the neighbor wires have not yet begun filling.  Since the wire is filled, it doesn’t make any connections to neighbors that don’t have the same flow value.  Since the neighbor doesn’t have a flow value initialized yet (assuming it is defaulted to zero), it’s flow value doesn’t not match the flow value of the wire that just completed filling, therefore it will not be connected.  However, on the next frame the empty wire will begin filling, using  the flow value of the filled wire which will make it connected again.  This flicker was quick, but it was noticeable.  Therefore, I added special checks for this case, and made the wires connected in this one frame case.

The Night the Music Died

Used the Pause method on the MediaPlayer to pause the music when the pause screen is active.  Unfortunately, there is no MediaPlayer property to determine if the music is paused, so I had to create a new variable to track if the music was paused.  I simply want to resume if the GameLevelScreen is coming from the pause state, but I want it to start playing anew if it is coming from the title screen or level select.  Also had to set this pause variable to false if the user quit from the pause menu to the main menu, otherwise it would still think that the music just needs to be resumed.  When that happened, it would try to Resume the title screen music when the level started.  The title screen music would just continue to play during the level, and the level music would never start.

Centering Text

Overloaded the drawRaisedString method, so that it now takes six arguments with the last being a boolean signifying if the text should be horizontally centered at the point passed as a parameter.  The drawing code is now in the six parameter method, and the five parameter method of the same name just calls the six parameter method with the boolean set to false.  This will keep me from having to change every line of code in the game that uses the drawRaisedString method.  Plus, I just add “true” as an extra parameter for the text that does need to be centered.

Background Colors

Fixed the background colors for level 4 (yellow) and 5 (green) so those aren’t so bright.  Also created a standard method in the LevelDefinition class that returns the background color, since that color was previously being determined in two different locations.  Updated those locations to use this new standard method.

Added columns of stars in the background which scroll if the player achieves the star rank (S Rank in all three categories at once).  Stars in the even number columns scroll in the opposite direction of the stars in the odd number columns.  I used Inkscape to make the stars since there was no easy way to make a star shape in Gimp.  Then, I just took a screenshot (PrintScreen button) and pasted into Gimp, because copy-and-paste from InkScape to Gimp doesn’t work.  I then used the fuzzy select tool to select the star, set the selected star region to white, inverted the select and set the remaining to transparent (after adding transparency to the layer).


One thing that I do like about C Sharp is that after some research, I found that structures (such as Vector2) can be passed by either value or reference.  At first I found it passed by value, when I tried to pass my star position to the getStarPosition method, but it left the position at the original value after the method completed.  Then I found that just using the ref keyword in the method parameter list and in the method call will make it pass the Vector2 by reference, which allows the method to modify the original Vector2 passed to the method.  This was necessary for me to make a trailing star effect, for the blinking stars that circle the results.  After trying a few different things, I thought the best look was two groups of three stars that circled the result screen.  Also, the yellow alternates between the three stars in each group.

More Effects

I also added a glow effect, so that the wire transitioned from yellow to white (four different shades) every 15 frames.  I didn’t like how it looked, so I just set it back to solid yellow.

Using the sprite scale parameter, I was able to make a light layover expand inside of the LED circle.  This gives the appearance that the LED is filling up.  The default color for an LED was set to light gray (previously white) to give a better contrast between the expanding yellow inner circle sprite and the rest of the LED sprite.

More Visual Effects

Crown Jewel

The one effect that I’ve neglected which I envisioned from the beginning was the actual filling animation of an individual wire in a cell.  I should be able to do this now, since I now know how to use a Rectangle object to determine which portion of the sprite to draw.  Filling just straight wires is not a problem, but it becomes more complex if a wire has bends or has intersections.  This effect should be able to be achieved  by first filling a small area from the origin side, then expanding outward in all three directions after the fill has moved passed the halfway point.  This should be similar to how I expand the overlay on the piece cooldown, except it will expand in three directions after it reaches the halfway point.

I did go back and add the “coming from” variable to determine the flow direction.  Also, I had to use the draw method which takes two Rectangle parameters, the source Rectangle and the destination Rectangle.  Using only one Rectangle will make the sprite stretch, but with two Rectangles I was able to achieve the clipping effect.  This clipping effect is what I needed to display the gradually filling wire in the cell.  Using the default tile was a good way to test the clipping, since it fills the entire cell.  This way I was able to determine exactly which regions are being clipped.  After I got it working correctly, I replaced it with the real wire image.  I’ll admit, I did hardcode the wire offset constant value and the halfway point constant.  Technically, those values probably could have been derived from the cell size, but that would have made things way too complicated, with nothing to show for it.  Additionally, I removed the dark yellow color of the filling wire, since it now has the visual animation of it filling.  The wires now truly look like they are continually filling, but unfortunately I can’t capture that in a screenshot, so this development image and these handwritten notes (click to enlarge) will have to do for now.


Scrolling Background

Looked at some other puzzle games, and I noticed that most had scrolling for animated backgrounds.  I thought this would be distracting at first, but I guess if the scrolling is slow enough it isn’t so bad.  Plus, it makes the screen seem more “alive”.

However when I implemented this, the background jumped from the game level screen to the game win screen, since the game win screen didn’t have the scroll offset value.  I made a few methods to allow the background scroll offset to be passed to the game win screen, and then back to the game level screen.  I didn’t have the offset value changing in the update method in game win screen, which made the scrolling stop on the game win screen.  I thought that this was okay, because there is already a lot going on with the rank values displaying.  The offset is passed back to the game level screen, which is a new instance of the object.  That is another issue that I may need to address later, if memory or performance becomes a factor.  When the game transitions from the game win screen back to the game level screen, it picks up at the same scroll value, so there doesn’t appear to be any jumping in the background scroll animation.

Overall, this gives a feeling of continuity between all of the stages in a level.  Then there is a visible shift (scrolling in the opposite direction) once the user moves on to the next level (completes stage N-10).