Blocks of Nibiru – Developer Log

After five years and sixteen consecutive Ludum Dare entries, I don’t know if there’s much for me to say in a post mortem anymore.  Honestly, I don’t feel like my game development skills have gotten that much better.  However, I feel like what I have previously done can be done in a much shorter period of time.  What used to take me the full 48 hours to accomplish, can now be done in the first day.  That leaves me a lot more time to test and tweak gameplay difficulty.

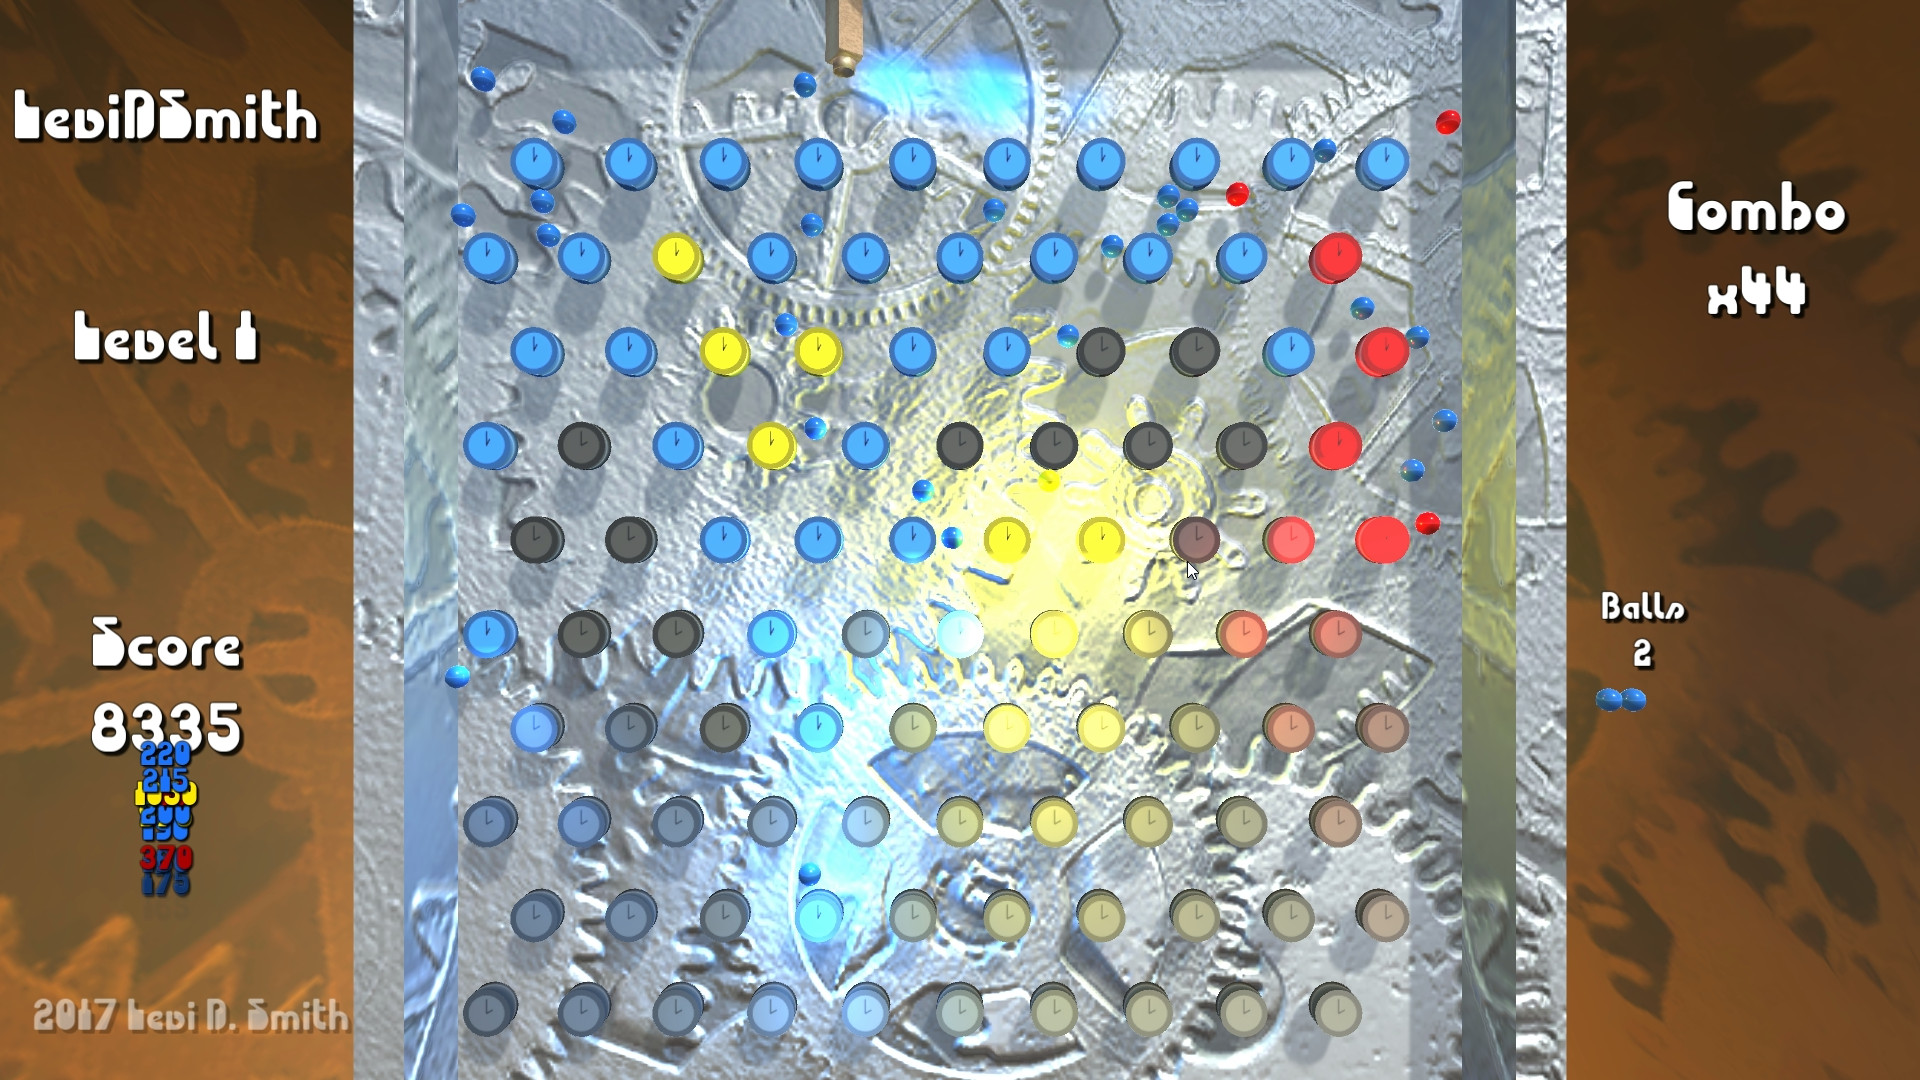
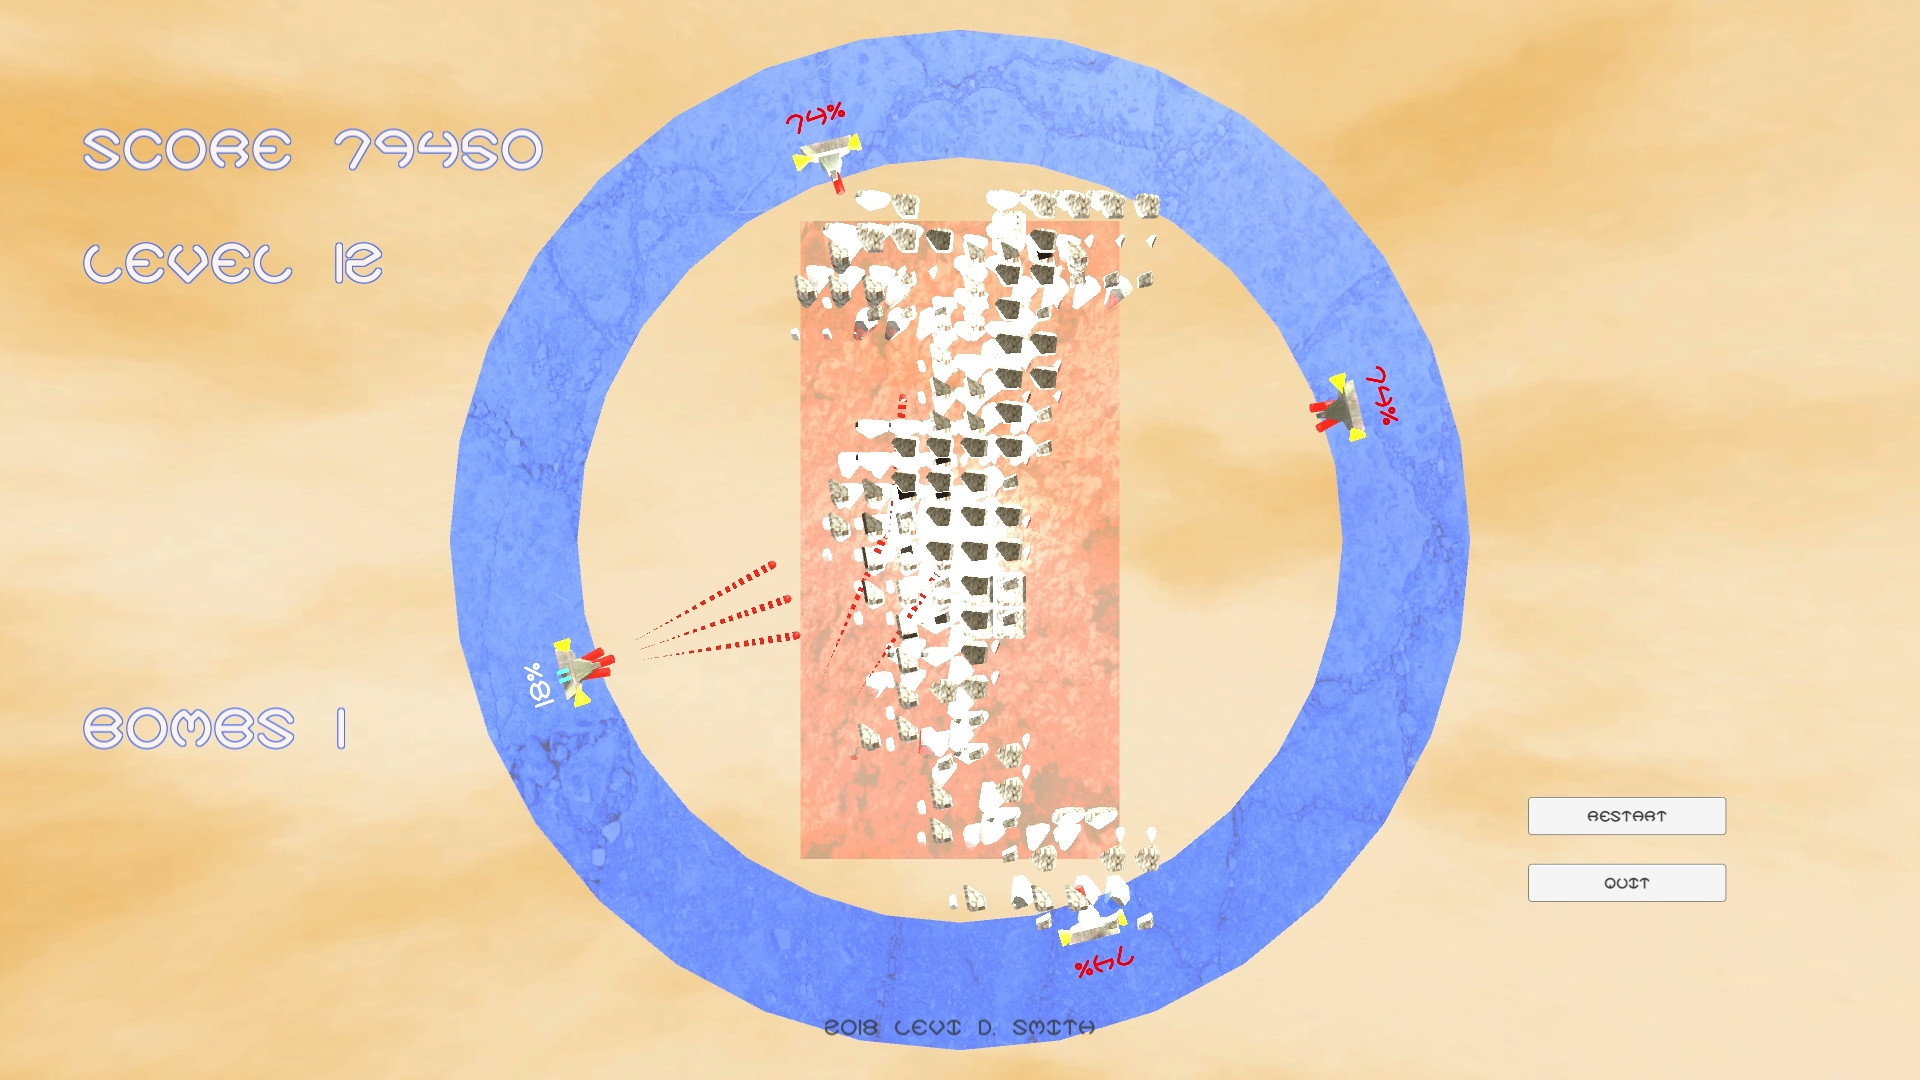
The idea for this game came from the story about a hidden planet called Nibiru, which is supposed to cause the end of the Earth.  I had originally envisioned a fully functional falling blocks game like Tetris with AI, but I settled for just getting the block stacking working.  The objective is to prevent the blocks from getting to the top like in Tetris, but you have to shoot them instead like in a space shoot em up.

In most of my previous Ludum Dare entries, I only had one or maybe two gameplay mechanics.  I believe Blocks of Nibiru had the most of any of my previous entries.  Below are most of the mechanics I was able to implement for this game.

  1. Multiple ships
  2. Upgradable cannons
  3. Gun heat / Overheat cooldown
  4. Speed upgrade
  5. Orbital movement
  6. Block stacking
  7. Bombs to clear blocks
  8. Collectible powerups

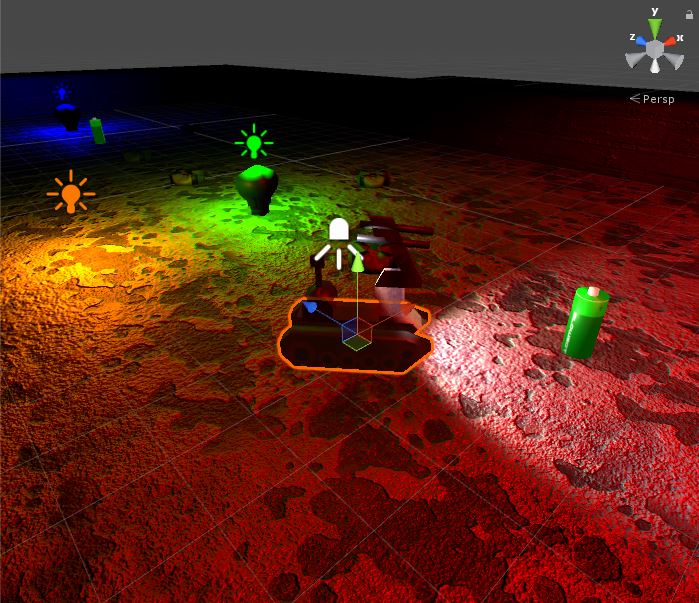
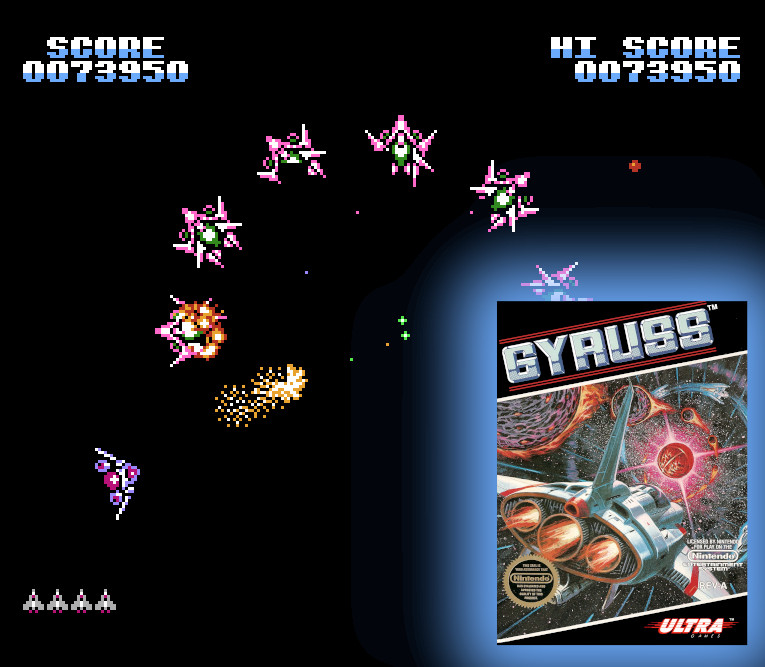
I really started learning how to place objects in polar coordinates when I made my Easter Egg Hunt game last month.  In that game I laid out the eggs in a circular fashion, using the angle as the interval and the radius as the random value.  Using the angle and radius mapped really well to the horizontal and vertical Input Axes in Unity.  I was amazed at how well it controlled in my game.  Then I remember this had been done before.  It was a game called Gyruss that I played on the Nintendo Entertainment system as a kid.  However, Gyruss did not have the ability to pull in and out like my game.  It may not seem like a big difference at first, but moving along the radius does really help when you’re trying to track down a powerup or trying to spread out a multi-cannon shot.

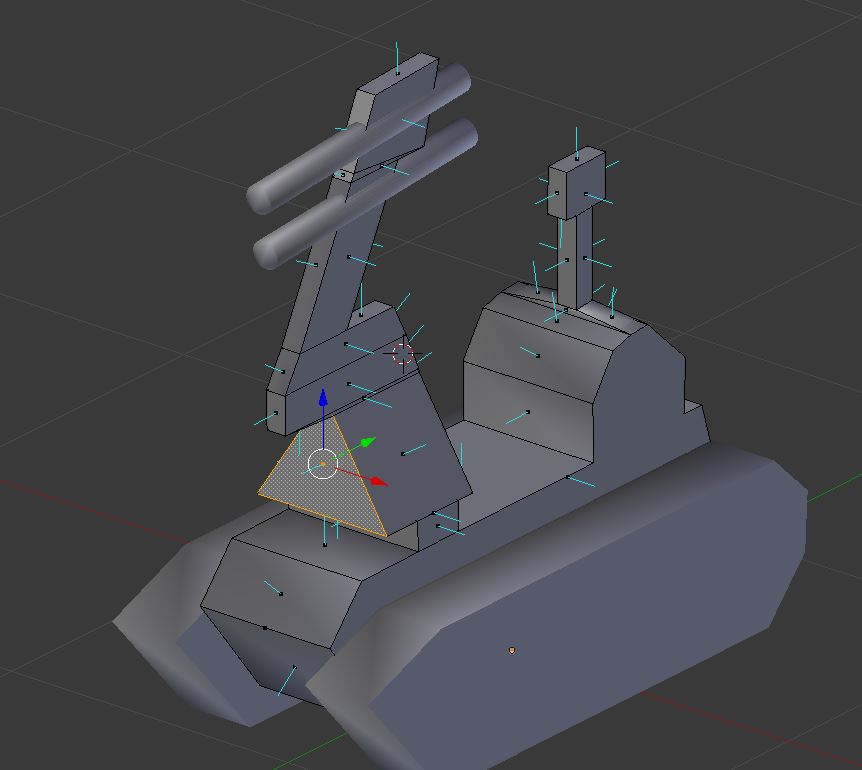
Since my ship object was a prefab, it was not difficult to make multiple instances of the ship.  Placing the second ship was easy, because I just added 180 degrees to its angle.  The third ship was a little more difficult.  I could not keep the ships evenly spaced (120 degrees apart) without moving them around, which would be awkward.  Therefore, I just added the third ship to be 90 degrees between the first two ships.  Then the fourth ship would just be 270 degrees away from the first ship.

For the cannons, I just modeled three red cylinders and placed them at angles at the front of the ship.  I tried not to make the spread two wide, but not to narrow as well.  The first cannon shoots directly forward.  To keep symmetry, I decided that when the first upgrade is applied, the two angled cannons would be enabled.  Then on the second upgrade, all three cannons would be enabled.  Again, since the ships were instanced, it made it so that the cannon upgrades would be unique for each ship.

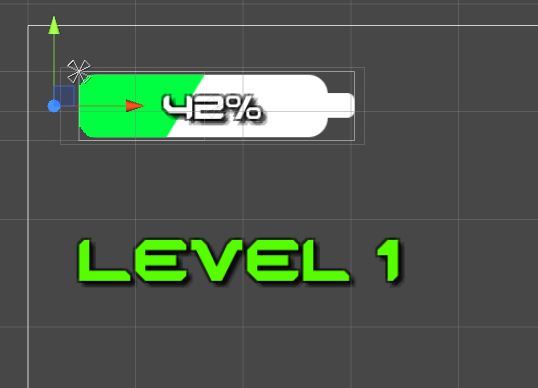
As I was playtesting the game, I noticed that an overheat / cooldown system was needed.  I didn’t want players to keep mashing the shoot button forever with no penalty.  I wanted players to feel like there was importance for when they take a shot.  Therefore, I added the heat percentage to the ship instance.  When it reaches 100% (it’s actually stored as a float value), then the player is locked out from shooting with that ship for a period of time.  I used my harmonica to make the beeping sound when the ship overheats, so that there is audio feedback.  I probably should have added a smoke effect or something when the ship is overheated.  The heat reduction powerups were made to allow more shots before the ship overheats.  Looking back, I would have made fewer levels of heat reduction, like just two so that when the powerup is collected it feels like it makes more of a difference.

The speed upgrade was not difficult to implement.  I just increased the speed instance variable for the ship.  However, it was not possible for each ship to have a unique speed, because that would eventually result in ships overlapping and give it just general janky feeling.  So I decided to have the speed upgrade applied to all ships, which kept the symmetric spacing between all of the ships.

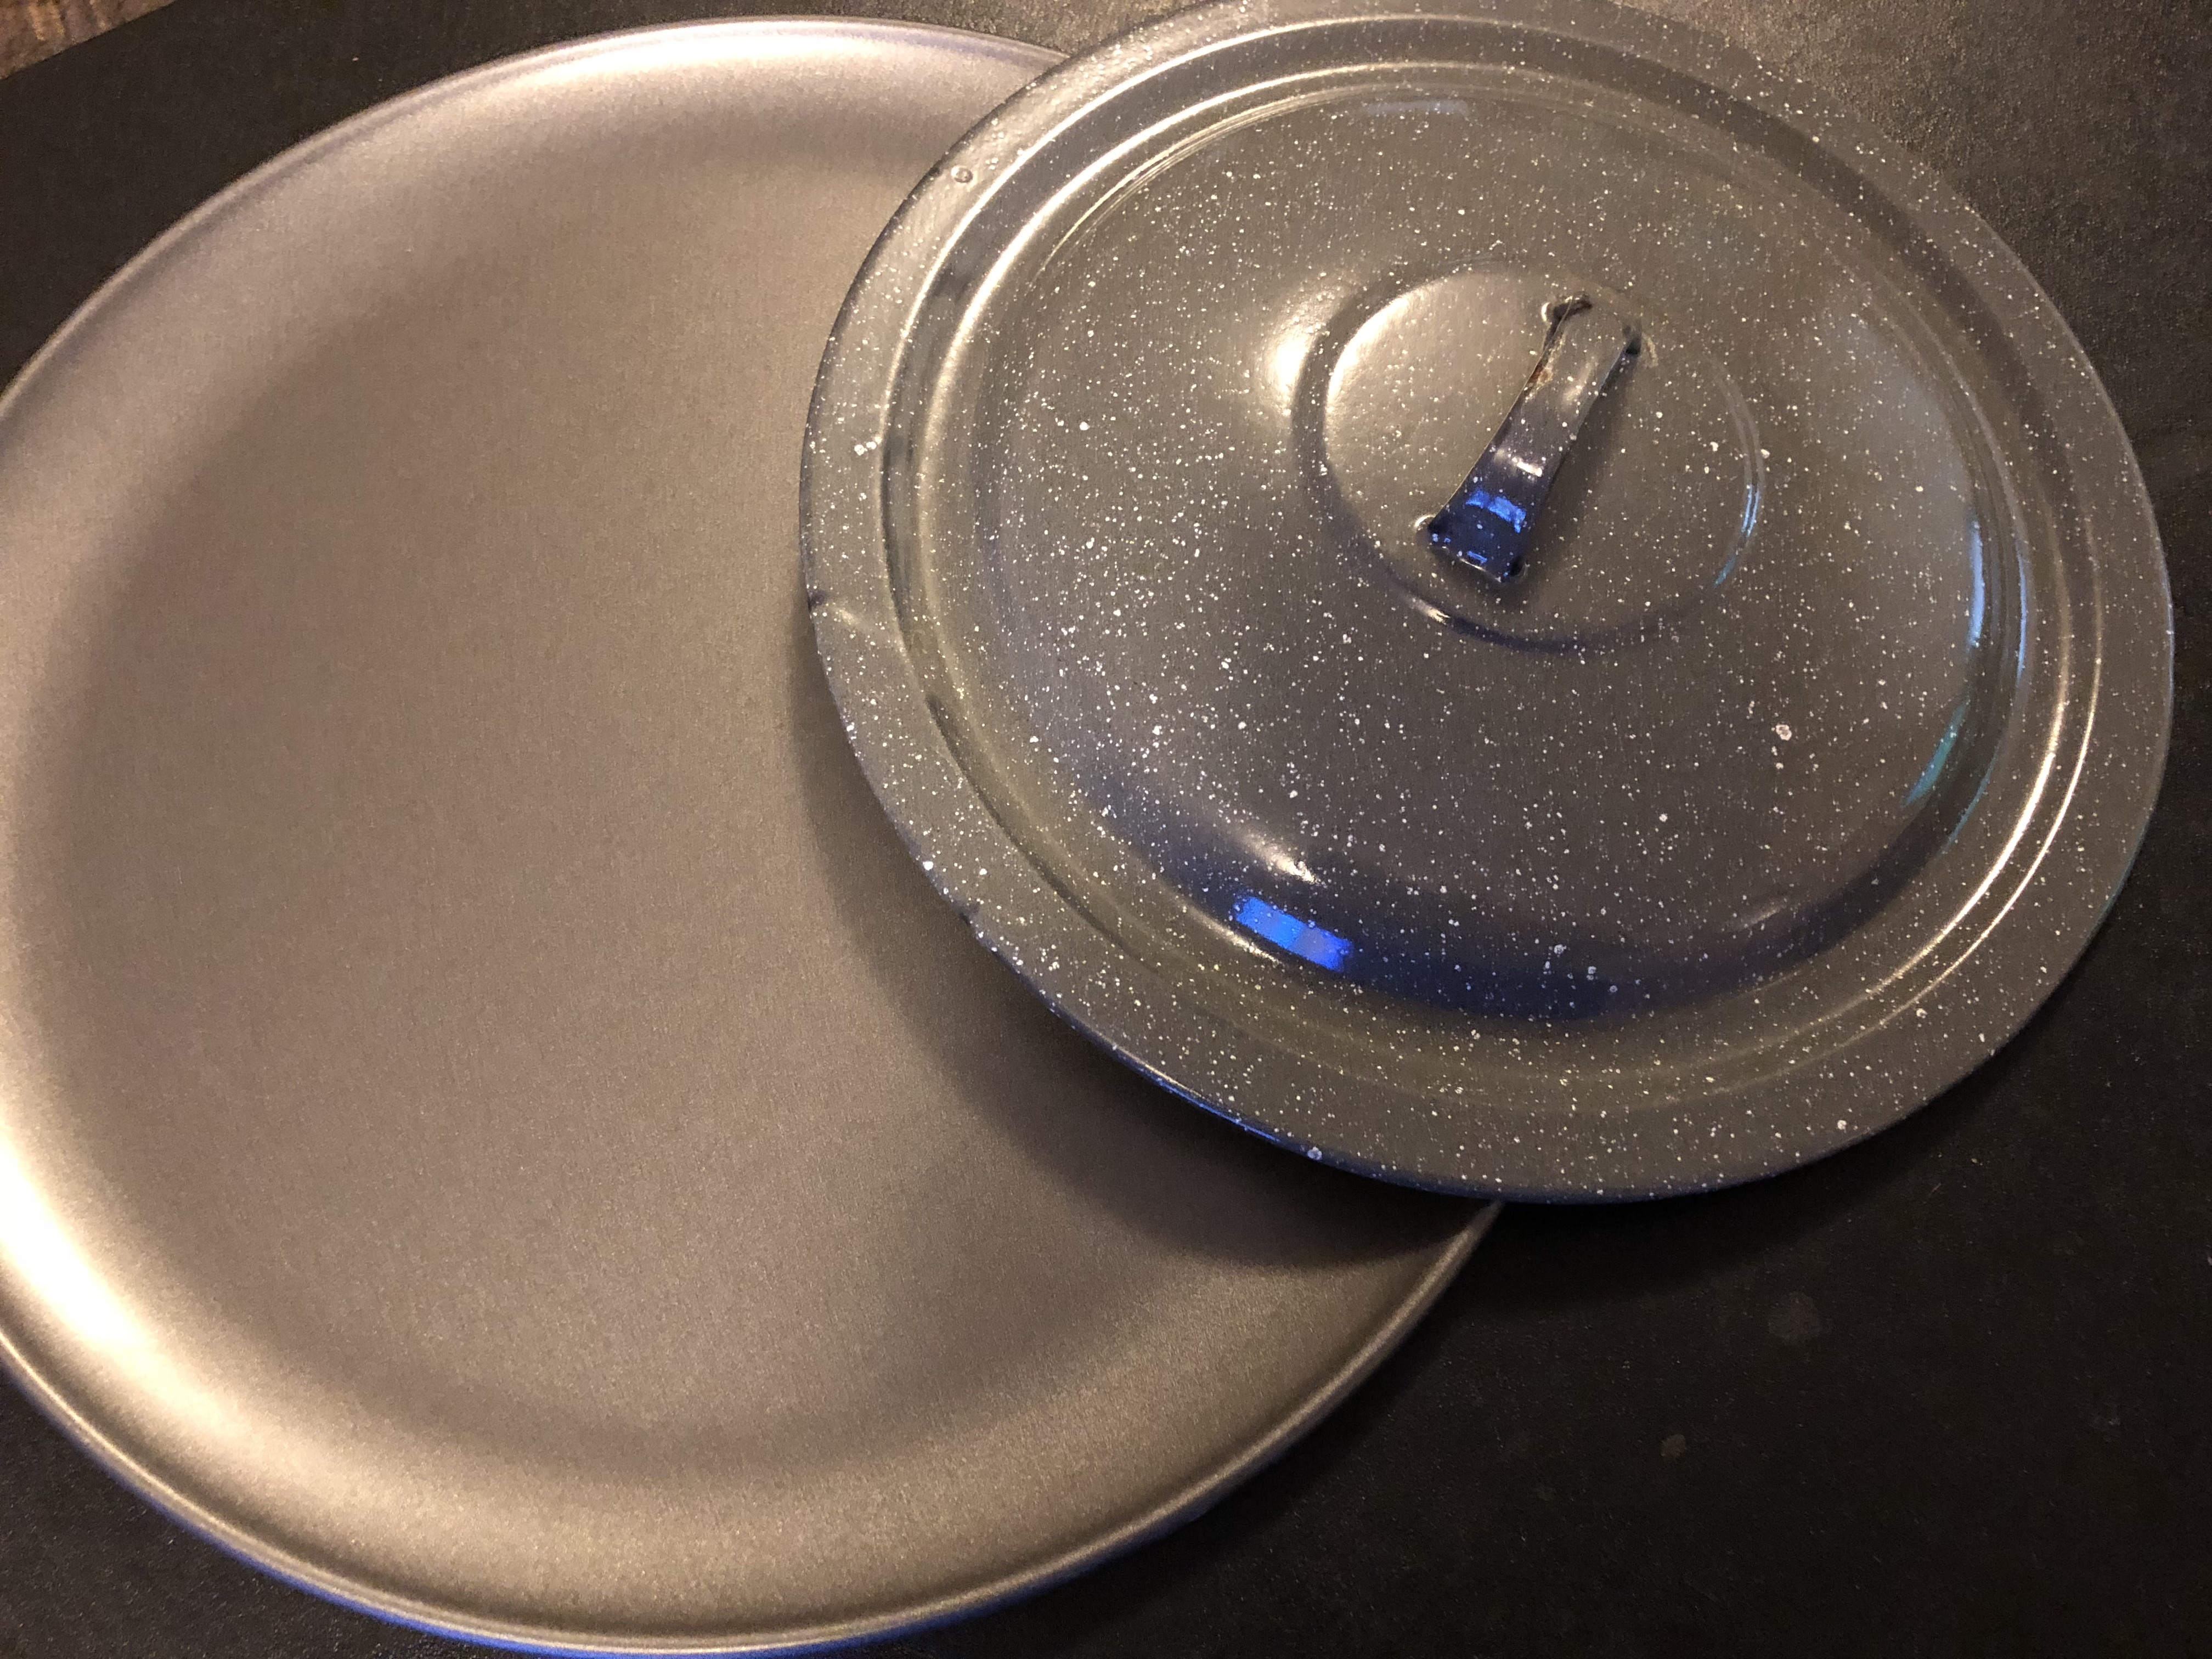
The bomb upgrade was fairly simple to implement.  If the bomb counter is greater than one, then decrease it and delete all block instances currently in the game.  I used a pizza pan and lid of a pot to make the sound effect, sort of like clashing two cymbals together.

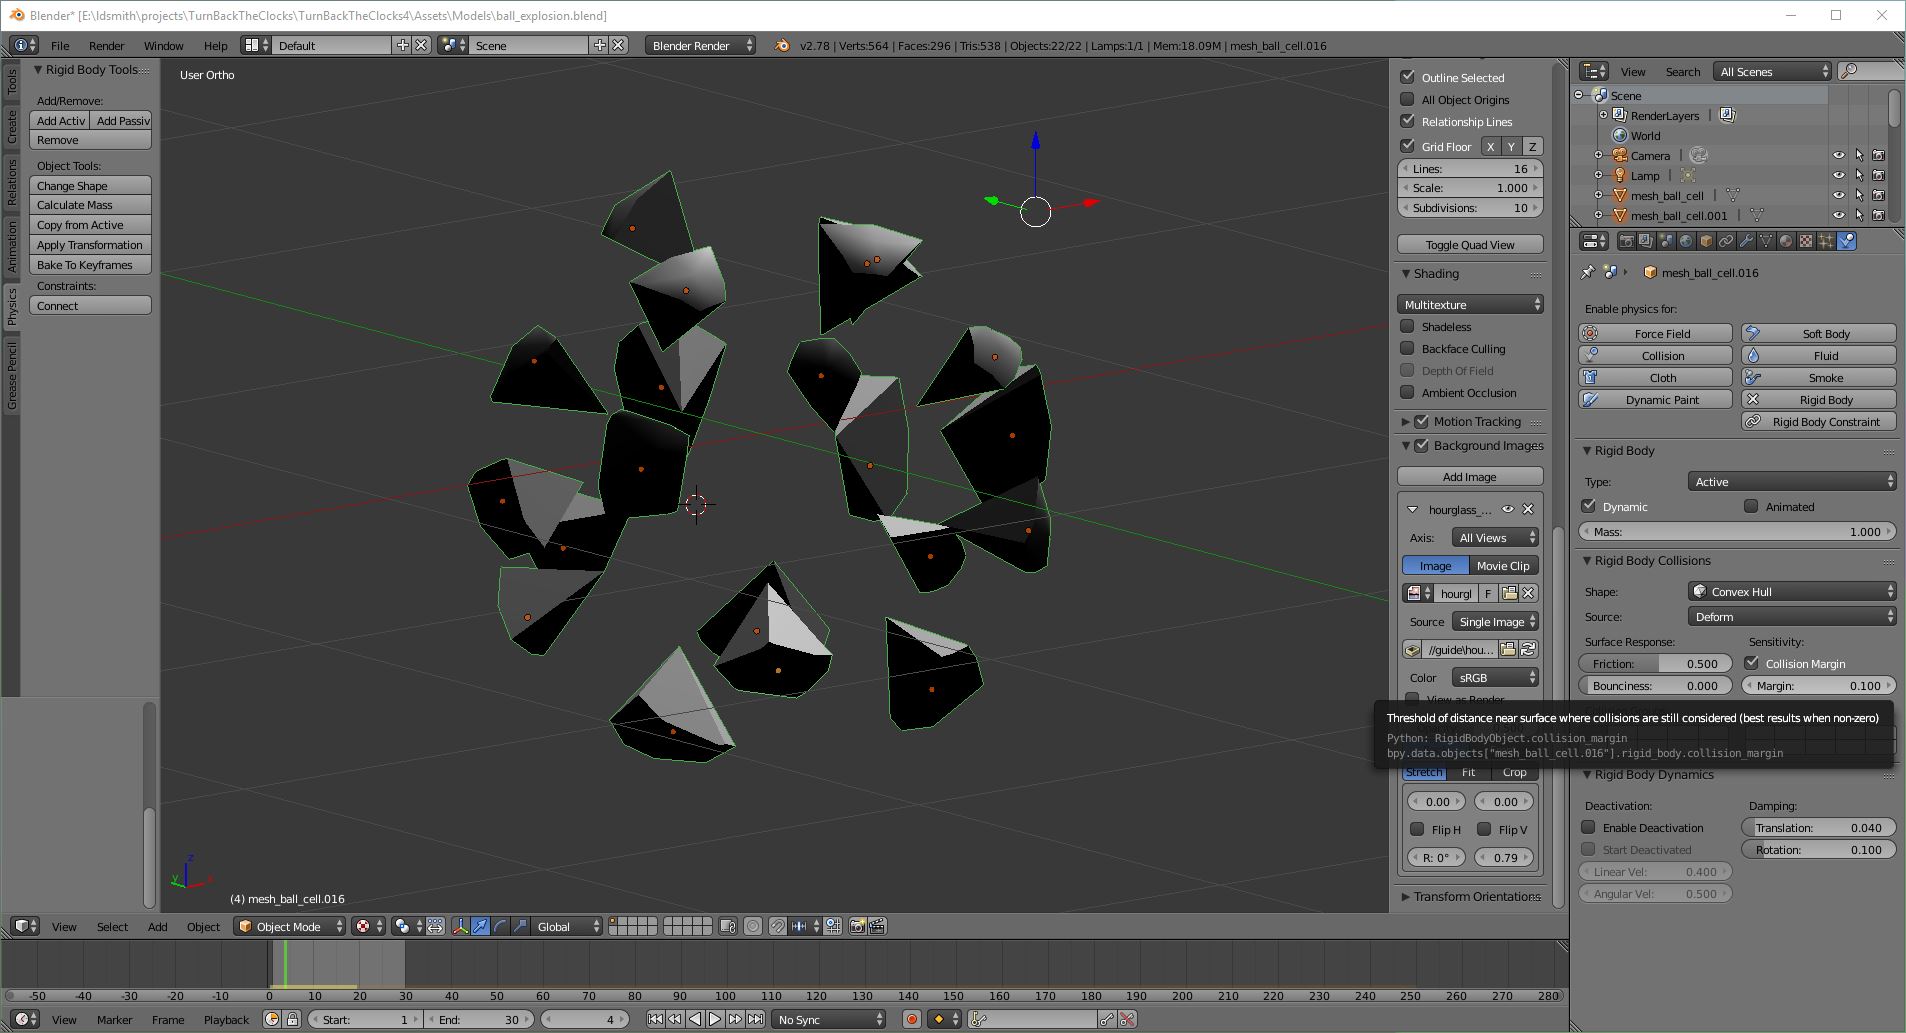
The powerups were made with a six sided circle in blender extruded out to make a 3D shape.  Then I duplicated and made a longer and smaller one to cut out the center using the Boolean modifier (I always forget if it’s difference or intersect).  The voice that plays when a powerup is collected is just my voice with Audacity’s vocoder applied.

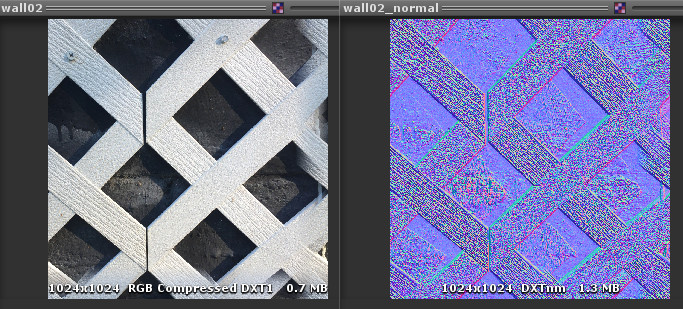
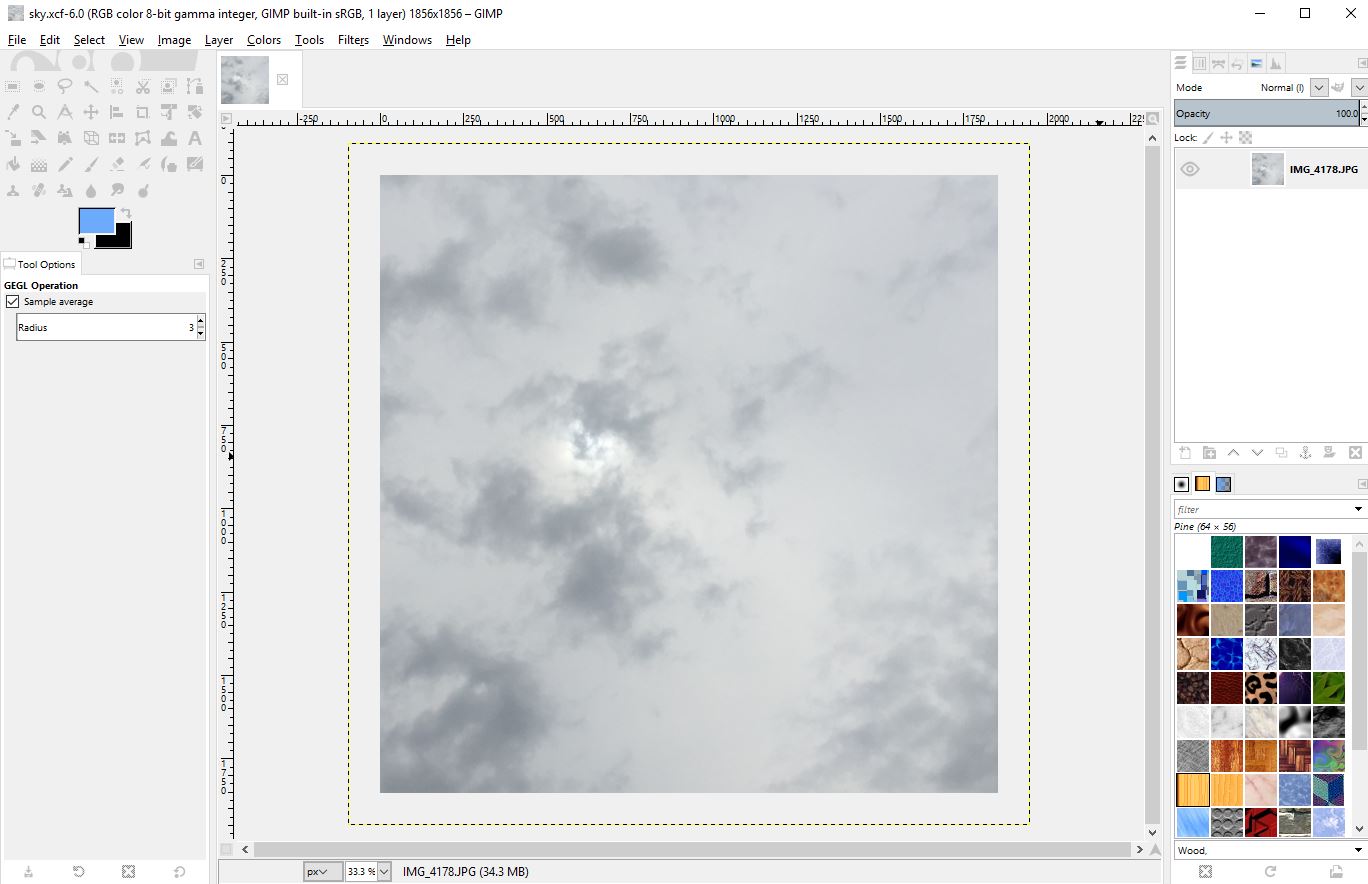
I guess the one thing I did learn from this game was how to rotate a skybox in Unity.  I took a walk at the local park early Sunday morning, and took a picture of the sky.  Unity now has an option to make a skybox out of a panorama picture, instead of having to put together six sides of a cube.  The important thing is to make sure that the picture is seamless.  I was able to do that in Unity using the Make Seamless Advanced plugin.  I also took pictures of some rocks around the house that I used for the block texture, and the side of a tree that I used for the background board plane.  The ship was textured with a picture I took of the metal on the side of my air conditioner.

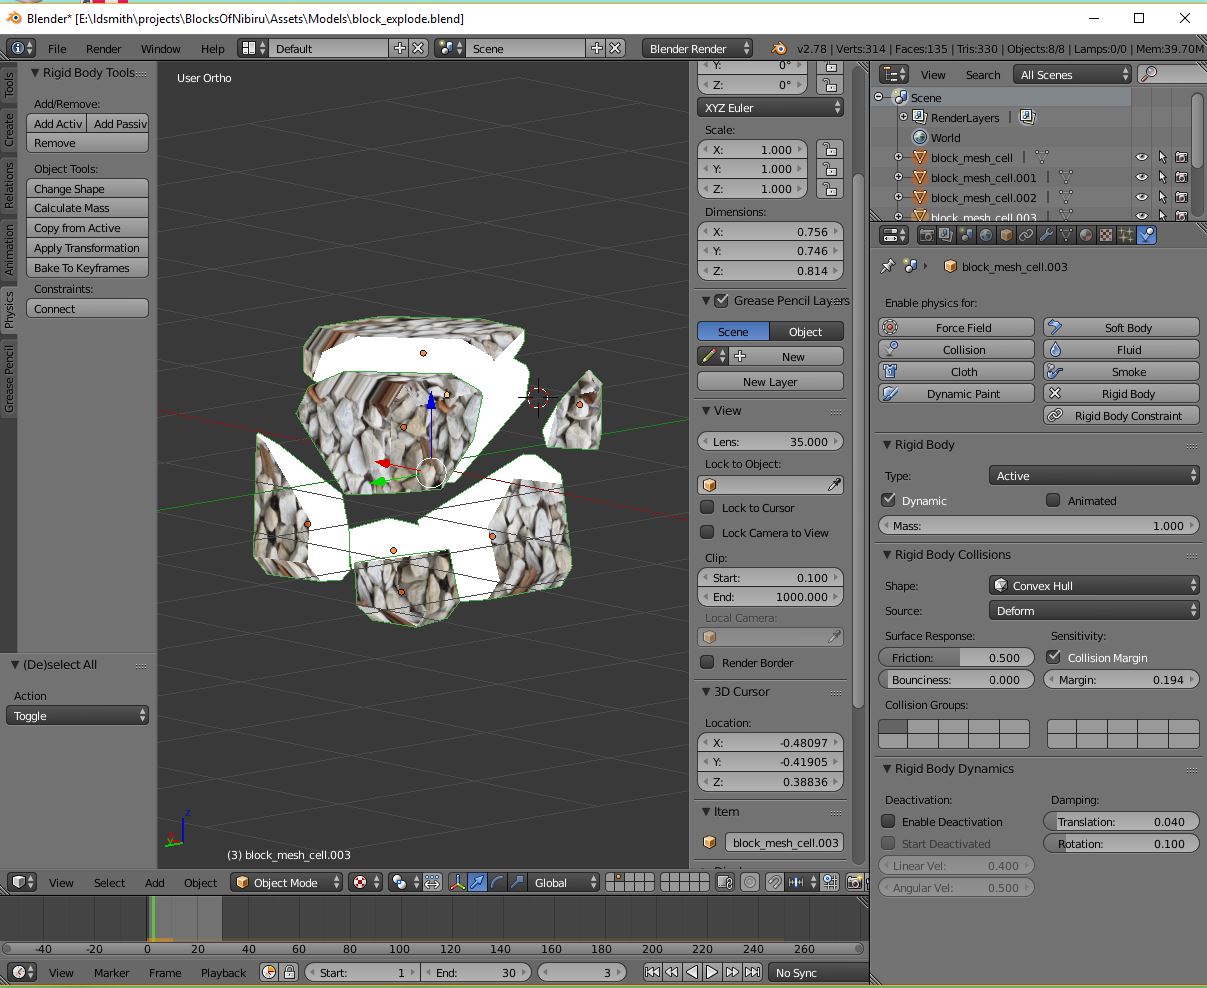
I used the Blender cell fracture plugin again, for making the blocks explode into multiple pieces.  I had to turn the fragment number down.  I think the default was something like 100, so I turned it down to 20.  The one issue was that I had to remember to set the animation to legacy for the explosion effect to apply.  As usual, I put the explosion into a separate prefab that gets instantiated when the block is destroyed, so that the block is immediately removed from the game logic.  It also allows me to put the destroy sound effect (which was just me clapping my hands in front of the microphone) in the explosion prefab, so that continues to play after the original block is destroyed.

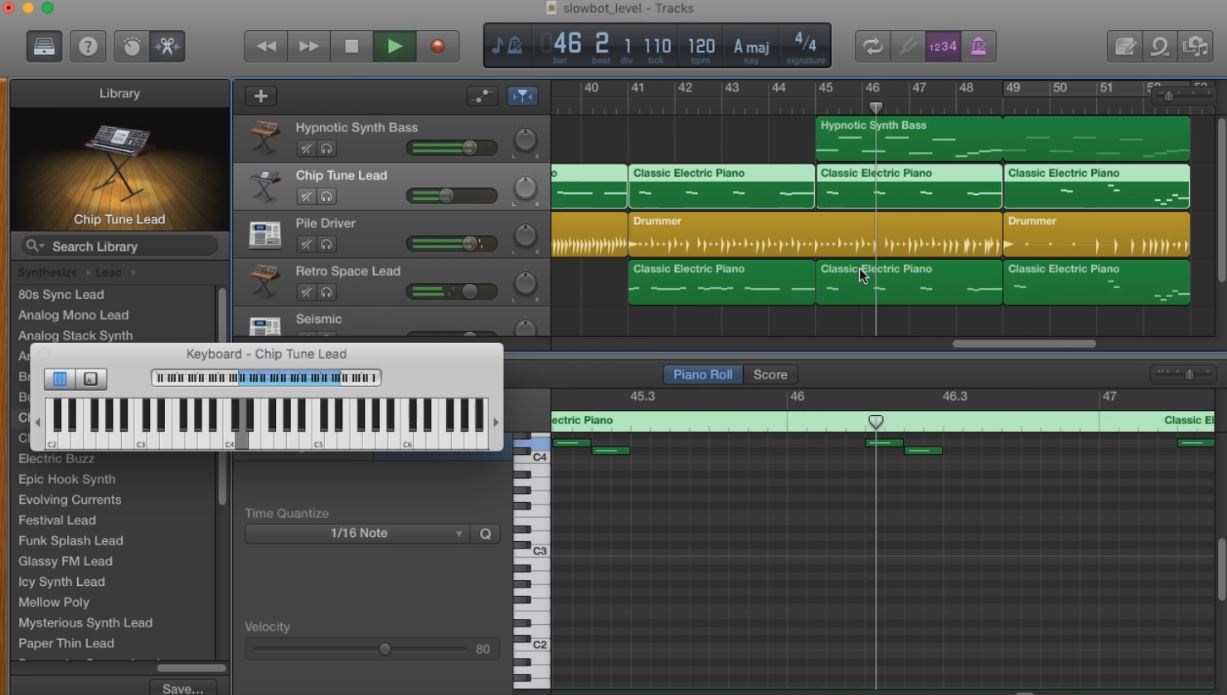
The music was composed in GarageBand again.  This time I used my new MacBook laptop, which is much more speedy than the one I previously used which was about six years old.  I really didn’t do anything out of the ordinary for the music this time.  I just made a couple of melodies and switched them between instruments, and used one of the standard generated beats.  I did increase the pitch of the music as the block stack gets higher, which makes it feel like a greater sense of urgency, similar to how the old Tetris for GameBoy did the music.

Looking back, I think there were a few things that could have made this game better.  I wish I had put tail renders on the bullets.  The explosions could have also had lighting effects.  However, having too many point lights on at the same time can cause problems.  I think after eight or so point lights, they just start getting ignored.  I could have at least put a point light on the ships, or a flash of light when the cannon is fired.

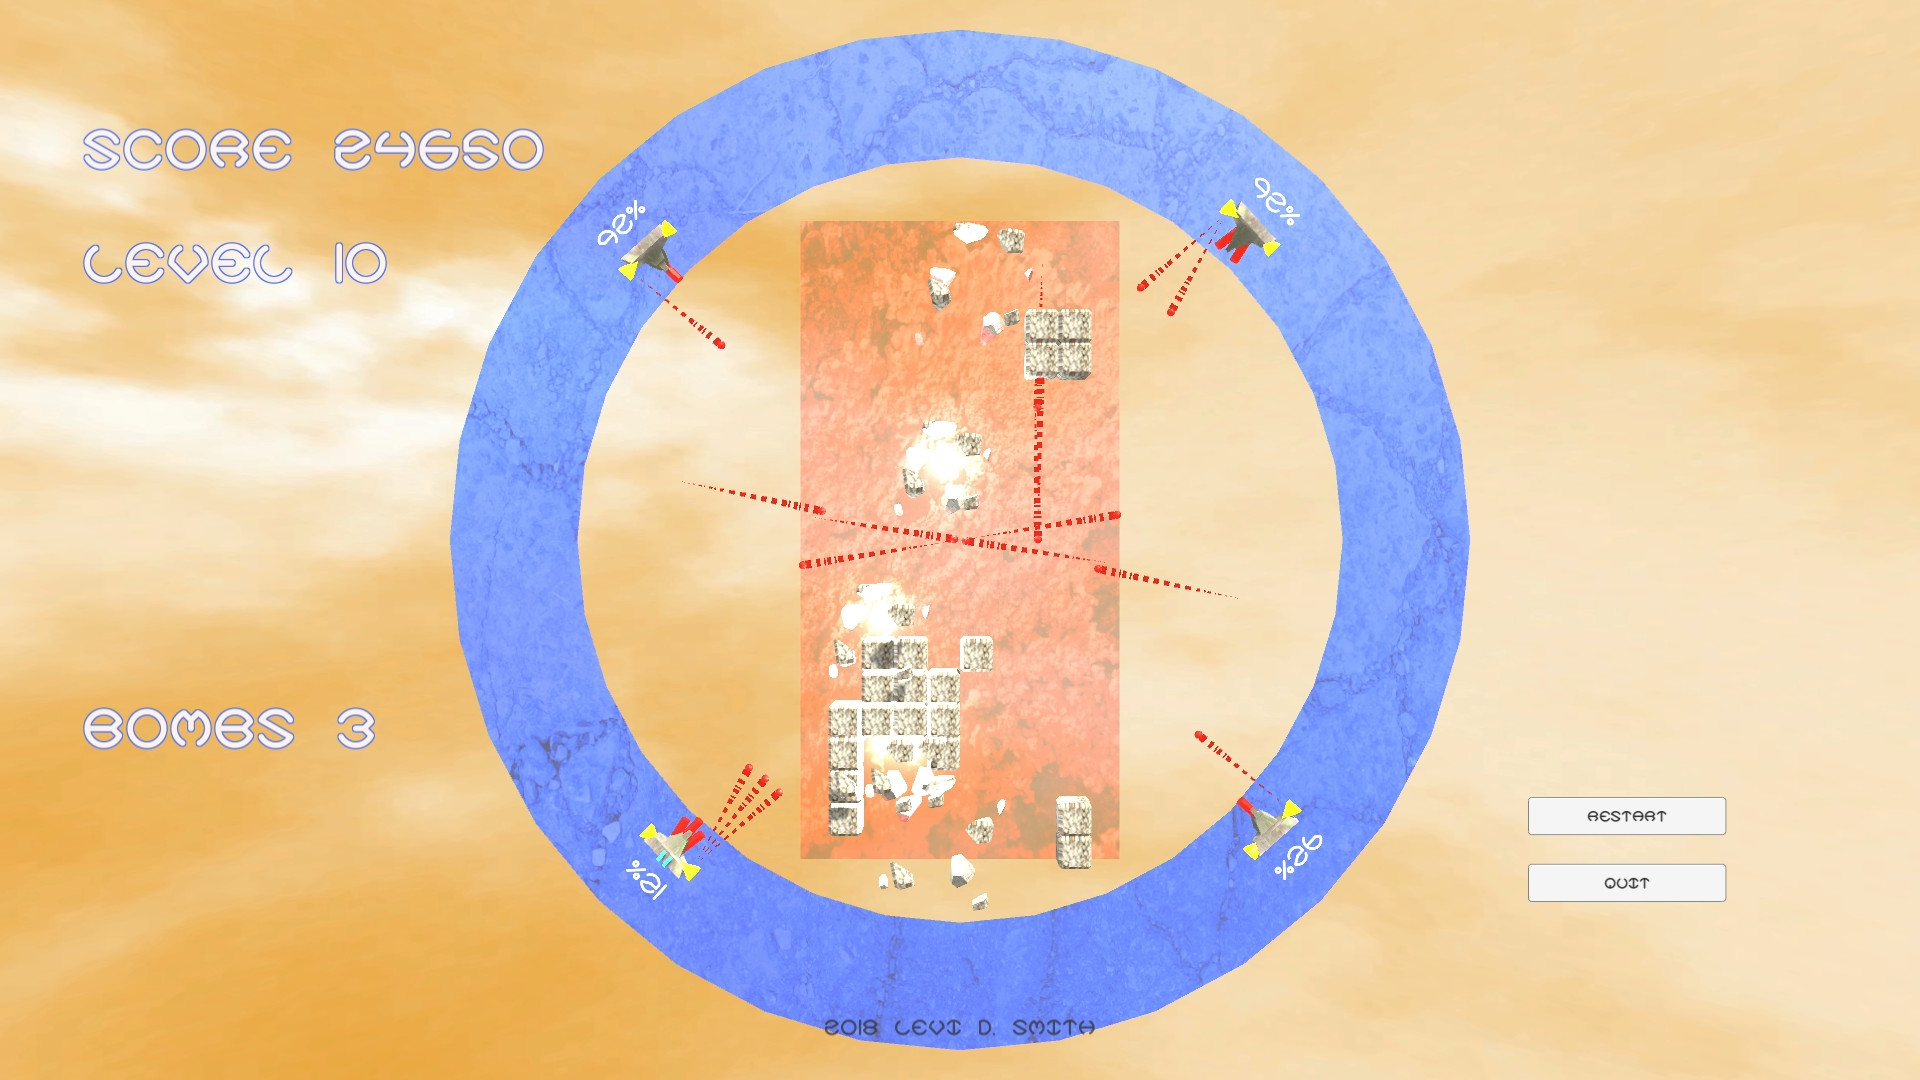
I also wanted to have the skybox change color as the player progressed through the game.  I couldn’t figure out how to get a handle on the color of the skybox.  Overall the game just like it has too much orange.  I probably should have made the score text, level text, and bomb display be larger and a different color.  The 3D text model on the title screen could have been a different color as well, because it’s really hard to read especially in thumbnails.

I guess that’s it.  I used to say that the day when I didn’t learn anything new, I would stop making games.  There are some new things that I do want to learn in Unity, like the new shader interface.  I just feel like I’ve moved out of the learning phase and into the making things more efficiently phase.

Turn Back the Clocks 4 – Developer log

Turn Back the Clocks 4 Turn Back the Clocks 4 Turn Back the Clocks 4 Turn Back the Clocks 4 Turn Back the Clocks 4 Turn Back the Clocks 4

Earlier this month, I participated in the 0h Game Jam. The objective of this game jam is to develop game from 2am to 2am during the daylight savings time change. For the United States east coast, this occurred on November 5, 2017.

I had previously created games for this game jam three other times, in 2013, 2014, and 2016. The first year, I just created a simple grandfather clock simulation, where you could move the clock hands around with the arrow keys. The next year I made a simple game where you click the clocks to turn them back one hour. Last year I made a space shooter, where you use a clock wind-up key to blast the clocks.

This year, I wanted to do something different again. I watched a lot of game shows on television when I was a kid, and one of the things I wanted to be when I got older was a game show host. The game show host thing never happened for me, but I thought this would be a good chance to remake one of those old game show games. One of the game shows that I watched regularly as a kid, was The Price is Right with Bob Barker.

One of my favorite games on the The Price is Right was Plinko. The contestants would guess the price of items, and if they were correct they would win discs to use on the Plinko board. The nice thing about the game was that there was a skill component (guessing the price of items) and a random component. The player would go up a staircase to the top of the big Plinko board, and drop discs one at a time. The board was filled with pegs, so the discs would always take a random path to the bottom. At the bottom of the board there were slots, each containing a different monetary prize. The biggest prize was always the center slot, but it was surrounded by two zero dollar slots. That made the game seem more exciting, because the difference between winning big and winning nothing was so close. I suppose that the position that the player dropped the disc also required skill, but it seems like the ending position based on the drop location was essentially random for the most part. If the player dropped the disc on the far right of the board, it probably would not end up in one of the slots on the far left. However, dropping the disc in center could definitely result in it landing in the far left or far right sides of the board.

I’ve been thinking about what makes games fun lately. I’ve come to the conclusion that there are two components to making a game fun. The first is the skill component. The player has to feel like they are contributing to the success or failure of the outcome. However, purely skill games feel boring, repetitive, or like they are a test or quiz. Therefore, there has two be a randomness component. Getting the balance between skill and randomness is the key to making a game fun. If the game is purely random, the player doesn’t feel engaged, because their contribution to the game does not impact the outcome. Roulette or “the big wheel” on The Price is Right are examples of games that are essentially completely random (although some could argue that the amount of force applied to the wheel could affect the outcome). Roulette isn’t a horrible game, but it’s not something that I would want to sit and play hours on end. I played through Yakuza 0 (龍が如く0) earlier this year, and the roulette game was one of the most monotonous minigames included. However, the hostess club game was one of the most exciting because it had random components (the types of people entering the club and their requests) and a skill component (matching the correct girls to the customers and fulfilling the requests).

With my newest Turn Back the Clocks game, I tried to recreate the Plinko game. It also includes mechanics similar to Peggle, in that the objective is to activate all of the pegs on the game board. The amount of skill required is minimal, as you only have the ability to control the horizontal position of where you shoot the ball. The ball takes a random path toward the bottom, enabling the pegs along the way. As a peg is enabled, I change the material of the peg from the red “off” material to the green “on” material. Also after a peg is hit, I have a function which loops through all of the pegs to determine if they are all enabled, which then transitions to the win state. As a ball is used, a counter of the total number of balls used is incremented as a way to keep score. Another component to making a fun game is having a way to determine if you are getting better at the game.

I decided to use Unity again, but this time I did not use Playmaker. The installation of Playmaker alone can take about 10 minutes, which are very valuable for a one hour game jam. My opinion of Playmaker these days is that it makes the easy things easier and the hard things harder. If I want to make an object spin, I can easily do that with Playmaker in a matter of seconds. Doing the same in code will take at least a couple of minutes to create a new script, assigning the script to the object, and then writing the few lines of code to make the object rotate. You also end up with a big mess of scripts for doing relatively simple tasks. On the other hand, trying to access other game objects, apply a complex trigonometry function, get a variable from another component script can be a nightmare in playmaker. A one line mathematical function in code can take minutes of adding Action boxes to your state, and you’ve got to get the ordering of the Action boxes correct or things will go wrong. Plus, accessing script variables in code is so much easier than having to define variables in Playmaker, especially when trying to access to variables from other game objects. Playmaker does provide a way to call a script (using the Call Method action and dragging in the script component), but trying to access Playmaker variables in other FSMs in other game objects in code can be quite messy.

Since my one hour game was quite plain, I decided to update it this weekend. I improved the physics, graphics, and music.

First of all, I made the ball object and collider half the size, because it kept getting stuck between the pegs. This actually reminded me of the old Plinko game when the disc would get stuck, and Bob Barker would have to get the hidden cane to push it loose. I’m not sure why he couldn’t just tap it with his hand, but I guess using a cane made it seem more legitimate. From what I remember, when a disc was stuck on Plinko, it was delivered back to the contestant and they got a do-over. The balls in my game still felt a little flat after changing the size. I changed the mass in the RigidBody of the ball, but it didn’t make too much difference. Then I learned that I need to create a Physics Material, which can be assigned to the ball’s Sphere Collider. In the Physics Material, the amount of bounciness can be changed. I also added a board around the pegs, so that the balls would not leave the game area. This worked really well, although the cannon which shoots the ball could still leave the game area. To fix this, I added a RigidBody to the cannon and freezed the position on all axes except for x, and froze the rotation on all axes. This worked well, but the balls could push the cannon when they collided with it, but setting the mass of the cannon to something large (I used 200) fixed that problem, and now the cannon is not able to exit the board area when it collides with the sides of the board. The board is a mesh that I created in Blender, which uses a Mesh Collider, without a RigidBody. I turned on Continuous Collision Detection for the ball prefab, which did seem to help prevent the balls from going through the walls of the board. Another problem with the original version was that if the ball hit exactly to top of a peg, it would not roll which makes sense. Therefore, when the ball is instantiated I add a random torque force to the RigidBody in the range of -500f to 500f. It seems like after a certain point, apply more torque really doesn’t have much of an effect, but having at least some torque makes it more random and keeps the ball from getting stuck.

I created and texture mapped a cylinder object in Blender to make a clock, which are the pegs. I created two texture images in Gimp. One texture is red and set to 2am (the non-activated peg) and a green texture set to 1am (the activated peg). The activated texture is assigned as a public Material in the clock script, so when the peg is activated I just get the clock mesh object and seting the material property of GetComponent<Renderer>(). I made an additional texture using a publicly available image of clock gear for the background of the game board. The texture was duplicated, and a normal map was generated with the new texture using the internal Unity normal map generator. Usually, this makes the image look better, especially when it interacts with light objects. Another addition I made was a light prefab, when flashes green for half a second and then destroys itself. It is important to only let the light live for a short period of time, because having two many lights can severely impact performance, or even worse Unity may stop rendering point lights if there are too many which looks bad.

In the background I created a half sphere object using the same clock gears texture, but with a different hue. I created a function in my LevelManager class which calculates the player’s progress through the game, by diving the number of active pegs by the total number of pegs. I multiply this zero to one value by a speed factor, and apply that as the rotation of the background. This gives the appearance of the background spinning slowly at the start of the game, and it gradually speeds up as the pegs are enabled.

The original one hour version of the game did not have any music. I liked the theme that I created for my last Turn Back the Clocks game, so I checked out the GarageBand project files for that game from my code repository. I loaded it into GarageBand on my MacBook Pro, and I change the instruments but kept the melody. I also changed the key from C to G. That makes the song sound new and fresh, without having to create new melodies.

There are a few other things that I would like to add to the game. It would not be too difficult to make it take advantage of my leaderboard API. I could have it submit the number of balls used after the player wins. I could also have the game keep track of time elapsed, and use that as another score metric. I could also make different configurations of pegs, so that the player has to complete each level, which would dramatically extend the gameplay lifetime. There could also be pegs with different properties, like exploding pegs. Objects could also be added to the game board to make it more difficult to reach certain pegs. The ball and cannon objects could use new models as well. I was thinking about having a semi-transparent ball with an hourglass inside. I don’t have any ideas for the cannon, but I could reuse the key mesh from my previous clock game.


Slowbot – Developer log

One more Ludum Dare in the books.  Slowbot was my fourteenth consecutive entry in the 48 hour game development competition.

I’ve noticed that my ability to quickly make games in Unity has improved over the years.  What used to take two days to complete, I can now finish on the first day.  That leaves a lot of time left over to polish and add more levels.

The theme this time was Running out of Power.  Early on I had the idea of a robot that would get slower as its battery depleted, and the name Slowbot seemed catchy.

As with my previous entries, I made sure that the core gameplay was working first.  The objective of the game is fairly simplistic.  Collect the three colored lights to proceed to the next level.  Collecting a light originally made the entire room illuminate with the color of light collected, but I thought that gave too much away.  Therefore, I limited the size of the activated light.  The headlight provides some assistance in seeing nearby hazards, while the rest of the level remains dark.

I used a spotlight which projected forward from the player robot.  As the robot’s power declines, the luminosity of the light decreases.  Looking back, I probably would have set a minimum luminosity value greater than zero, because when the power gets below 10% it is too difficult to see anything, which does not seem fun.

The robot’s speed also decreases as the power decreases.  The pitch of the sound effect played as the robot moves is also lowered as it runs out of power.  Along with the headlight fading, it gives a realistic feeling of the robot running out of power.  The game is over when power reaches zero.  The only penalty for losing is having to restart the current level and reactivating the lights again.

There is only one hazard in the game, which are the mines.  The mines explode when you collide with them, which lowers the robot’s power by 25%.  I created an explosion prefab that briefly illuminates the area in orange, which gives the player feedback that they did something wrong.  I should have also added a particle effect to make it look like pieces of the ground were flying upwards, so maybe I will add that in a future release.  As I learned from developing previous games, it’s best to have the explosion as a separate prefab and not a child of the GameObject being destroyed.  That way you can go ahead remove the mine from the game world and not worry about the explosion being removed as well.  It is also important to set a lifetime variable for the explosion, and clean it up after a defined period of time so you don’t overload the game with numerous explosion objects hanging around.

By default, there are a few Unity settings which provide ambient lighting.  The Window > Lighting > Settings, Environmental Lighting value needs to be set to the color black.  Environmental Reflections also need to be set to None and Intensity Multiplier set to 0.  These settings had to be disabled, otherwise it would still be possible to see all of the walls and mines on the screen.  For this game, I really wanted the player to use the headlight like a real flashlight to search for mines and see the walls, which made having complete darkness a necessity.

Power can be restored by picking up batteries.  I used a picture of a standard AA battery as a guide when modeling it in Blender.  One difference I made was that I applied the texture that I created as the emissive material, so that the batteries can be seen in the dark.  I felt that not having the batteries always visible would make finding them too difficult.  It also allows me to use the batteries as a guide to show the player where to go, similar to how coins are sometimes used in Mario games.

One new technique I learned for this game jam was creating a meter for the UI.  For many of my previous games, I would just display health and things like that as a numerical value, which is not visually appealing.  Earlier in the week, I watched a tutorial on making health bars with different shapes using the sprite mask option.  This looked much better than the scaling approach that I had used in my other games.  I wish I had learned how to do the sprite mask technique a long time ago.

The level generation code that I wrote was similar to my Free the Frog and Ancient Adventure games, where I define the level layouts in text files, which are stored in the Resources folder and read as TextAsset objects.  Then I used a the Split method to read the lines which became the horizontal rows, and the ToCharArray method was used to get the character value of each cell.  Each type of object is represented by a unique ASCII character.  This made creating the levels really simple in my Notepad++ editor.  Walls are represented by # in the text file, and holes are represented by a period.  The player’s starting position is represented by @R, G, and B represent the three colors of lights.  Mines are represented by x.  A regular floor tile is just the space character.  I created twenty total levels using this format, each stored in its own text file.  The one trick of reading level data out of a text file is that you need to subtract the current row number from the total number of rows if you want the level laid out in the game like it is defined in the text file.  Otherwise, the first row will be closest to the camera and the last row will be furthest away from the camera.

There are drawbacks to using text files for defining a level.  Each cell can only contain one type of object.  For the lights, mines, and player position a floor object gets created as well.  There is no way to add additional information to an object in a cell, such as the initial direction an object is facing.  This could be resolved by using a format such as XML, but writing an XML parser takes up a lot of valuable time in a game jam.

I defined an empty Room GameObject, which holds all of the prefabs instantiated for the level.  This is done by using the SetParent method on the transform of the instantiated prefab.  I live dangerously and find the Room GameObject by using the Find method, but if for some reason the Room GameObject is inadvertently deleted, then the game will throw errors when it tries to set the parent to a null object.  The reason for using a Room is so that I can create method to reset the level, which is called when the player moves to the next level or when the player dies and everything needs to be reset.  The Room lets me loop through all of the child GameObjects and remove them all by calling Destroy on each.  If I didn’t have them setup this way, then I would have to check every object in the scene to see if it something that needs to be deleted when a level needs to be loaded.  For instance, the camera and LevelManager GameObjects are not deleted when a level is loaded.  One thing to look out for though is that you don’t just write a loop that keeps calling Destroy on the first index until the child count is zero, which will result in an infinite loop and crash Unity.  Actually, there’s a hacky way to get Unity out of an infinite loop, but I’m not going into that here.  Destory is actually a request to remove from the game and it isn’t actually gone until the next call of Update.  This has “bit” me in a few of my games, when I had expected a GameObject to be gone after calling Destroy, but something else was still able to reference it later in the code on the same call to Update.

I used a picture of a bomb diffusing robot as a guide when modeling the robot.  I made a freehand side outline in Gimp of the robot, using different colors for the tracks, body and arm.  Then I was able to use that outline in Blender as the background image guide.  I started with a plane and deleted all vertices except for one.  Then I kept extruding that vertex around the outline of the robot parts.  After the outline was complete, I joined all of the vertices to make a face.  Then I extruded that face for the body and tracks.  I duplicated the tracks so that there was one on each side of the body.  I used two cylinders for the arm, which I scaled and rotated until it matched my background image.  I took a picture of the metal on one of my shovels, which I used as the texture for the robot.

For the floor and wall textures, I took pictures around the house of concrete, bricks, fencing, and my hardwood floor.  I duplicated these and made normal maps from grayscale using the Unity texture options, while also modifying the bumpiness option.  By default, the texture looked too grainy in the light.  I did compare the lighting effects with and without the normal maps, I think it is a definite improvement, but I don’t think normal maps make it look that much better.  It would probably make more of a difference if I was using a normal map generated from a high-poly model, instead of just generating it from grayscale.  I’ve used normal maps before, but this is the first time I used them in a Ludum Dare competition.

The music for the game was composed in GarageBand on my MacBook Pro.  I used two electronic style instruments for the main melody.  Then I alternate between the two instruments, making slight modifications in the melody.  I used one of the electronic style drummers to generate the beat.  I really can’t say I did much different in the music composition process for this game, but I am happy with the results.  This time I used an A major scale, instead of the default C major scale.  According to some music sites, the A major scale has a more cheerful tone.  The music that I  composed does remind me of the victory melody of an old RPG.  I sort of feel like my music creation skill has maxed out, so I may need to look into new techniques.  Music seems to be one aspect of game development that has remained the same, at least since after the 16-bit era when real musical recording started being used.  I exported the mp3 and GarageBand project files  to my Windows system using the system connect in the Mac finder.  I’ve learned that it is important to transfer the music project files as well, so that I can check them into my source code repository, in case I need to change or regenerate the music files later.

For this game, I decided to play Foley artist again and create all of my own sound effects instead of using a program like BFXR.  The battery pickup sound was made with my power drill.  The moving sound of the robot was made with my electric can opener.  The mine blast was me crumpling paper with the pitch lowered in Audacity.  The light switch sound was actually an old battery powered remote light switch held up to my microphone.

As with my Expand-O-Ray game, I did a voice over to give tips and explanation of the game.  Each tip is about 5 seconds long, and they are played at the start of the game sequentially with a slight delay between tips.  This could be improved by only playing the tips when they are relevant.  For instance, play the tip about mines reducing power after the player actually hits a mine.  This would require an additional boolean for each tip to track if the tips has been played, to prevent the tip being played every time a mine is hit.

I added the level times in the last few hours of the competition.  The times are held in a List of floats, which is sized to match the numbers of levels.  I just kept adding Time.deltaTime to the current array index while the player is active.   This prevents the time from being increased during the “Level Complete” message and “Game Over” message, and much easier than trying to keep track of start and end times.  It also allows me to continue adding time to the current level after the player respawns.  After the player completes all twenty levels, all of the level times and the total time is displayed.  I tried displaying the total time while the game is playing, but looping over an array of twenty floats on every frame to get the sum caused a significant reduction in frame rate.  It probably wouldn’t be too difficult to save level times to a leaderboard, using my Unity/PHP/MySQL leaderboard system.

There are a few improvements I would like to make with the game.  I had originally planned on having a drone type enemy, which would patrol and chase the player when close.  The robot model needs a lot of work, so that the tracks and wheels look more realistic.  I would like to have different types of robots with different properties, along with purchasable upgrades.  I think it would be neat to also have a movable arm on the robot that the player would need to operate to diffuse bombs to pass.

I was happy with how this game plays and feels.  Some people have told me that it’s one of my better games.  If I  release this game on major platforms, I would probably change the name, because Slowbot (while catchy) doesn’t sound like a very exciting game.  There has been evidence of really good games not selling well just because they had a bad name.  I also want to do more research on how real bomb diffusing robots work, which may give me additional ideas for this game.  I think I would be neat if a game like this could be used to train people how to use real bomb diffusing robots.

Gameplay video