Eight Way Shooting

http://www.youtube.com/watch?v=YTmCgEdq4Fw

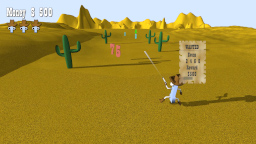
Added eight way shooting to the game, so that the player can aim vertically as well as horizontally.  Pressing up will set a flag that keeps track if the player can shoot upward.  When looking upward, then the Y velocity is set to the projectile speed.  If the player is not walking, then the player should shoot directly up, so the projectile’s X velocity is set to zero.  If the player is walking, then the projectile will move diagonally up/left or up/right depending on which way the player is walking.  I don’t have graphics for the player lookup up or down yet, so for now it just displays “looking up” or “looking down” over the player’s head.  One feature I plan to add is making the player aim diagonally up or down when the left or right trigger is pressed.  However, that will require an update to ResistorKit to handle those inputs, as well as adding methods in the ResistorKit screen class.

I went back and modified the velocity for the up/right and up/left shots, since it will actually go slightly faster than the projectile moving directly vertically or directly horizontally.  Currently the projectile speed is set to 10, so that it moves 10 pixels each second.  When shooting diagonally, the projectile will actually move 14.142 pixels according to the Pythagorean theorem ( square root of (10 squared plus 10 squared) ).  To make the diagonal speed match, the values of the X and Y components can be found by dividing the projectile speed by 1.414 (or multiplying by 0.707) which is the square root of two.  This is because Sqrt(1^2 + 1^2) = Sqrt(1 + 1) = Sqrt(2).  Fortunately, finding the length of the two sides (projectile’s X and Y velocity) of the triangle from the hypotenuse just requires multiplying by a constant.  I believe this is because the two sides of the right (90 degree) angle are equal, but I don’t have any formal proof of this.  If I allowed precision aiming where the X velocity was not equal to the Y velocity, then more complex calculations would probably be needed.

The projectile collection class has been modified to handle more than one projectile using a List.  A projectile is removed from the projectile from the List whenever it is inactive.  The alive flag now indicates that the projectile is ready for removal from the collection.  This may be slightly inefficient, since it is allocating memory for a projectile each time one is shot.  I may revisit this later if there are performance issues.  One problem is that I couldn’t just simply increase a counter variable to loop through each element and delete it if it is inactive, since that will modify the structure of the List which could result skipping elements if not careful.  Therefore, I looped through the List in reverse starting at the List size minus one and going down to zero.  That way if I delete an element then it will not effect the iterator.

Similar to enemies, I added code to handle passing a projectile from one room to the next.  I removed the condition that if a projectile hits the room boundary, then it disappears.  One interesting side effect is that now the projectile will live forever if it does not collide with an enemy, so it will loop forever as long as it is in the player’s room or an adjacent room.  Therefore, I added a variable to track the lifetime of a projectile, which I currently have set to  60 frames.  This may be upgradeable in the future with a socket.

Finally, on each projectile update I now check to see if the projectile has collided with a block.  This uses the same collision method that I created in the map class to do the enemy collision.  If the projectile has collided, then I set the alive flag to false, which will mark it for removal from the projectile list.  I also added the player’s width to the starting position of a projectile when shooting right, that way it doesn’t look like the projectile is going through the player’s body.

Egg Carton Problem

Piece Placement

Added a new GamePiece class to the project, which represents one of the components that can be placed on the board.  I intend for this class to be subclassed for each of the specific types of components (wires, resistors, etc).  The GameLevel class represents the game board and the piece queue.  I could have created a separate GameBoard class, but I decided otherwise since it is just a 2D array of GamePiece objects.  Each GamePiece has a fill value (how many frames until the flow goes to the adjacent cell(s)), an Elex value, and booleans for keeping track of which sides accept flow.   Author and date information have been added as a header comment in each of the code files.  It just looks odd not seeing the GPL there.

I had two alternatives.   I could have just created a list of pieces that have been placed on the board, having each piece know its row and column location on the board.  That is the method used in many 2D games, where each player and enemy knows its own x-y coordinate position.  The approach I took is creating the 2D array of pieces, which represent each cell on the board.  If a cell does not contain a piece, then null is stored for that array location.  I think the 2D array approach will work better when trying to determine the connections between wires.  It’s like Easter eggs in an egg carton.  There’s really no reason for each egg to know it’s x-y coordinate.  The egg carton just needs to know which egg goes into which slot.  The location of the egg can be derived by it’s slot in the egg carton, so it’s really redundant for each egg to also keep track of its position.  The 2D array approach shouldn’t be any more memory intensive, since storing null in a cell doesn’t require memory to be allocated.

Button Presses

Four new methods have been added to the GameLevel class:  confirmButtonPressed, cancelButtonPressed, actionButtonPressed, and optionButtonPressed.  These correlate to the A, B, X, and Y buttons on the XBox controller respectively.  I wanted to keep everything in the GameLevel class platform independent, and keep all of the platform specific code in the ResistorGame (formerly Game1) class.  This will make it easier if I want to add keyboard controls or give the user the ability to customize the controls.  Since this is a simple game, the confirm button will be used to drop a piece to the board, and the cancel and action buttons will be used to rotate the piece.  Resistors and I wires can only be rotated in two positions.  L wires (aka elbow wires) can be rotated in four positions.

XBox Testing

One difficulty that I’m having is that every time I want to test on the XBox (after it has been shut off), I have to Reset All Connections in the XNA Game Studio Connect and remove then re-add the XBox device in XNA Game Studio Device Center using the new code generated on the XBox.  I’m not sure if there is a way to keep from having to do this every time.

Adding Pieces to the Board

When the confirm button is pressed, I simply add a GamePiece object (just a new one for now) to the GamePiece array in the GameLevel class using the setPiece method, passing the piece, row, and column as parameter.  That method simply adds the passed-in piece to the game piece array at the specified row and column.  When the draw method is called, it loops through each cell in that array, and if it is not null (i.e. contains a piece), then it calls the draw method on the GamePiece object.  Since the GamePiece object will be subclassed, it should correctly draw whatever component it is.  For now, it just draws the regular tile using a red shade.  One problem that I had to fix was when the user held down the confirm button, then it would continually drop pieces to the board until that button is released.  Therefore, I added code to detect when the A button was pressed and released, then only called confirmButtonPressed when the A ButtonState went from Released to Pressed.

Easter Egg Hunt – Multiple Cameras Added and Bonus Eggs Implemented

Four picture-in-picture cameras have been added, which display each of the rabbits and the eggs that each has collected.  Each camera is a child of the Player object, so that it stays locked at the same position in front of the rabbit.  This gives a good view of the eggs collected, but can be jarring when the player suddenly rotates a large amount, such as going directly left to directly right.  I figured out that I can specify the size of the camera on screen in pixels by setting the pixelRect property of the camera.  In the Unity inspector, I have only been able to set relative sizes and positions.

The method for placing eggs was updated, to ensure that eggs are evenly spread out over the gameplay area.  Previously, the lower left portion of the gameplay area had few eggs because of an error using 360 degrees instead of 2 Pi radians with the Sin and Cos functions.  To evenly distribute the eggs, I calculated the start of the radian range for an egg by dividing 2 Pi by the number of eggs, and then multiplied by the current egg number.  The end of the radian range is the same, except using the egg number plus 1.  Then I generated a random float from 10f to 19f for the radius length from the center of the gameplay area to the egg, which ensures that the eggs don’t clump up in the center and don’t lie on the oustide edge of the gameplay area.  The radius of the gameply area is 20f.  The x position of each egg is calculated by radius * Cos(2 * Mathf.Pi * radians) and the z position is radius * Sin(2 * Pi * radians).  This method divides the circle into even slices based on the total number of eggs.

A new Bonus class (different that the Quest class that I removed) was added to track the bonus color and multiplier.  I made a list of int, which currently just holds 2 and 5, and the multiplier is selected from that list.  I added additional code to ensure that if the 2 multiplier is selected, then exactly 3 bonus eggs will be generated.  If the multiplier is 5, then only one bonus egg is generated.  When the regular eggs are created, if the random color equals the bonus egg color, then it loops and keeps generating a random color for that egg, until it doesn’t equal the bonus color.  It seems like with the bonuses added, there are far fewer tie outcomes in the game.  Since there are just a few bonus eggs, I placed them at any valid location on the gameplay area.  If more bonus eggs were instantiated, then I would use a method to spread them out like I did with the other eggs.