
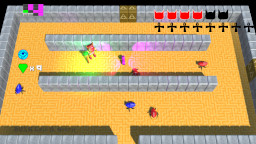

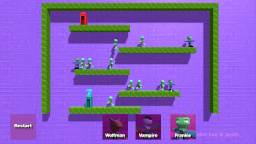


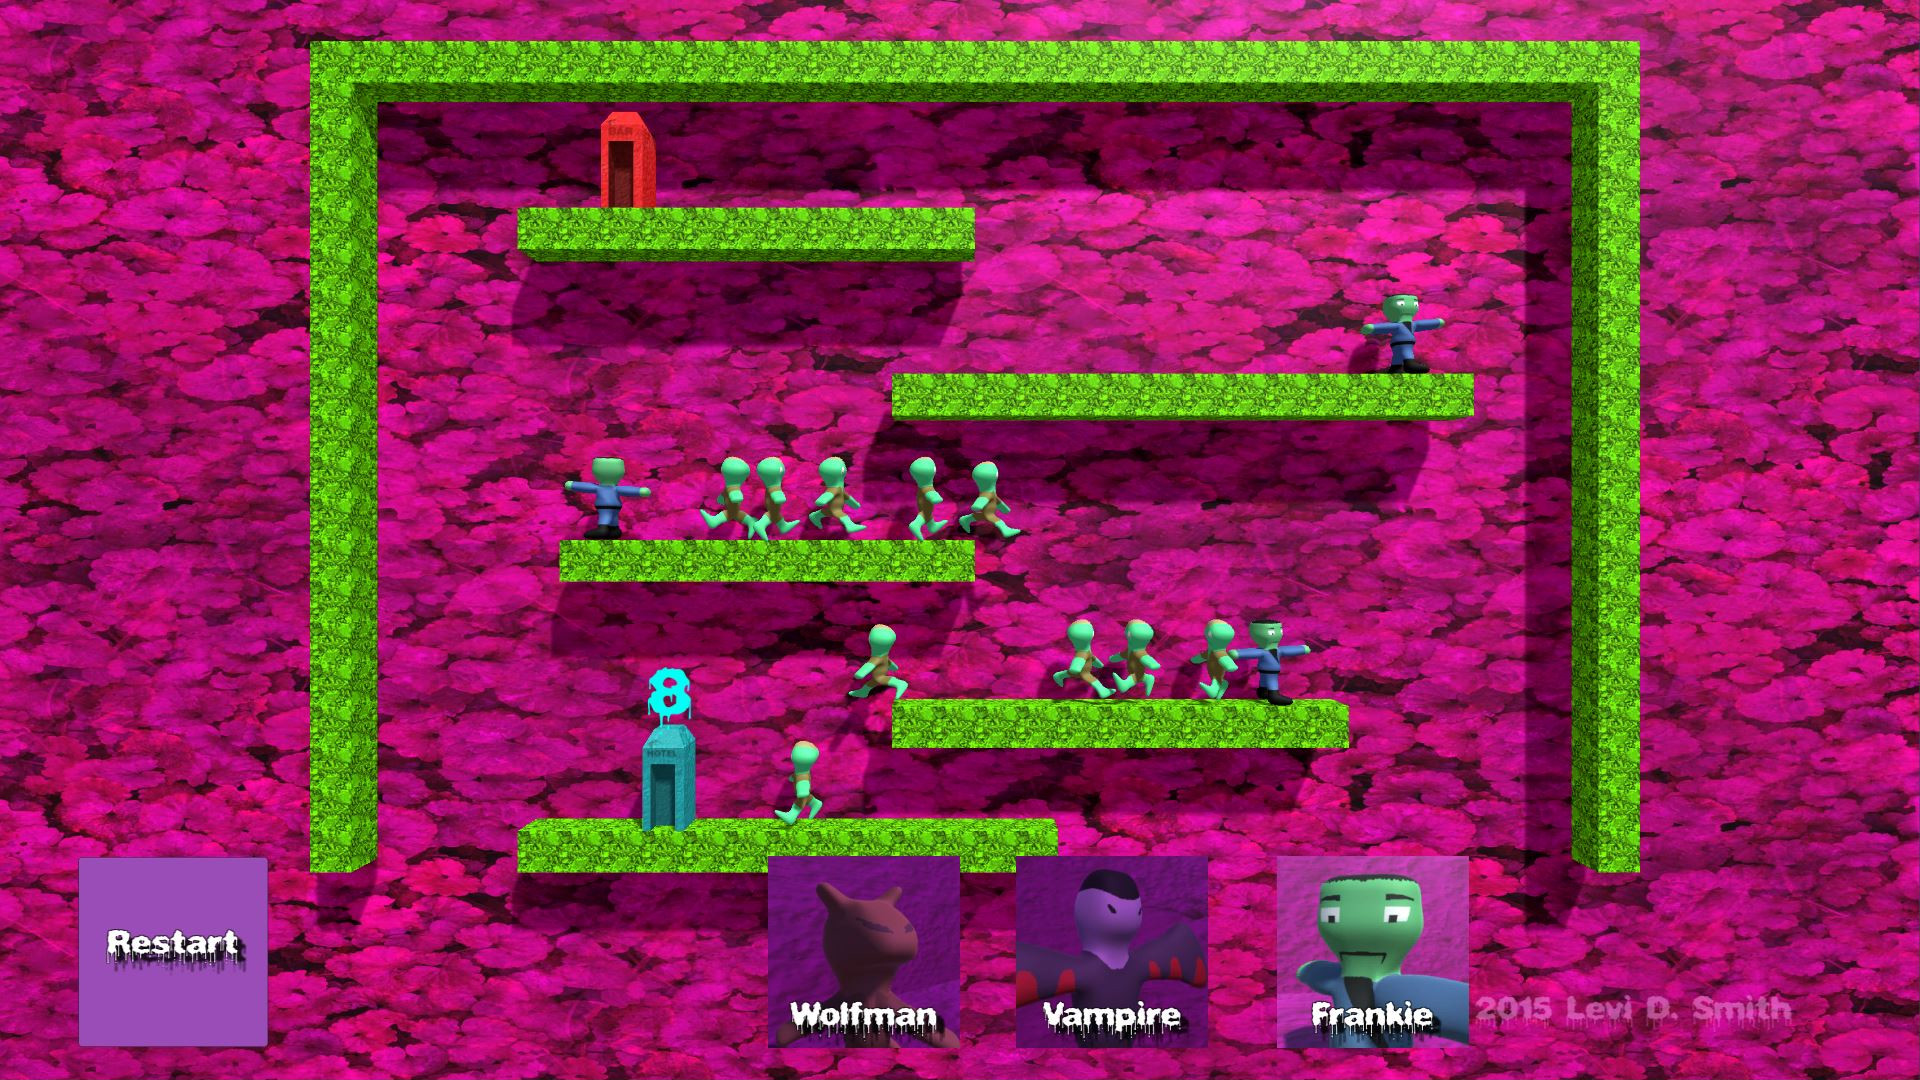
Overview
All of the monsters in Monsterland stopped by the local bar for a few drinks after a hard day of monster work.
Since drinking and driving is not permissible in Monsterland, the monsters need to find their way to the Monster Hotel to stay the night. As the owner of Monster Hotel, you need to help the drunken monsters find their way to your establishment.
All monsters coming out of the bar are boogey men. Use your powers to transform the monsters to make their way to the Monster Hotel.
Wolf Man – Can dig through ground
Vampire – Allows the monster to land softly from a long drop
Frankie – Blocks other monsters from proceeding
Post Mortem
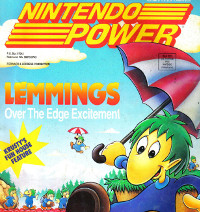 The game uses the same basic mechanics as the Lemmings game that I first played on the SNES. I remember Nintendo heavily promoting the game at the time, as it was featured on the cover of Nintendo Power. In 48 hours, I knew I couldn’t implement all of the different Lemming abilities. Therefore, I just picked three of the ones that I remembered. Those were the digger, the floater, and the blocker.
For this game I used Tiled for generating an XML file containing the positions of the blocks, as well as the entry and exit positions. The TMX file has to be renamed to TXT and placed in the Resources folder to be able to assign it to a TextAsset which is used by my UnityHelper XmlReader script. Then the Prefabs are assigned to the script, which does the job of instantiating the Prefab objects at the correct positions.
I created an object which spawns the units at regular intervals. The units will keep walking in a straight line until they collide with a wall. I used a capsule collider for the unit, and I set the local Z velocity to a constant value on every frame. When the unit collided with a object with the wall tag, I would rotate the unit by 180 degrees, which would make the unit walk in the other direction since the local Z is now pointing in the opposite direction. Unfortunately, it would also detect a collision when the capsule collider touched the ground. To fix this, I added a box collider in front of the unit which does not touch the ground and fires a trigger when it hits something with the wall tag. By using a trigger, I ensure that my box does not react to the world physics. I also added a similar trigger event so that the units reverse direction when bumping into each other. Otherwise, the units would start stacking on top of each other. Ideally, I would have the units pass through each other, but that problem would be too difficult to solve under the time constraints. To keep the units pinned on the Z plane, I set the rigid body constraints on the Z position.
Another problem arose when the trigger box hits two wall blocks at the same time. This would change the direction of the character, and then immediately change it back to the original direction. To fix this, I added a small amount of delay to the trigger state so it would only fire on one trigger events.
The digger simply stops and starts digging a hole below his current position. I determined which block to remove by shooting a ray downward from the unit’s position. However, this really didn’t create a hole big enough for the units to fall through. I used the position of the block removed and casted a ray to the left and right of that position, and destroyed the adjacent blocks as well.
The floater unit prevents the unit from dying after a long fall. I added another collision event which compared the force returned from a collision, and if it is greater than a certain value (force of falling more than three units down) then it would destroy the unit. When I was testing this, I never noticed the units dying, so it seemed like I was losing units for no reason. For that reason, I spawned a particle effect where the unit was destroyed. I just used a standard particle effect, but I wish I could have made a goopy style splatter. To obtain the floating effect, I simply increased the drag value on the unit’s rigid body.
The blocker was fairly easy to implement. When that ability is activated, I just increased the mass of the unit so that other units can not push it. I also set the movement to the standing state, similar to the digger, so that the unit stays stationary.
I increased the available ability types by one for each stage. That way, the player is not presented with all of the abilities at once. Using the new ability type is essential for completing the current stage. If I had more time, I would have liked to had more levels, and levels that would require using a combination of abilities to complete.
I saved the modeling and graphics for last. In some of my past entries I would spend too much time on the modeling, so this would force me to do it quickly. Since this is a monster theme, I decided to use a different monster for each ability. The default creature is the boogeyman, since I think of the boogeyman as being any type of creature. The Wolf Man is a digger because I think of canine type creatures as diggers. I made the floater a vampire, since bat type creatures can fly. I made the blocker a Frankenstein (shortened to “Frankie”) since he is big and immovable. I wish I could have made a morphing effect when transitioning between abilities.
I used Blender for making the character models. I created a simple half outline in Gimp, and then I used that outline to form my models using loop cuts, resizing, and translating vertex positions. I created a simple six bone armature and created a simple walk animation in the dope sheet action editor. I then unwrapped the mesh using the “from view” option which makes painting the texture model much easier (although there is more stretching around the sides). I exported the layout in the UV editor and painted the texture in Gimp. I did mess up once by not separating the front and back layouts, so my creature had eyes in the back of its head. Separating the back layout wasn’t too difficult, so I just had to draw the back side of the creature.
 The boogeyman that I designed is just a simple imp type creature. I used the same mesh for the wolf man, but I gave him pointy ears and I elongated his snout. I tried giving the vampire wings, and used white face with a black rope with red trim. I had “the master” from Manos: The Hands of Fate” in mind. Frankie was given a blocky head and body, which was done by modifying the mesh. I wasn’t going to spend the time modeling bolts into the side of his neck.
I modified the animations slightly for the monsters. The vampire flaps his wings. Frankie holds out his arms and twists his head in a similar fashion to the blocker in Lemmings.
I updated my GarageBand software to the latest version earlier in the week, and I used it on my Mac laptop for composing the music. I used a B minor signature for composing the music. I used some organs which sounded creepy and kept modifying the notes until it sounded okay. I made another similar track which was a little slower for the title screen.
I recorded my own voice making howling, “blah”, and grunting sounds for each of the monster types. I lowered the pitch and added echo effects to make the sound effects seem more creepy.
Overall, I am happy with what I was able to accomplish in two days. This entry definitely feels more “gamey” than my previous Ludum Dare entries. The biggest weakness of this entry is probably the lack of levels, since I only have three and ran out of time to make more. I will probably make a short trailer and throw it up on Steam Greenlight to see what sort of response it gets.
![]()
![]()
![]()
Released


