Ambiguity

Multiple Wire Problem

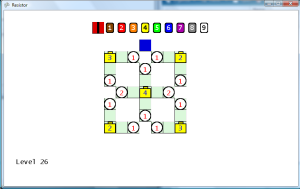
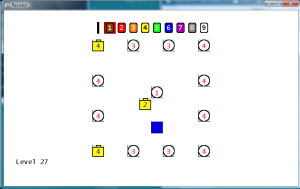
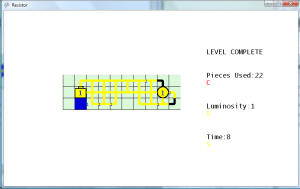
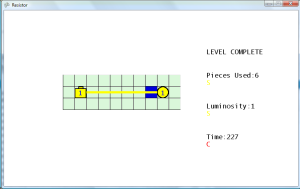
Noticed a problem that doesn’t happen too often, but when it does it is really annoying.  This is when you place a wire (or resistor) next to two filled wires with different flow values.  For instance, if I place a wire where the blue square is in the first image below, then what flow value should the new wire get?  Should it be a 3 from the left wire or a 5 from the right wire?  Remember, this is my puzzle/arcadey game rules, and not a real simulation so I get to make up the rules.  Currently, it just uses the value of the first check in the if/elseif/else block.  However, this is ambiguous to the player, because the player can’t determine what the value of the wire placed will be.  That’s unless they’re clever enough to figure out that the cells are evaluated in a clockwise manner starting at the top.  So currently the new wire would get a value of 5 from the right wire.  However, if the wire were placed in the blue square in the second image, then the new wire would get a value of 3.  This was confusing me as I play tested the game, so I’m sure it would also confuse other players as well.


Therefore, in the checkStartFilling method in the GameLevelScreen class, I added a loop that calculates the highest value of all the adjacent cells, and uses that highest value for the new wire.  In the two images below, now placing a wire in the blue square will set the new wire’s value to 5 in both cases, since 5 is greater than 1.  It’s not realistic, but a least the player can clearly anticipate what the value will be now.


Connection Problem

This logically fixed the problem, but the display was still misleading, because it would make a complete loop with two different flow values in the loop.


To fix this problem, I updated the draw method in the GamePiece class to only make connections to wires with the same flow value.   The resistor wires are a little tricky, because it’s difficult to determine which wires carried the flow in and which ones carried the flow out.  Another visual distortion happened when two wires with different values were placed next to each other that only had one joining wire each.  Those appeared to connect since the default image for a wire with only one connection spanned all the way across the cell horizontally.  Therefore, I made wire images specifically for only one connection (N, E, S, W) on each side and an image for a no connection wire ( O ) to resolve this issue.  These new images provide a few pixels for a break padding, so that those wires don’t appear to be connected to pieces that they are not connected.  Now as shown the in the screen shot below, with the updated code and images the user can clearly see the flow through each of the wires, and there is no doubt that the value of the wire in the blue square is now 5.

Game Win Screen Updated

Moved the game win display code to the game win screen, to make it consistent with the other screens.  To to this, I had to pass the piece count, luminosity, and time values to the Game Win screen.  Additionally, I had to pass a reference to the level definition object, so that the rank values can be calculated.  I also added a win delay on the Game Level screen, so that there is a one second pause between the time when the last LED is activated and when the Game Win screen is displayed.

More Level Design

Created twenty new levels (21 to 40).  I purposely designed some of the levels to force the player to use the higher level resistors (2, 3, and 4).  I increase the highest level battery used by one for each ten levels.  One flaw that I’m making in level design is making it so that every tile must have a piece to clear the stage.  Technically, this is fine but the user will always get an S rank in pieces used.  Therefore, I should always include a few tiles that don’t have to be used, so that there is a chance for lower piece ranks.


During play testing, I noticed that one level didn’t have any tiles and only objects.  This was due to me exporting the wrong layer as the tile layer.  Going back and exporting the correct layer resolved this problem.


High Level Resistors

The player now starts out with only one selectable resistor (value 1).  Every 10 levels, the maximum selectable resistor increases by one.  This prevents the player from using a high level resistor to lower the initial wire to zero, which would allow the player to quickly complete the level.

(Gray video distortion fixed. Thanks to tip from SHADEE.)

Week 3 Wrap-Up

(The capture format was set to FLV in XSplit (instead of MP4) with the highest recording quality (20), but there is still some initial distortion in the video after it was loaded to YouTube)

Touch Up Work in Audacity

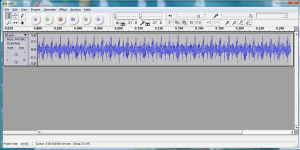
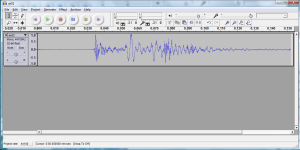
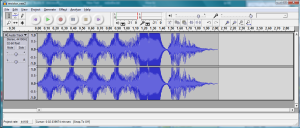
Touched up the sound effects in Audacity, to give them the appropriate lengths to be used in the game.  For the buzzer, I trimmed down the hair clipper sound effect to 0.25 seconds.  Not sure why, but I wasn’t able to find a crop function in Audacity.  Therefore, I just had to select the portion of the clip I want to use, copy, then paste it in a new Audacity window.  Next I started looking for a sound to use for the main menu.  The buzzers and rings were too harsh of a sound, so I loaded up my shaken Pepto Bismol sound effect.  After cropping out everything except for one shake of the bottle, I realized that this makes a great menu selection sound.  It actually sounds like muddy boots on a wooden walkway.  For the wire filling sound, I slimmed down the running water clip.  The original sound is a little harsh, so I raised the pitch by 265.  The ice sounds were a little flat, so I increased the speed by 200.  It now sounded like an old fashioned money changer.  With this new sound, I added 2 seconds of silence at the end, and then applied the echo effect (delay 0.5 seconds, decay 0.5).  The spoons sounded good without any modification except for cropping out the rest of the noise.  I’ll use this as either a menu sound or a rank display sound.  The spoon hitting the glass made a good sound, but there was a lot of background static noise in the sound capture.  I used Audacity’s noise removal tool to fix it, but it seems to have raised the pitch of the sound as well.  It still sounded okay, so I’ll probably use that as the sound when an LED is lit.  The CO meter made a nice beeping sound, but it was really loud so I used the normalize effect.  I’m not sure where I will use this sound, but I’ll go ahead and import it into the project for now.  This gives me a total of eight sound effects, which should be enough to get me started.


Apparently, the volume of the MediaPlayer object uses a value between 0 and 1, and I incorrectly assumed that it was 0 to 100.  For some reason, the sound when it is played on the PC is much louder than it is on the XBox.  Maybe the XBox (or my television) has sound normalization so it isn’t loud like on the PC.  Setting the MediaPlayer volume to 0.1 makes it sound about right on the PC, which I believe is one tenth of the volume.  I will have to test it on the XBox later to see if that makes it too low to hear on the console.  If it does, then I may have to write some platform specific code to handle the differences between the PC and console.

Ran into a bit of an issue with playing sound effects.  In order to play a sound effect, the current screen must have a handle to the MediaPlayer object, which is only available in the main ResistorGame class.  I don’t want to have to pass a MediaPlayer object to each function on each screen that may want to play a sound effect.  I think I’ll make the sound effects like the screen transition, where the screen will implement a public method which will report whether or not the screen needs a sound effect played.  Then the Resistor game class will query that method on each update, and then play any sound effect that is requested to be played.  I usually don’t write code this way, but I think it may make things cleaner in the end, especially if I decide to write a media handler class.  I created a method called getRequestedSoundEffect in the Screen class and added a protected instance variable called iSoundEffect.  If the ResistorGame calls that method and it returns a value greater than -1, then it will play the sound effect at that index in the sound effect array.  Thefore, any of the subclassed Screen just have to set the iSoundEffect variable to any of the sound effect constants defined in the ResistorGame class.  Amazingly, this worked perfectly the first time that I tested it.  I also discovered that MediaPlayer is not required for playing SoundEffect objects (Songs objects only), but it was good that I implemented it this way, otherwise I would have the same problem with passing the sound effect array around to all of the screens.  Just calling the Play method on the SoundEffect object itself will play the sound.  One drawback is that only one sound effect can be played for each update call, otherwise the previous sound effect(s) ID assigned to the iSoundEffect variable will be lost.  This may be a good thing, because there shouldn’t be too many sounds playing at the same time.  Once scenario that I can imagine is if two LEDs are lit at exactly the same time.  Just playing the sound effect once should be sufficient.

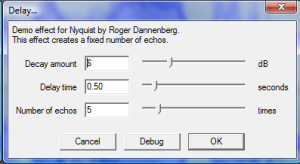
Using Audacity and a short tutorial from eHow, I was able to record my voice for the title screen which I gave a repeating robotic sound.  First, I used the Repeat Effect on the start of the audio clip.  Then I used the Delay Effect with Decay=10, Delay=0.01, and Echos=20.  I repeated that effect about 6 times.  I also made audio clips for “level complete”, “game over”, “S”, “A”, “B”, “C” and applied the same effects.


Level Selection Modification

I may have messed up by making the LevelDefinition instance a member of the GameLevel class instead of the ResistorGame class.  The ResistorGame class needs to pass the maximum number of levels to the LevelSelectScreen class.  The maximum number of levels is defined in the LevelDefinition object, so it has to get a reference of that object from GameLevelScreen which is a little messy.  I may have to rework this later.

Sound Effects Added to Game

After updating the game code, I now have sound effects for menu movement, menu selection, wire begins filling, light filled, and light busted.  I had to add an additional variable to keep track of light filled, since this property was never actually tracked.  I added that check to the game win check, since it was already looping through the lights on the board, so if the number of lit lights is greater than the number of lit lights on the previous check, then the lit sound effect is played.  I was happy with all the sound effects, except for the electricity one (originally water running from the faucet).  It still sounded to static-like, and it started to give me a headache after awhile.  Therefore, I replaced it with the phaser sound that I made (also from the water running) which has a much smoother sound.  I also had the Pepto Bismol sound (now named SE_PLOP in the constants) play on each menu movement and the spoon sound (SE_SPOON) played on the selection.  This didn’t sound right because the SE_PLOP was longer than SE_SPOON, so I just switched out the occurrences of those two sounds, which makes it sound much better.  The lit light and light busted sound effects sound great.  I may need some delay or an animation when a light is busted, because the light busted sound effect plays through the game over screen.

Special Cases

While playing the game, I noticed a special case that may need to be handled.  If a wire is placed next to two (or more) filled wires (or other pieces), I believe it just takes the Elex value of the first one in the if/elseif statement.  I should calculate the highest of all the neighbors, and assign the new wire the highest value of all the adjacent pieces.

Another thing that had been bothering me is that I thought that the time statistic was proportional to the pieces used statistic, which would make it somewhat redundant.  However, through testing I found that it is possible to get a S rank in time and a C rank in pieces by quickly spamming wire pieces.  This is a good thing, which prevents someone from getting the best possible grade by quickly spamming pieces.  The inverse is also true, where someone can get an S rank in pieces but a C rank in time.  Just take a long time laying down the pieces in the shortest path.


Batteries not Included

http://www.youtube.com/watch?v=GUvDc-xiLC4

Fill Adjacent Modified

I slightly modified the method for calculating when to start filling adjacent pieces.  Before, when a piece went from unfilled to filled, then it would check to see if it had any unfilled neighbors, and begin filling those.  Now, on every update it loops through all unfilled pieces, sees if those have any filled neighbors, and then begins filling if it has a filled neighbor.  This fixes the problem of not filling a wire if it is placed to a neighbor that has already been filled.  A piece will now begin filling instantly if it is placed next to a filled wire.

Since it is now impossible for the flow to ever stop, then only end game conditions now are when 1) all lights are filled or 2)  one of the lights bust.  Limiting the number of end game conditions to two outcomes is a good thing in my opinion.

Batteries Added

Created a GamePieceBattery class, which replaces the need to manually start filling the first wire from the level startup code.  Batteries automatically start filling without being connected to a filled piece.  Batteries also have a constant Elex value, and they do not take the Elex value from surrounding wires.  Could let the player have a limited number of batteries (just one for the earlier stages) and let the player place the battery on the board.  There could also be only special  cells where batteries can be placed on the board.  One thing to think about is if a wire is already filled and a battery is placed next to it with a higher Elex value, then does the wire take the new Elex value of the battery or start refilling?  Removed all starting cell variables from the GameLevel class, since it is now handled by the battery.  Also removed the level fill wait value, since the battery will automatically filling on its own.

Win State

Added a STATE_GAMEWIN state to the main ResistorGame class, so all of the end level logic, display, and music can be handled in that state.  Much easier than making a bunch of special cases in the STATE_GAMELOOP state.  Created a simple victory fanfare theme, which is played after the player completes a stage.  Got bit by not calling SpriteBatch.begin()/end() again.  Need to find a way to run in debug mode under Windows, so I don’t have to spend as much time trying to figure out the cause of game crashes.  I’ve also added a winning victory fanfare melody, but I’m not as happy with it as my title theme or level theme.  It needs some work, or it needs to be scrapped all together.

Screen Abstract Class

Decided to start working on the title screen, to give the player a way to gracefully exit the game without having to press the default Back button.  I realized that the title screen will be using the same button press handlers and drawing methods as the GameLevel class, so I created a Screen abstract class which defines all of the button press and drawing methods as abstract methods.  The GameLevel class has been changed to GameLevelScreen which now subclasses Screen, and I added the override keyword to all the implemented methods.

I’m going to try a new approach for passing controls between screens in the game.  In Java games that I’ve written in the past, I would have to pass a reference of the main class to the specific screen class.  This was really messy, so this time I’m going to make the screen class report the next screen to display through a getter method, eliminating the need to pass and keep track of a reference of ResistorGame in the TitleScreen and GameLevelScreen classes.  I added a protected variable in the Screen class to keep track of the next screen and a method called getNextState.  This method returns -1 to stay on the same screen or a positive integer to move to a different screen, which are the same states defined in the ResistorGame class.  For instance, when the confirm button is pressed on the title screen, it sets the next state variable to the constant for the GAMELOOP state, and then the next call to update in the ResistorGame class will call the getNextState on the TitleScreen object and then appropriately set the state to make the GameLevelScreen the active screen.  By doing this, I was able to take the state logic mess out of the ResistorGame class and I now just have a currentScreen object of type Screen that holds a reference to the current Screen object, so the button press and display methods are just called on currentScreen, and through polymorphism the appropriate implementation of those methods are called based on the subclass.  If I spent some extra time on it, I could probably eliminate the state variable out of the ResistorGame class entirely, and just rely solely on the class type of the currentScreen object.

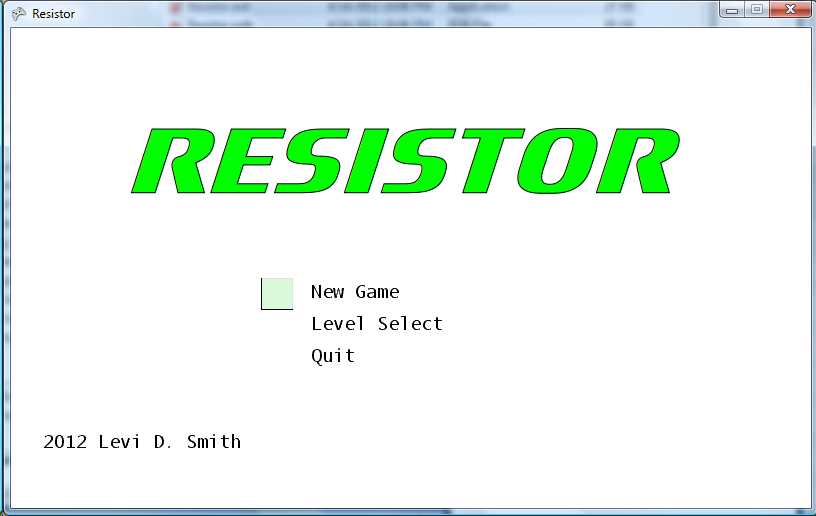
The title screen has been modified to display three options: New Game, Level Select, and Quit.  The Back button has now been disabled, and the user must select Quit from the main menu to quit the game.

The Level Select currently just allows the user to select a stage level between 1 and 9 using up and down button presses.  For now it doesn’t actually change levels since there is only one level defined.