Ambiguity

Multiple Wire Problem

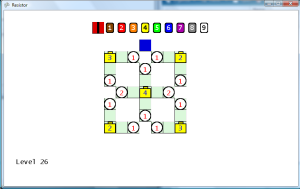
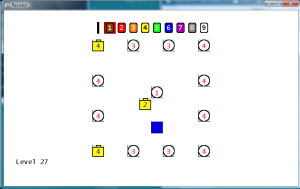
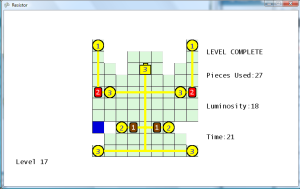
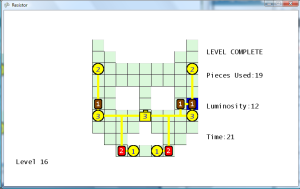
Noticed a problem that doesn’t happen too often, but when it does it is really annoying.  This is when you place a wire (or resistor) next to two filled wires with different flow values.  For instance, if I place a wire where the blue square is in the first image below, then what flow value should the new wire get?  Should it be a 3 from the left wire or a 5 from the right wire?  Remember, this is my puzzle/arcadey game rules, and not a real simulation so I get to make up the rules.  Currently, it just uses the value of the first check in the if/elseif/else block.  However, this is ambiguous to the player, because the player can’t determine what the value of the wire placed will be.  That’s unless they’re clever enough to figure out that the cells are evaluated in a clockwise manner starting at the top.  So currently the new wire would get a value of 5 from the right wire.  However, if the wire were placed in the blue square in the second image, then the new wire would get a value of 3.  This was confusing me as I play tested the game, so I’m sure it would also confuse other players as well.


Therefore, in the checkStartFilling method in the GameLevelScreen class, I added a loop that calculates the highest value of all the adjacent cells, and uses that highest value for the new wire.  In the two images below, now placing a wire in the blue square will set the new wire’s value to 5 in both cases, since 5 is greater than 1.  It’s not realistic, but a least the player can clearly anticipate what the value will be now.


Connection Problem

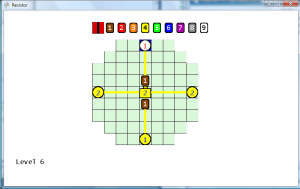
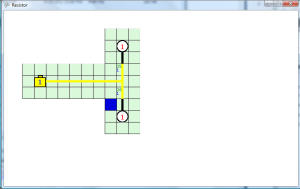
This logically fixed the problem, but the display was still misleading, because it would make a complete loop with two different flow values in the loop.


To fix this problem, I updated the draw method in the GamePiece class to only make connections to wires with the same flow value.   The resistor wires are a little tricky, because it’s difficult to determine which wires carried the flow in and which ones carried the flow out.  Another visual distortion happened when two wires with different values were placed next to each other that only had one joining wire each.  Those appeared to connect since the default image for a wire with only one connection spanned all the way across the cell horizontally.  Therefore, I made wire images specifically for only one connection (N, E, S, W) on each side and an image for a no connection wire ( O ) to resolve this issue.  These new images provide a few pixels for a break padding, so that those wires don’t appear to be connected to pieces that they are not connected.  Now as shown the in the screen shot below, with the updated code and images the user can clearly see the flow through each of the wires, and there is no doubt that the value of the wire in the blue square is now 5.

Game Win Screen Updated

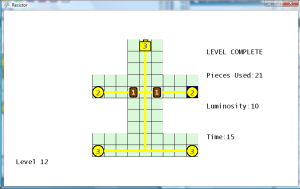
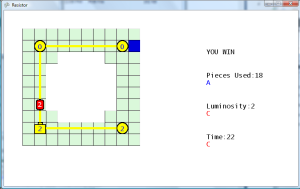
Moved the game win display code to the game win screen, to make it consistent with the other screens.  To to this, I had to pass the piece count, luminosity, and time values to the Game Win screen.  Additionally, I had to pass a reference to the level definition object, so that the rank values can be calculated.  I also added a win delay on the Game Level screen, so that there is a one second pause between the time when the last LED is activated and when the Game Win screen is displayed.

More Level Design

Created twenty new levels (21 to 40).  I purposely designed some of the levels to force the player to use the higher level resistors (2, 3, and 4).  I increase the highest level battery used by one for each ten levels.  One flaw that I’m making in level design is making it so that every tile must have a piece to clear the stage.  Technically, this is fine but the user will always get an S rank in pieces used.  Therefore, I should always include a few tiles that don’t have to be used, so that there is a chance for lower piece ranks.


During play testing, I noticed that one level didn’t have any tiles and only objects.  This was due to me exporting the wrong layer as the tile layer.  Going back and exporting the correct layer resolved this problem.


High Level Resistors

The player now starts out with only one selectable resistor (value 1).  Every 10 levels, the maximum selectable resistor increases by one.  This prevents the player from using a high level resistor to lower the initial wire to zero, which would allow the player to quickly complete the level.

(Gray video distortion fixed. Thanks to tip from SHADEE.)

Keep on Trucking

Laundry List

I’m getting the feeling that this is the point where a lot of my other game projects have died out.  A core game and fancy title graphics.  I have rarely taken the time to go back and add all the bells and whistles, such as sound effects and flashy graphical effects.  Plus, I’m really not a fan of level design.  It really feels arbitrary to me, but it does take expertise to make good levels in a puzzle style game.

Therefore, to keep myself on track I made a laundry list of the next things to complete in the game.  Some will require a little research since this is my first XNA game, such as saving the game status.

  • Hold Confirm button to keep placing wires
  • Zoom in for letters on title screen
  • Game over screen delay / graphics
  • Display level/stage before starting a level
  • Transitions between screens (such as fade out)
  • Show player ranks for stages on level select
  • Don’t allow levels that haven’t been completed to be selected on level select
  • More levels; different array sizes
  • Colored backgrounds for level screens
  • Save levels completed along with ranks
  • Render objects in Blender
  • Add graphics/sound effects on level complete screen
  • Keyboard controls so that others who don’t have XBox can play test

The first task I tackled was the hold confirm button to keep laying pieces.  This is a core gameplay change, so I felt it was most important.  Basically, I just required a new instance variable in the GameLevelScreen class, which tracks if the confirm button is being held down.  On each update, it checks to see if the button is held down, and if it is, then it tries to set a piece at the current cell.  Therefore, it is constantly trying to set a piece at the current cell (but can’t since no more than one piece can be assigned to a cell), so there may be room for optimization here later.  Anyway, the controls feel MUCH better and less jerky now with this in place.  I think I need to put a cooldown on resistor usage, because the player can select a resistor and just spam it all over the board to quickly complete the level.  It’s okay for the wires to not have a cooldown, because spamming wires will likely cause the player to bust an LED and lose.

Continuing to resolve the tasks that required the most programming first, I decided to implement the record display on the level select screen.  To do this, I had to create a PlayerRecords class, which holds the records of each completed level.  This object is populated with the level ranks after each level is completed.  The level select screen uses this to display the ranks for each level.  Currently, if a level is replayed, then the ranks are overwritten each time the level is completed, which should be fixed later.  For now, the level select screen just shows the integer values associated with each rank, but these will be changed to the rank graphics in the near future.  Plus, I will need to implement a way to scroll through the higher levels.


In the level select screenshot above, I played through level 1 getting ranks C, S, B.  Then I selected level 5 and got ranks S, C, B.  Noticed an error which caused the game to crash.  After completing the fifth level (level index 4), it would actually go to level index 5 (which didn’t exist but used the layout of level index 0 as default).  When that level was completed, it would go to level index 1 (level 2) next.  So it appeared that it was looping back to level 1 (level index 0), but it really wasn’t.  Therefore, when it tried to save the statistics for level index 5, it reported an error because I only allocated the array in the PlayerRecords class to hold values for five levels (level index 0 through 4).  I went ahead and added the level index to the game level display, but I will probably create a method to convert that index to a stage number.

New Levels

Next I started working on adding new levels.  Before churning out new levels in the Mappy tile editor, I wanted to make sure that new levels can be easily added to the game.  I added two new List variables to the LevelDefinition class, to hold all of the tile maps and object maps.  This will eliminate the if/elseif statement mess that was in the getter methods that return the object arrays, tile arrays, and rank arrays for the currently selected level.  I really need to create a Map object to hold those values for each level, but I don’t want to have too many classes right now, so I don’t think it’s worth the time and effort to rework that code now.  The only benefit is that it would eliminate potential problems of managing five parallel Lists, but instead it would just be one list of Map objects.  I added additional checks in each of the methods that return ranks in the LevelDefinition class, so that it doesn’t try to index a position in one of the rank arrays if the level parameter is greater than the size of one of the rank lists.  This shouldn’t ever happen unless the NUM_LEVELS constant in the LevelDefition class is set to a value higher than the size of the rank Lists.  If this happens in the object or tile array getter methods, then it just returns the array information for level 1 (index 0).  I didn’t add any checks to see if the object and tile arrays were completely empty, because I thought that would be obsessive.  I may have to think about the ability to add an expansion to the game later, which may conflict with the PlayerRecords definition.

I used the Mappy tile editor to create more levels for the game, bringing the total to 20.  I wrote a small Ruby script to loop through all the files in the map export directory, and it does some minor modifications to prepare those arrays to be used in the game, then it writes out the results so that I have all the arrays in one file instead of 40 different files.  Made another minor modification to the rank code, which was preventing it from saving the ranks for the first stage (index 0).


More Title Screen Updates

Got side tracked and spent about an hour getting the letters on the title screen to zoom in.  After all letters are displayed, then there is a 5 second pause, then the letters zoom in again.   I’m not sure how much more time I will want to spend on the title screen.  Gameplay is most important, but the title screen is the first thing that people see.  I definitely wanted to display the title screen as soon as possible.  I am so sick of seeing idiotic Game Studio Logos on startup that just waste my time.

So now I think I just need to re-do the font for the menu items to match the title font, and then have a new menu item selected image (the default tile has been there for a while).  I’m thinking of just using another portion of the computer card images that I already have, and maybe apply a brighter white color and a drop shadow.

Level Up

Tile Editor Agony

Started using the Tiled tile editor to create levels for the game, because I thought that was the editor I used for Legend of Tux.  I created a simple sprite sheet which contained the tiles on one layer, and the batteries and LEDs on another layer.  I found that I was only able to export my maps in a very limited number of formats.  It’s sad that this tile editor can’t output a simple indexed array of tiles.  I’m really not in the mood to write a parser for any of these formats, so I went back to the Legend of Tux wiki and found that I actually used Mappy last time.  Therefore, I downloaded Mappy and recreated my levels with that tool.


Mappyland

Mappy will not load PNG spritesheets unless two DLLs are included, so I had to download those file separately from the Mappy website.  Apparently there is a now bug with the “export all layers” functionality, so each layer has to be exported individually or else you will get an array filled with zeros.  What a pain!  Unfortunately, they don’t provide a binary download for the previous Mappy versions, and it’s not on SourceForge so a previous version isn’t archived for download.  The author even says on the website that 1.4 is a beta, so why can’t the last stable release still be downloaded?


Make sure to set the color depth to 16-bit when creating the map, or else the sprite sheet will not load and Mappy will complain.  As shown in the sprite sheet above, batteries start at index 10, and LEDs start at index 20.  I can get the Elex value of the LED or battery by modding (%) by 10, which really isn’t scalable past 10, so this may need to be reworked later.  This sprite sheet is just used for creating the level arrays, so I was sloppy when placing the numbers.  In the actual game, the numbers are programmatically placed on the objects.

I created getter methods in the LevelDefinition class to return the background tile array and object array.  Then I have a method in the GameLevel class which converts the integer arrays to actual objects (GamePieceBattery, GamePieceLight, etc).  Using the Mappy exporter, I was able to acquire the static array data definitions, which I pasted into my LevelDefinition class.  Wrote simple if/else statements to return the correct array for the level, but this could be changed to a switch/case statement (if C Sharp has those… I don’t know, and I didn’t feel like looking it up, since if/else does the job).

Next Level

Added instance variable to the main ResistorGame class to track the current level.  I’ve been trying to keep instance variables out of this class except for the media files.  When the GAMEWIN state is enabled, the current level instance variable is incremented.  If the current level variable is greater than the maximum number of levels (currently hardcoded to 5), then it gets set back to zero.  For the  LevelSelectScreen, the class could return a level index, and the ResistorGame class can use that value to set the current level instance variable.

One problem I’ve noticed is that the cursor defaults to cell 0,0 at the start of each level, which may be off the actual game board, now that the shape of the levels are custom defined.  I may need to add an additional object to the level definition which is the starting position of the cursor.  Additionally, all levels are using the same value thresholds for the ranks, which will need to be fixed later.  The S rank for luminosity should be easy to calculate (the sum of the bust values of all the LEDs).  As for the time and pieces used rank, I’ll probably just play through the levels a few times, and use my best scores for S rank, then use some sort of bell curve function to determine the thresholds for the A, B, and C ranks.


Loose Ends (Fix later)

Here’s just a few additional things that need to be fixed.

Currently, there is a display issue if the wires connect to the resistor from the sides.   The wires need to be removed from the resistor sprites, then just simply display a standard wire which will make the proper connections, then display the resistor core on top of it.

I haven’t decided if I should let the player move the cursor off the board cells, and just prevent the user from placing a piece on a non-board space… or should the player only be allowed to move the cursor on game board spaces.  If the player is allowed to move the cursor off of game board spaces,  then the player shouldn’t be allowed to lay pieces on those empty spaces.

I may allow the player to continually lay wires as long as the confirm button is held down, because currently the player has to keep alternating between pressing the direction and the confirm button to lay continuous pieces, which feels jerky.

The LED values can still fall below zero if enough resistors are used.  Need to set the bottom limit to zero for these.