Spamming not Allowed

Cooldowns

Made another gameplay change today.  The fact that the player could pick a high level resistor and spam it to quickly complete the level was really bothering me.  Thefore, I added an array in the GameLevelScreen class which holds the cooldown value for each selectable piece.  When the piece is dropped, the cooldown value for that piece is set to 2 seconds (120 frames).  That value is decreased by one on each update until it reaches zero, then the user may place that resistor again.  So now the user can still use all resistors, but it will take a really long time to complete the stage, which solves the problem of the player winning the stage quickly if all resistors are used.  Using all resistors will also not give the player the best luminosity score.  I could put in a limit on how many times each resistor can be used, but I think that would over-complicate things.

Active Screen

A new abstract method has been defined in the Screen class, which is setActiveScreen.  This is a method that I already had in the TitleScreen class, but I thought it should be included in all Screen classes.  This method is called whenever the Screen gets set as the currentScreen.  Initialization that needs to be done whenever the screen gets control (such as setting pause values) can be set in this method.  This was going to be necessary for both the GameWinScreen and GameOverScreen, so I thought it was best to have it as a common abstract method.  Those two screens now have a pause instance variable that is set to the wait time in the setActiveScreen method, which prevents the player from bypassing the screen until that pause value hits zero.  This will also allow me to just call setActiveScreen on the currentScreen object once when control is passed, and I won’t have to call that method specifically for each Screen subclass instance.  I already had a setCurrentScreen method defined in the Screen class, but it is not abstract and its job is to set the next screen state to -1.  I think having the setActiveScreen abstract method handle the subclass specific code is best for now.

Title Screen Completed

Added a new background image for the currently select main menu item.  Used Gimp to create a free selection shape on top of one of the computer card images.  Used the color tools to make the image grayscale, and then increased the brightness twice.  Then I applied the bevel filter twice, and drop shadow filter once.  Also gave the currently selected item ‘s font a green color, and changed the font to Motorwerk.  Unless there is a good reason to change it again, I’m considering the title screen done.

 Loose Ends

Made a slight modification to the level complete sound effect, so the pitch gradually raises through the sound clip.

Added delay when an LED busts before moving to the Game Over screen.  The LED is now filled with red when it is busted (could use a cool breaking graphical effect later).

Tax Tag and Title

New Title Logo

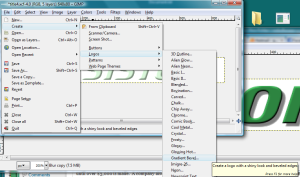
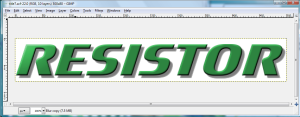
After wasting about an hour trying to follow a Gimp tutorial to make a 3D text logo, I ended up using Gimp’s default  bevel logo creator.  The results are just as good as the 20 step tutorial I was using, and it was done in about 2 minutes.  I went ahead and made separate layers for each letter in the title.  I exported each layer as a separate PNG image, that way I can apply special effects with each individual letter.  I also kept each letter image at the full size of the title text.  It is a little wasteful, but eliminates the need to do calculations in the code to place each letter.  I just put each image at the location where the title needs to go, and it should look fine since everything but the letter is transparent.  Hopefully, this won’t have an impact on performance, and it’s just a title screen so high frame rate isn’t essential.


New Title Background

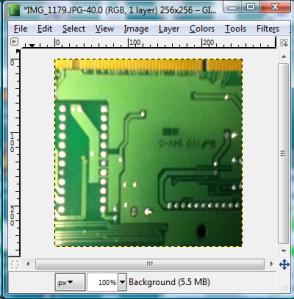
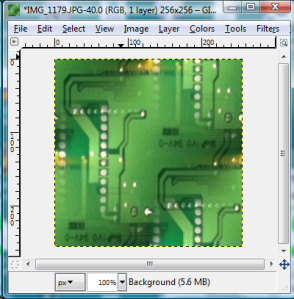
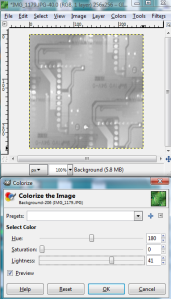
Used the image of one of my old computer boards, and shrunk it down to a 256×256 pixel square.  Then I used the Make Seamless filter in Gimp, which is found under the Map menu.  Then, I made the image grayscale and lighter by using the Colorize option and setting the saturation to zero.


The new graphics were then imported into the project.  I added a variable to track which letters should be displayed on the screen, and a constant to track the amount of frames between displaying letters.  Currently, the letters just pop-in, but I would like to add a zoom in or other method of displaying the letters later.  I added a variable to track the offset of the scrolling background image.  I simply created two loops to display the background image, setting it off vertically by the number of pixels in the offset, which makes it scroll.  Finally, I created a gradient that is filled with light green at the bottom, and gradually transitions to a transparent color.  I overlap this on top of the scrolling background image, to make it appear as if the background is fading away.  Well, it doesn’t appear that way to me because I know how it’s implemented, but I think it should appear as fading away to the untrained eye.

One problem now is that the title screen looks considerably different than the rest of the game.  The title screen has realistic images and rendered text, while the rest of the game looks like it could have been created in Microsoft Paint.  This is really apparent on the level select screen which still has the old title logo.  I may have to use Blender to render some of the components to make those look more realistic as well.

So until I create another update video, I won’t be able to show off the scrolling effects.   This picture will have to do for now.

The Game Biz

Began reading up on what needs to be done to publish the game, if I want to make money off of it.  One question I also have is if I need to create an LLC or other form of company to sell the game.  I read on one site that a company is not required until over $3,000 is made.  A company also helps protect the individual from being sued directly, if that unfortunately happens.  Taxes would also be paid through the company instead of my personal income, which may help in the long run if the company does not make much money.

Lines aren’t easy

Displaying the Board

The weekend is over, which means I don’t have much time to develop at night due to work.  I tried making a simple grid board using lines, however drawing lines in XNA is much more difficult than in graphic libraries I’ve used before, like OpenGL, AWT, Allegro, and ClanLib.  I was able to find some documentation on how to draw lines in XNA, but I was just really looking for something to draw a simple line from one x,y coordinate to another x,y coordinate.  To avoid this complication, I went ahead and created a simple 32×32 pixel tile, with dark lines on the left and bottom edges.  I repeated this tile for each cell in the grid, which will be used for the game board.  I also created a simple transition from the title screen to the game board screen when the “A” button is pressed on the controller.

Additionally, I need to find a way to easily translate my code from an XBox target build to a Windows target build.  I would much rather do my simple tests under Windows, and just use the XBox for testing major releases and milestones.  Currently, I have two separate projects for building on XBox and on Windows, but it will quickly become a pain to copy source files and resources between the two projects.

Sprite Creation

The sprite images for the resistors and wires have now been created in Gimp.  I will try to convert these to a sprite sheet later for efficiency, but for now I’m just going to leave them a separate images.  Each is a 32×32 pixel image, which should fit perfectly into the board cells.  The wires are 6 pixels in width, and centered horizontally so that it will align correctly when rotated.  I created resistor sprites for 0 through 9, an “I” wire, an “L” wire, and a light (just a circle for now).  Currently, I’m going to make it so that the light can be wired from any side, along with the light output from any side.


Level Design

Finally, I did a little more conceptual level design, which can be seen in the scanned image below.  Each level will be composed of multiple stages.  Once all stages are complete, the player will move to the next level, which will introduce new pieces or gameplay mechanics.

Since this is intended to be a simple game, I won’t actually use the terms “amp”, “electrical current”, or “volt” in the game, but instead just use an lightning bolt icon to represent the units.  For simplicity, voltage, current, and resistance units will all be the same.  This may upset electronics purists, but I don’t want players to be constantly calculating Ohm’s Law in their head while playing  a puzzle game.  If the emitter outputs 5 units and it runs through a 2-resistor, then the output from that resistor will be 3 units.  For now, I will call this nonsensical unit “Elex” and add a warning about the game not being completely scientifically accurate.

Level 1 will start out easy using the lowest resistors, 1 through 3, and only I and L wires.   Later Level 1 stages will have the Elex increased from the power source, and the maximum values for the lights will be increased.  Again, if the player connects the wire to the light with the Elex value higher than this value, then the light will bust and the game is over.  If Elex is lower, then the light will be dimmer based on the current Elex value.  Having greater  luminosity will result in a higher score at the end of the stage.  A perfect bonus will be awarded if all lights are running with the maximum luminosity value.  Additionally, in later Level 1 stages the player will be required to connect two lights instead of one.

Level 2 will continue to increase the types of resistors used, by including one through nine.  Some of the cells may be blocked out to make the player construct more complex paths.

Level 3 will introduce the T wire, which is used for splitting.  The player will be required to manage two active wires concurrently.  Hopefully, I will be able to display the Elex value next to the wire as it fills.  Splitting will cause the unit value to split in half for each path.  Block cells may be used to force the player to use the T wire.

Level 4 will add resistors with two color bands, expanding the resistor values all the way up to 100.  An “expert” or “hard” mode could hide the display of the resistor value on the sprite, requiring the player to calculate the resistor value in their head based on the colors.  Since this is a game just to teach the color values, the third multiplier band and fourth tolerance band will not be used like on actual resistors.

Level 5, if implemented, will include capacitors, but I haven’t thought much about how those will be used in the game.  Somehow they will be used to store electrical units.