Setting up the Code Repository
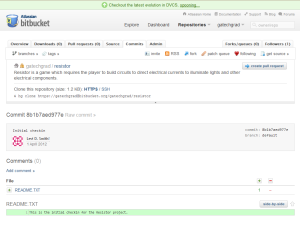
First update made to the Resistor code repository. We are on our way. Used Git Bash along with the command given on the BitBucket project page to instantiate the repository clone on my system. Git Bash provides an interface similar to bash on a UNIX-like system or cygwin, and the local file system can be found in “/C”.
Created a simple README file in my project folder, and added it to the repository by right clicking the file, selecting TortosieHg, and then selecting Add. Then I selected the main project folder, right clicked, and selected Hg Commit. This brings up another window where release comments can be entered, then Commit is pressed to update the repository. Unlike Subversion, the code is not uploaded to the main repository server just yet. To move the code to the master repository on BitBucket, the folder must be right clicked again, Tortoise Hg selected, then Synchronize. This will display the TortoiseHg Sync window. Pressing the Push Outgoing changesets button will cause the changes to be added to the master repository, after entering the BitBucket password of course.
Creating the Project
Created a default XBox 360 (4.0) game project in Visual C# 2010 Express, using the folder I created after cloning the repository as the location. However, errors were returned when trying to run the project because no device was capable of displaying the executable. This was not a problem before when developing a Windows game, but I’m assuming that it is an issue now since this project specifically targets the XBox 360 platform.
Used the XNA Game Studio Device Center to add my XBox 360 as an output device. Gave my XBox 360 the name “Gyromite”. Unfortunately, it prompted for a connection key, which I didn’t have yet.
Joining XNA Creator’s Club
Went to the XNA Creator’s Club online site to create an account. Get your credit card ready (ugh!). Somewhere, RMS is shedding a tear.
For whatever reason, it wants a gamertag to create an account. I really don’t want to mix my developer profile with my regular gaming profile, so I created the new gamertag GaTechGradDev. After shelling out a Benjamin to Microsoft, my developer profile was activated. Next, I downloaded XNA Game Studio Connect to my XBox 360, after downloading and signing in as my new developer profile. I’m hoping that this will work on my older XBox as well, so I can use it for development and my newer one just for gaming.
Using the XNA Game Studio Connect app, I was able to get the connect key required for the XNA Game Studio Device Center on my PC to add a new device. My PC was able to connect to the XBox with no problems after entering the code.
Restarted by development IDE, but the project would still not run. Figured out that you have to right click on your XBox in the XNA Game Studio Device Center, then select Set as default XBox 360. Unsurprisingly, this was not documented as a part of the developer setup on Microsoft’s site. After that was fixed, I got the Cornflower blue screen (not “of Death”) on my television, which is a good thing.
On the Big Screen
After some aggravation with trying to get transparency to copy from Inkscape to Gimp (I just made the background white and forgot about it), I was able to get the Resistor title screen to display on my television. Apparently the default resolution for an XBox360 game is 640×480, which I haven’t used since I was programming QBasic on my 386. I will look into changing that later, but for now here is the title screen in all its glory.


