Delivery Kid

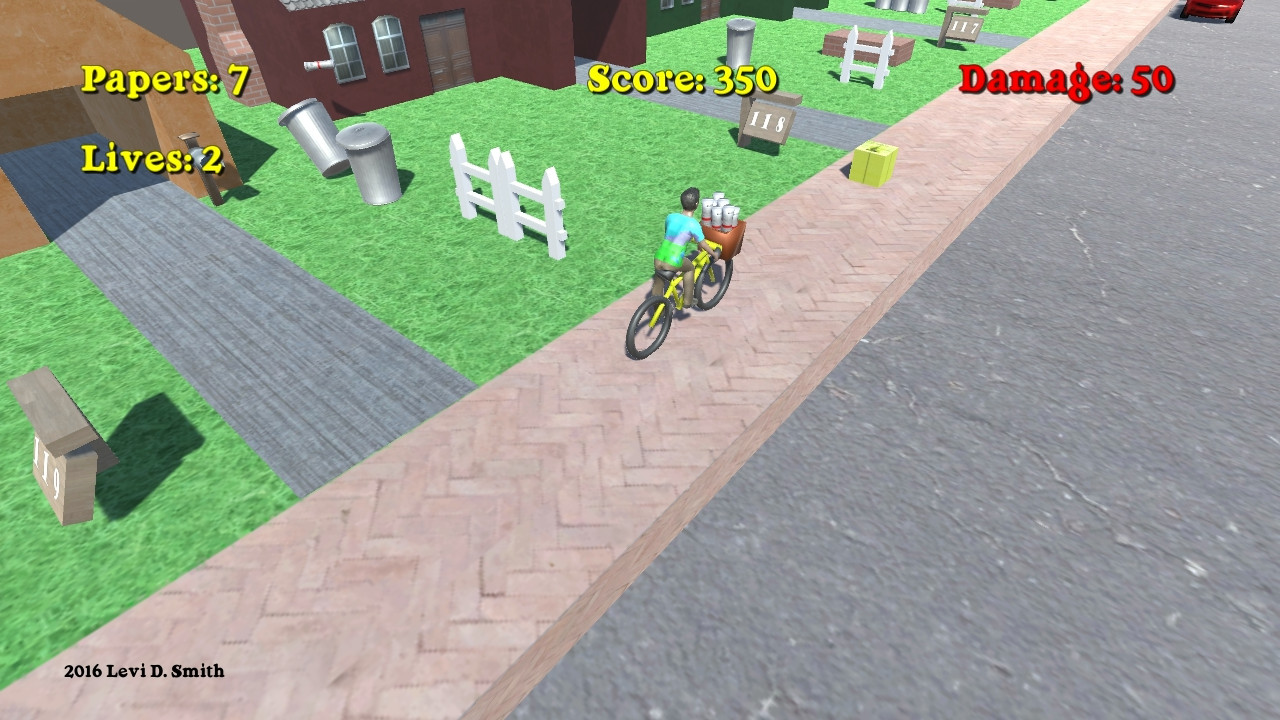
Delivery Kid is a game with classic arcade gameplay.  Deliver newspapers to all of the subscribers.  Avoid hitting obstacles or the delivery kid will be fired.  Break windows and topple garbage cans for bonus score.  Are you good enough to complete deliveries through the entire week?

Game Design

For this game, I am analyzing the gameplay of the source material and will attempt to implement that gameplay in a 3D world using Unity.  I am documenting my thought process before I implement each component in order to capture all of the game’s rules in writing.  First of all, I identified all of the objects in the game, and I implemented those objects with primitive 3D Unity objects..

Player – The player will be represented by an object with a capsule collider.  The capsule collider will allow the player to smoothly move up ramps and other objects.  The player will move forward in the world Z axis at a constant rate.  If the user presses up on the controls, then the player will move faster.  If the user presses down on the controls, the the player will move slower, but not completely stop.  The camera will be parented to the player, so that the camera always follows the player.

The player will have a Rigidbody so that it responds to physics, and the X and Z rotation axes will be frozen.

The player starts with three lives.  One life is deducted whenever the player collides with a house or enemy.  The game is over when the player’s available lives falls below zero.  The number of player lives will be displayed on the screen.

The player will have a Playmaker FSM with one state that controls the player movement, using the Get Axis Vector action which stores the user’s input into a Vector3 variable.  The player’s location is then translated by that vector in world coordinates.

House – There will be various houses placed in a row on the right side of the bounding box.  The objective will be to deliver newspaper to the target houses.  Target houses will have a brighter color to differentiate them from the other houses.  Each target house will have a mailbox.  The house will initially be implemented with a box collider, with a short box trigger surrounding it for the yard.  If the player fails to deliver the newspaper to the target house, then it will no longer be a target house on the next level.

Newspaper – The objective is to throw newspapers so that they land in the yard trigger area of the target houses.  The player will throw newspapers in the negative X axis towards the houses by pressing an action button on the keyboard, gamepad, or mouse.  Some force will need to be applied to the newspaper in the positive Z direction, since the majority of the screen is filled with the world in front of the player.  The Z force could possibly be based on how fast the player is moving forward.  Newspapers can also be used as weapons to stun enemy characters.  The newspaper will contain a sphere collider.

The player starts with a stock of 10 newspapers.  One is subtracted whenever a newspaper is thrown.  The player cannot throw any newspapers when their stock is zero.  The number of newspapers in the players stock will be displayed on the screen.

Newspaper Refill – The newspaper refill object will set the player’s stock back to 10 newspapers.  Newspaper refills will appear randomly next to houses.

Mailbox – One mailbox will be available for each target house.  Bonus points are awarded for landing a newspaper in the mailbox.  The front of the mailbox will have a box trigger.  When a newspaper enters the trigger, then the newspaper will stop moving by setting the kinematic value to true.  The mailbox will also have a regular collider that surrounds the mailbox object.

LevelManager – There will be a set number of houses for each level.  After the player passes the final house, the level is completed.  The Level Manager will instantiate the player when the level starts.  At the start of each level, the LevelManager will instantiate the Player object.

For the first level, the LevelManager will instantiate twenty houses.  Ten random houses will subscribers and the other ten houses will be non-subscriber houses.  The subscriber information will be stored in an array of booleans.  During the game, another boolean array will track which houses have been delivered a paper.  The index for that house will have their delivery set to true if a newspaper is delivered to the mailbox or delivery area.  After the level, the subscriber array will be compared with the delivery array.  Any subscriber who did not get a delivery will be set as a non-subscriber.  The game is over if all houses become non-subscribers.

If the player successfully delivers newspapers to all of the houses that are subscribers, then the player will have a perfect delivery and one of the non subscriber houses will be chosen at random and converted to a subscriber house.

The level number will start at zero and increased by one after reaching the exit object.  The level number corresponds with a day of the week, which will be displayed before the beginning of each level.

Enemies – Various types of enemies will try to attack the player.  If an enemy collides with the player, then the player loses a life.  When all player lives are lost the game is over.

Obstacles – When the player collides with an obstacle, they will lose one life.  Unlike enemies, obstacles do no move.  Below is a list of obstacles.

  • Trash Can – Originally 100 points;  I think it should be 100 breakage points for unsubscriber
  • Fence – This could be a part of the house, but I decided to make it a separate non-moving object
  • Yard Sign – Another non moving object.  It displays the house number which starts at 120 and decrements by one for every house.
  • Breakdancer and Radio – Stationary objects.  Breakdancer stops spinning if hit with a newspaper
  • Brick Barbeque – Stationary object in yard.
  • Fire Hydrant – Stationary object that is always in the sidewalk.
  • Car – Cars move in the negative Z direction in world coordinates on the road at a constant velocity.  Cars spawn at the end of the street at regular intervals.  Cars also spawn at the second and third intersections at random intervals and move in the positive X direction.
  • Jackhammer Guy – Always spawns on the sidewalk or in the road.
  • Dog – The dog chases player if player gets too close.  The dog move slightly slower than the player, giving the player the chance to escape.
  • Grates – Grates are always on the edge of the road next to the sidewalk.


Lot – The lot one is gameplay unit where one house resides.  There will be a large plane representing the ground area that is not covered by the houses.  The lot is the gameplay area where the player can move.  The lot consists of the yard around the house, the sidewalk, and the road.  This object has a plane collider to prevent the player from falling through the world.  There are also two cubes spanning the length of the lot, which are placed on the left and right side side of the ground plane, which are required to keep the player from leaving the gameplay area.  The mesh renderer and mesh filter are removed to keep the user from seeing the invisible walls.

Intersection – An intersection is a road that runs horizontally with no houses.  There is an intersection at the start of the level, and then intersections after the fifth and tenth lot.  The player will need to avoid cars in the second and third intersections.  The intersection will also have left and right boundaries to prevent the player from leaving the gameplay area.

Exit – The exit is placed after the last house, and when the player collides with the exit the game will proceed to the level complete state.  The exit is an invisible cube collider, and it must be big enough to completely block the player’s path to prevent the player from moving around it.

Score Points – Not an actual object in the world, but there will be a global variable which tracks the number of points that they player has accumulated.  Below are the point values associated with various tasks.

  • Regular paper delivery: 100
  • Mailbox paper delivery: 250
  • Hit enemy (lawnmower) with newspaper: 100
  • Hit breakdancer: 350

A separate point value is kept for breakage bonuses.  The breakage values are listed below.

  • Break window: 100
  • Break window combo: +25 for each additional window on same house (100 for first window, 125 for second window, 150 for third window, and so forth)

Videos


Released

Indie Game Booth Analysis

Yesterday, I attended the Momocon anime, comic, and gaming convention at the World Congress Center in Atlanta, Georgia.  The convention was well organized and executed for the most part, and I can honestly say that it was a more worthwhile experience than DragonCon (also in Atlanta) for me, coming from a gaming and developer background.  While DragonCon focuses on everything Sci-Fi and Fantasy, ranging from Star Wars to Lord of the Rings, Momocon has a leaning towards all things Japanese and Otaku in nature.

I mostly attended the video gaming related sessions.  The first one I stepped into was Localization of Games presented by Sam Mullen, the Localization producer for Sega of America.  His presentation shed light on many topics relating to translating Japanese games so that they can be brought to American markets.  This covered the process of working with hired translators, incorporating translated text in a game, managing the schedule to account for translation times, and analyzing the outcome scenarios when releasing a game.  He also addressed questions about whether to remain true to the idiosyncrasies of Japanese culture or Americanize the game so that it is more familiar to the American audience.

Another panel that I attended was “Breaking Into the Game Industry”.  I was really disappointed that this was mostly about writing resumes and interviews.  I was expecting a session on how to pitch your game to publishers, how to setup a gaming business, how to market your game, and other things like that.  Later in the day, I attended the Senran Kagura Panel.  While that session was really humorous, it really didn’t go into depth of the game’s development aside from the backstory of the designer Kenichiro Takaki and the design of the characters.  I also wanted to attend “One Man’s Journey Through Animation”, which was presented by Ke Jiang who worked on the PS3 game Journey.  Unfortunately, I was eating lunch during the start of that session and it was already over by the time that I had arrived.

One of the main reasons why I made the trip to Atlanta was to see the Indie game booths at Momocon.  I submitted one of my games for the Indie Game showcase, but unfortunately it was not selected.  Disappointingly, there was no visible mention of the Indie game showcase, but maybe they are presenting the winners at another time (I only attended on Friday).  There were about ten indie game booths on display which wasn’t bad, but it really paled in comparison to the comic and anime booths.  A considerable amount of space was also given to table-top gaming, LAN parties, and other competitive gaming.


Momocon Indie Games
Me entering the Indie Games portion of the Momocon convention floor


Momocon Indie Games The first games that I saw had playable demos on small screens and laptops.  I didn’t see anyone playing the laptop games.  It just seems sort of weird to sit down and start playing on a laptop that isn’t your own.  One laptop with nobody playing isn’t horrible, but when you have four empty computers sitting there it sort of gives the impression that there’s something wrong with your game.  I would recommend just having your game on one system, and if you draw a crowd, then you can always setup additional systems as needed later.  Having too many systems also makes the booth look cluttered.

One problem I saw with many booths was putting a picture of a controller with the button commands on a poster.  That is about as bad as old Playstation 1 games that would display a controller with the commands during a loading screen.  If the controls are not intuitive, then control hints should be provided in the game.


Momocon Indie GamesThis game was very popular and had an impressive display.  I could immediately see from one of their posters that the game was a cross between pinball and RPG.  I really liked the scroll banners, which were displayed at most of the indie game booths.  A quick search on the Staples website shows that you can have these custom banners made for as little as $40 and up to $70 for the larger sized banners.

This game was displayed with a projector onto a screen.  Subconsciously, I think our brains try to convince us that things that are displayed on bigger screens are better, just based on the larger display.  After all, in these days of HD and 4K television displays, people still go to the movie theater to get that “big screen” experience.


Momocon Indie GamesFor this game, I liked that they had signs offering Steam codes at a discount for those who wanted them.  It gives the player an incentive to buy the game there at the convention.  Most players will probably not even remember the name of your game when they get home, just because people are bombarded by so much information on the convention floor.  Honestly, I can’t remember the name of a single game that I saw, but I do remember the mechanics and look and feel of each of the games.  This team also had other goodies like T-Shirts for sale promoting their game which is another good way to promote your game.


Momocon Indie GamesThis was another popular indie game booth.  One of the team members approached me and gave me a business card with their information.  I think a critical part to running a booth is interacting with the onlookers, even if they are just casually passing by your booth.  I would definitely recommend greeting everyone, because you never know who could be a potential customer.


Momocon Indie GamesThis game definitely didn’t get any love while I was there.  I played it for about a minute, but couldn’t get past the first set of spikes due to a very tricky jump.  A game demo should make the player want to continue playing and not frusterate the player.  The other problem was that there wasn’t any team members running the booth.  To be fair, the people running the booth may have went to lunch or on a restroom break.  However, if I was paying $350 for a booth on the convention floor, I would want someone there at all times.


Momocon Indie GamesI liked the booths that had a company logo or game art on the front of their table.  It just makes the booth look more interesting than just having a plain cloth over the table.  I would keep the swag giveaways simple to just one or two items.  Having ten different giveways makes your table look like a kid’s toybox.


Momocon Indie GamesThis shooter seemed to be popular with players.  However, you can barely see the name of the game on the display on top of the screen.  It would also be nice if there was some indication of which platforms the game will be released.  Is it PC only?  Is it coming to Steam?  Will it be on the Playstation 4 or XBox One consoles?


Momocon Indie Games I talked to the developer of this game for a few minutes.  He was friendly and did a good job of describing his game and answering my questions.  The Greenlight display on the banner is a nice touch, so players will know to vote for the game if they want it on Steam.  The graphics looked simple, but it had some very unique mechanics of jumping from planet to planet in a Super Mario Galaxy style, but in 2D.


Momocon Indie GamesWhen I came back to this game, activity had picked up quite a bit with multiplayer games in progress.  A live multi-player demo definitely sells the party atmosphere aspect of your game.  However, the demo should also contain a single player mode just for those gamers on the floor by themselves.  From the banner that I saw earlier, I never would have known that this was a puzzle game, which made me think that the banner was for the booth adjacent to it.


Momocon Indie GamesThis display was definitely unique, with a computer on a small train running on a track.  One of the posters advertised this as the fastest computer in the world, moving at something like 0.3 miles per hour.  Of course, fastest in their definition is distance over time instead of computations per second.  Pretty lights are always a nice touch, but I didn’t understand the point of the bottles.  Are they running a concession stand from their game booth?  I could also never tell which game this was actually promoting.  It really reminded me of 90’s beer commercials, where the entire advertisement would have nothing at all to do with the actual product.


Momocon Indie GamesThis was another shooter which had nice graphics, but there wasn’t anything that really compelled me to play the game.  I’ll give them credit for having a consistent and professional looking theme.  I would have had the game’s name displayed on a poster above or next to the screen, because as you can see in the picture bystanders can block the banner art.  The people who designed the original arcade cabinets put the name of the game in the front of the cabinet above the player’s head for a reason.


Momocon Indie GamesWhile some may think that business cards are outdated, I think they are essential for a successful booth.  I talked with one of the developers, and asked if he had a Twitter account or website so I can find out more about his game.  Since he had a business card, I didn’t have to hand him my phone to enter it.  Also, please don’t write down your website URL with a pen on a sheet of paper, especially if it is something like www.geocities.com/Neighborhoods/SiliconValley/mycoolgame.html.  These are the two cards that I received from developers at the show, which I think are good examples.  Keep the amount of information on the card simple, with just your name, email, Twitter handle, and website.


Momocon Indie GamesI liked the simplicity of this booth.  Just show the name of the game, because that’s what you want people to remember.  The colorful floormat and game art on the front of the booth also help it stand out from the others.


Momocon Indie GamesI liked this display for what appears to be a gaming movie, but there wasn’t anyone there to tell me more about the movie.  Is it an indie movie?  Will it be released in theaters or digital only?  This display just seemed like an orphaned child sitting in the corner alone.


Two other booths, not pictured here, did not have playable demos.  Personally, I think it is almost essential that you have a working demo in order to be taken seriously.  One booth had a screen showing people playing their game.  Honestly, I did like seeing the recorded player reactions as they were playing the game.  However, it was impossible to tell if those emotions were genuine since there was no playable game to try for myself.  The other booth just had a pre-rendered animation sequence that was kept on a loop.  It really didn’t tell me what the game was about or why I should be interested in it.


In conclusion, I will admit that I’ve never run a booth before aside from helping at the Georgia Tech booth in a high school college drive years ago.  I probably can’t appreciate everything that goes into running a booth at this time, but I hope to have a booth at a major convention one day.  That’s one of the reasons why I wrote this post, so I can come back at a later date and remember what I thought did and didn’t work at indie game booths from the perspective of a regular attendee on the convention floor.


Expand-O-Ray

Expand-O-Ray Overview

Use the Skiles Bot 5000 to test the Expand-O-Ray, which expands and shrinks objects in the test area.  To complete the levels, you must make some blocks bigger to reach new areas and shrink other blocks to pass.


Time-lapse showing the creation of Expand-O-Ray over 48 hours!

Expand-O-Ray Post Mortem

Expand-O-Ray is my seventh Ludum Dare entry.  It really doesn’t feel like two years have passed since I participated in my first Ludum Dare back in April 2013.  After doing some experimentation with Stencyl and Unreal Engine for previous jam entries, I decided to fall back on Unity this time.  Along with the Playmaker addon, it makes creating a game much simpler under time constraints.

On the Friday of the theme announcement, I met with other developers at the Knoxville TechCo.  We had a good crowd, and all of the regulars were there (Mike, Dylan, Jeffry, Jacob, and Ruth Ann) as well as two new comers (sorry, I’m bad at remembering names unless I see them written down).  I was sort of expecting the theme to be “Edge of the World”, “Grow”, or “Unconventional Weapon”.  We all waited for the theme announcement by monitoring IRC and Twitter, and had a fairly lengthy discussion about the current state of indie games.  After the theme announcement, my first idea was to make a game where all of the characters are anthropomorphic weapons, but I think I’ve turned themes into characters too many times now.  The next idea that came to me on the drive home was having a gun that could expand and contract objects.  I don’t subscribe to the theory that you are supposed to write down your first five ideas and throw them out.  My games are almost always based on my first or second idea, and I think they usually turn out well.

Later that night, I started working on the base engine.  I used a similar layout to my warmup game, Power Panda, but I had to create everything over again from scratch of course.  However, I am glad that I created that warmup game, as I avoided some pitfalls when creating my real entry under time constraints.  One trick that I learned while creating the warmup game is to create an empty bullet spawn location object that is parented to the player object, which just holds the location in front of the player where the bullet should be created.  If you spawn a bullet at the same location as the player, then it will instantly collide with the player and bad things will happen.

Originally, I had planned for the player to have two guns or rays.  One for expanding objects and another for shrinking objects.  The player would press  a button to switch between the two.  This would probably work for a console game, but on the PC I’ve found that players can become easily confused if the game requires using more than the arrow keys and spacebar, even if the controls are displayed on the screen.  Using the control key to shoot is really stretching it, so having another key to switch between weapons was out of the question.  Therefore, the one projectile can either enlarge or shrink an object.  I color coded the enlargeable objects green and the shrinkable objects cyan.

Expand-O-Ray shrinkable blocks
Shrinkable blocks

To enlarge an object, I kept a target scale value which is the current scale value plus one.  The current scale value is increased at a constant rate until it reaches the target scale.  The target scale is clamped so that it will never grow beyond four times the original size.  The shrinkable objects use a similar process, except the scale is decreased.  One problem with the shrinkable objects is that even if it is scaled down to zero, the player may still not be able to pass since there is an infinitely small box collider still in its place.  To resolve this, I added an additional check so that if the scale is zero, then the object is automatically destroyed which completely removes it from the scene.  I also considered having an enlarged object slowly retract to it’s original size, since the player could become stuck if an object was enlarged in such a way that it traps the player.

There are a few things that I focused on improving on this entry over my previous ones.  I have done voice work for some of my previous games such as Bomb Squad, but the story was always a virtual wall of text that the user had to sit through before starting the game.  This time I made a point to have the story unfold while the player is active in the game world.  This is a similar approach taken in games such as Bastion, although my narration isn’t as interactive as that game.

It was easy enough to come up with a simple story in Notepad (did anyone catch the references to my alma mater in the story?), but I wanted to display the text along with the speaking voice.  I recorded my voice using my Blue Yeti microphone, and lowered the tone and applied a slight echo using Audacity.  I also maxed out the treble modifier twice to make it sound like my voice is being played over an intercom system.  The narration for the first level was about a minute long, which I split into ten audio clips with Audacity (one clip for every line displayed on the screen).  I created a Playmaker FSM state for each line of text, which played the audio clip and set the corresponding GUIText object at the top of the screen.  When the level is completed, the last state transitions to the next level’s state dialogue by responding to the broadcasted level complete event.  However, a problem arises when the player completes the level before the narration is complete, so the current level’s monologue continues on into the next level, and the next level’s monologue never starts.  Therefore, I created a prefab that contains an object with an FSM for the current level’s monologue.  When the player completes the level, that prefab is destroyed, and the prefab for the next level’s monologue is created.  It actually works very well, and the voice work is perfectly synchronized with the text on the screen.  It seems fairly simple, but only a developer can appreciate the difficulties in implementing something like this.  I’m hoping to make this code a little more modular, and then include it in my UnityHelper library.

Expand-O-Ray Playmaker FSM
Playmaker FSM for story monologue for first level

Over the past few weeks, I have been working on my modeling skills by creating a Sculptris a Week on the streak.club site.  I started by creating helmet and body for my robot creature which looked pretty good.  However, I quickly realized that making cylindrical shapes in Sculptris for the arms and legs was not quite as easy.  Therefore, I exported my model to OBJ format and imported it into Blender to add the remanding parts, which were the arms, shaft, and wheels.  I think I did my best texture mapping so far for this character.  One improvement was learning that I can do a “project from view” in Blender to create the texture map layout, which is imported into Gimp to do the texture drawing.  On previous models, I would define seams for the entire model, which is very time consuming and never gives a very good layout anyway.  Sure, with the “project from view” technique there is a little stretching on the sides of the model, but I usually don’t put much detail into the sides anyway.  Plus, with the extensive time savings, I think it is well worth the trade-off.

For this game, I used my XmlReader script again that I created for my Oiram game and also publicly available in my UnityHelper package that I previously mentioned.  It makes creating the level layout very easy by reading the XML level output from a Tiled map.  The only catch is that you’ve got to rename your TMX file to TXT and place it in a folder in your Unity project called “Resources”, and then link the text resource to the appropriate TextAsset public object in the Unity inspector.  The XmlReader script must be placed on a GameObject (I use an empty one) before it can be called with the “Call Method” action in Playmaker.  The XmlReader script defines a GetLevel method, which takes an int as a parameter which is the level number.  The script then automatically instantiates the assigned prefab objects in the scene based on the layout defined in the XML generated by Tiled.  I also created a LevelManager object, which contains the FSM which handles the loading, clearing, and switching between levels.  The level number is kept as an Int variable in the LevelManager FSM.

Moving the character is done by simply storing the Horizontal axis input variable, and then setting the velocity of the player object in the X world direction to the input (-1 to 1) multiplied by a speed constant.  Jumping is accomplished in another FSM which waits for input from the “Jump” button (spacebar by default) and then applies a vertical world force to the player object.  Another FSM on the player handles playing all of the animations, which were created by modifying the Blender armature using the Dope Sheet and Action Editor.  After importing the model into Unity, I used the Legacy setting on the model rig again, since it’s the only way I know how to get animations from Blender to work correctly in Unity.  When the absolute value of the player’s horizontal velocity is greater than a specified value, then the running animation is played.  Otherwise the standing animation is played.  If the absolute value of the player’s vertical velocity is greater than zero, then the jump animation is played.  The standing and running animations are looped, but the jumping animation is not.  The only problem is that the jump animation played twice, since the vertical velocity is zero at the apex of the jump.  Therefore, I had to modify the FSM to only leave the jump animation state once the player has collided with a block.  In case anyone didn’t notice, I payed homage to Mega Man and Johnny Number Five in the jump animation.  (Yeah, I know nobody under the age of 30 has ever seen the movie Short Circuit).  Another rigging issue was that the wheels rotate halfway, but never make a complete rotation.  I only set three keyframes in the running animation, which are start (1st frame), mid (15th frame), and end (30th frame), and the start and end frame are the same pose to make looping seamless.  When posing the armature, you can only set the rotation of the bone, but it is up to the animation engine to determine the direction to rotate to get to that position.  This problem could be resolved in a future update by adding additional keyframes in the animation, which sets the wheel bone at four positions instead of the current two positions, which would force the animation engine to rotate the bone in a complete turn.

mega_johnnyfive
Johnny Number Five is Alive!

One problem that I wasn’t able to resolve is that if the player holds down a movement key while jumping, then the player will cling to the wall.  That is normal in some games such as the original Ninja Gaiden, but I didn’t intend on having it work that way for this game.  It could be resolved by setting the velocity to zero if the player is jumping and collides into a block, and disallow horizontal input until the player has touched the ground.

On the afternoon of the first day, I took my MacBook Pro to the local Chick-Fil-A and composed the music for the game using GarageBand.  I set a basic rhythm using some synth instruments and added a beat using the drum kits.  The main melody alternates between two instruments.  For the title screen theme, I just took the first few measures, dropped the beat, and cut the tempo in about half.

For the sound effects, I used BFXR again using the basic jump and shoot generators.  For the expand object sound effect, I used a powerup sound.  When I first added the expand sound, the sound finished much sooner than the time that it took for the object to finish the expansion process (one second).  Therefore, I imported the expand sound into Audacity to lengthen the sound effect to match the same amount of time that it takes for the object to fully expand.  The shrink sound is the same sound effect, just with the “Reverse” modifier applied in Audacity.

The level design was created completely in Tiled, which basically creates a 2D 14×200 array.  I liked keeping the player’s movement restricted to the XY plane to give it the feel of a classic platformer.  There are four objects which are the ordinary block which make up the bulk of the level, the expanding blocks, the shrinking blocks, and the exit.  I created six levels for the game, which take about a minute or less to complete each.  When the player touches the exit object, then the LevelManager transitions to the next level by deleting all of the prefabs, resets the player’s location, increments the level number, and then loads the next level from the XML definition for the room.  The first level is an introduction to the game, which only requires the player to jump to reach the exit.  The next level is the introduction to expanding objects, which requires the player to expand two blocks to reach the exit.  The third level introduces shrinking blocks, so the player has to shrink a few blocks to reach the exit.  The remaining levels contain a mixture of expanding and shrinking blocks.  The level design isn’t perfect, and it’s probably the one thing that I should have spent a little more time developing.  The old school platforming NES games like Metroid are an example of great level design, because those games seemed to always know exactly how high to make a platform to keep it out of reach until the player has performed the correct task to proceed.


expandoray_leveldesign
Level design using Tiled

The one planned task that I wasn’t able to complete was adding the gun model.  I actually made a decent looking gun in Blender and texture mapped it.  The problem is that the gun mesh was a separate object, so I could not attach it to the arm bone so that it follows the arm when animated.  I could have merged the gun mesh with the robot mesh, but then I would have had to texture map the entire model again, which didn’t seem like it was worth the effort.  I’ve saved the gun mesh in a separate Blender file, so I’m hoping to eventually learn how to apply more than one mesh object to a Blender armature.  If I can figure out how to do that, then I could add multiple guns with different mesh structures, which can be switched by the player by enabling and disabling each of the gun meshes.  I also had a shoot animation, but I didn’t get it added in the player animation FSM, as it didn’t transition back to the correct animation after the shoot animation completed.


Expand-O-Ray Gun
Left on the cutting room floor


Before the deadline, I added a few special effects to make my game look a little better.  The projectile had a tail renderer which looked okay, but I added a green point light to the projectile which really made the projectile stand out against the environment.  Originally, the Exit prefab was just a cube, so I made a cylinder in Blender and texture mapped it with a texture that I created in Gimp by adding some random RGB noise and applying the Pixelate blur effect.  Then I created a layer mask and added a vertical linear transparent gradient.  This makes the cylinder look more transparent at the top and opaque at the bottom.   Then in Playmaker I added a simple continuous rotate action, which rotates 180 degrees in a second.  I also added a red point light near the top of the exit area.  Finally, I added a small particle system which simulates a puff of smoke whenever the player jumps.  This was achieved by setting the emission shape to circle, rotating it so that it is flat on the XZ plane, and making sure that prewarm is selected.

expandoray_pointlight
Pretty lights

Another big time saver was creating shortcuts to my project directory in Blender and Gimp.  In past games it seems like I would spend a considerable amount of time just navigating the directory tree just to get to my project folder.  I also got in the practice of saving my models, textures, and sound assets directly to the appropriate folder in the project directory.  Again, in the past I would waste valuable time saving to a “raw” folder, and then importing the assets by dragging them into Unity.  That was a redundant step which definitely got tiresome after doing it for each and every asset.  I also wrote a Ruby script which copies my Tiled TMX file to the Resources directory and renames it to TXT, as required by the Unity TextAsset.  It is important to keep the original TMX in case changes to the level design need to be made later.

If I decide to develop this game further, there are a few things that I believe I can do to make it into a full retail game.  First, I would need to develop more levels.  I could add additional obstacles and traps such as spikes, so that the player would have to enlarge objects to make a bridge over them.  Shooting would feel better if the player could aim the gun in any direction, instead of just left and right.  I would have a variety of objects that could be expanded and shrunk instead of just cubes.  I could make some gravity puzzles so that the player has to shrink a block to let objects fall to complete a puzzle.  Enemies would also make the game more exciting, but I would want to come up with interesting ways of defeating them, instead of just shrinking them with the shrink ray.  I also thought about having the blocks expand and shrink in different directions to make platforms, instead of just expanding on all three planes.  It would also be interesting to have moving platforms.  New guns could be added to the game with different functions such as freezing time.  If I felt really ambitious, I could connect all of the rooms together and turn it into a Metroid-vania style game.

I’ve got to give a big thanks to Splazer Productions and Juipter Hadley for taking the time to do playthrough videos for many of my games.  I would definitely recommend subscribing to both of their YouTube channels.  Plus, they don’t resort to profanity, cursing, or potty humor in their videos in an attempt to sound cool like other game casters.

I don’t think my game will do very well in the ratings, since it isn’t a 2D platformer using pixel art and pixelated blood splatters.  I really don’t care, because I’m proud that I made something that I think is unique and looks cool.  My game will never be on a major console, unless the “powers that be” decide to open up their systems for all developers.  However, I think developing this game was a better way to spend a weekend than sitting in front of the television playing a rehashed game  from one of the so-called “Triple A” monolithic game development companies.

ありがとうございます!私のゲームを楽しむ!


Released