For my Ludum Dare entry this time, I decided to create a first person shooter style game involving giant mutant vegetables for the “growing” theme. Based on view counts, my first person shooter that I developed for the 7dFPS a year ago is by far my most successful game on Itch.io. However, for that game I used existing assets from the Unity Asset store. For this game, I would need to create everything in under 48 hours.
A few days ago, I started playing some of the old FPS games that I owned as a teenager. The first FPS games I ever played were Wolfenstien 3d and DOOM II on my 386 computer. Back then, the 3D graphics were revolutionary compared to the sprite based games on 8-bit consoles. Soon after playing those games, I picked up a “Tricks of the DOOM Programming Gurus” book from the computer store. As I began learning how to make DOOM levels, I learned that all of the enemies and items were sprite based. The sprites are just turned toward the player, which keeps them from appearing flat. This technique is called billboarding, and it is used in games for saving on processing power for numerous low resolution objects, such as a crowd in a football stadium. Long time DOOM players will notice that the level names in Mutant Veggie Arena are parodies of the original DOOM difficulty levels.
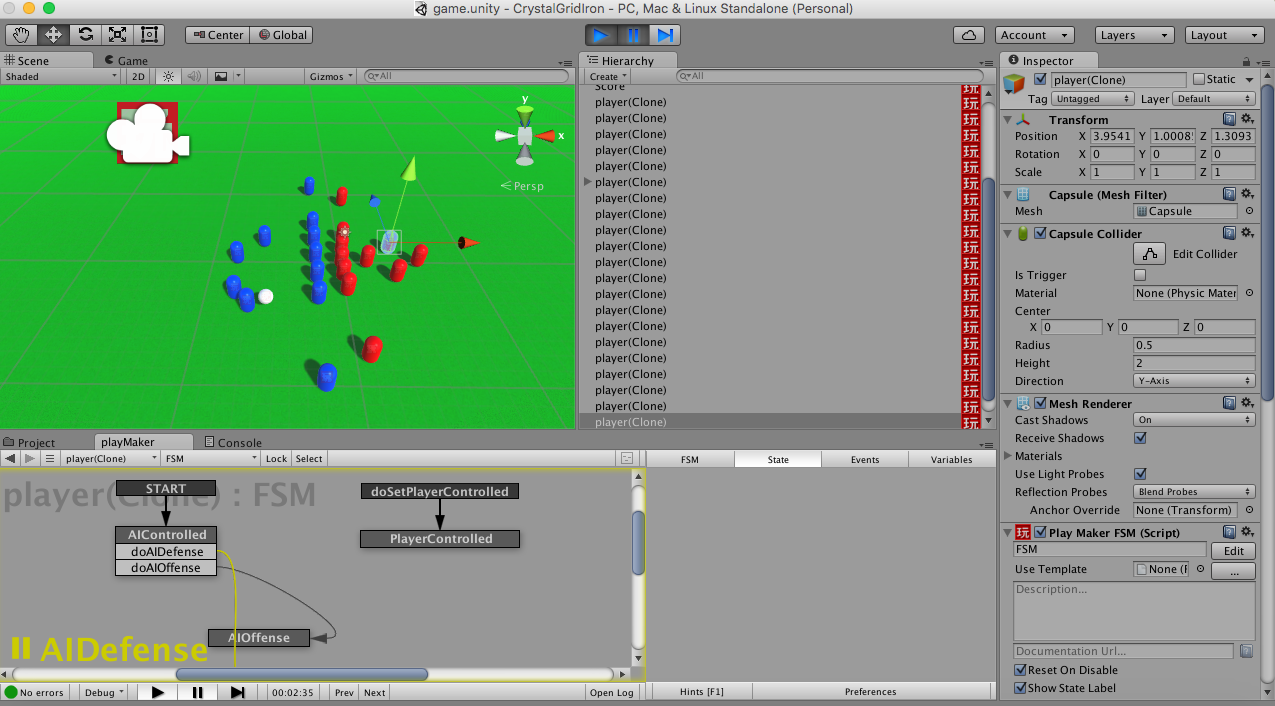
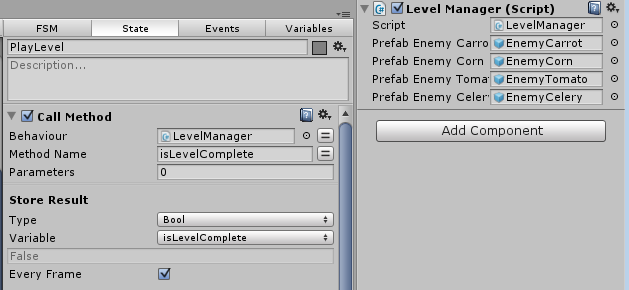
For this Ludum Dare, I wanted to focus on gameplay and AI. I spent the entire first day just working on making the engine and configuring the enemy behaviors. I saved all of the enemy graphics, sound effects, and music for the second day. This was risky, but I’ve found that I can spend more time than needed on the artwork if I do it first, since I can be a perfectionist at times. I used Unity and Playmaker again for this entry. I’m really starting to feel how to make the right balance between Playmaker and Unity scripts. All state management is handled in Playmaker as well as simple calculations (such as subtracting a constant value from the player’s health). However, anything more complex is more easily handled in a Unity script written in C sharp. The method can be called using the “Call Method” action, and then pulling the script component from the assigned object to the “behavior” slot on the action parameter. The only problem is that a FSM on a prefab can only call methods in scripts assigned to other prefabs, and non-prefab FSMs can only call scripts assigned to objects that are not prefabs. In the example below, I call the isLevelComplete method in the LevelManager script that is assigned to the LevelManager object. This is because I must count the total number of object with the “enemy” tag, count the number of enemies that are in the queue to be spawned, and compare that to zero. To do that calculation in FSM would require multiple actions and multiple states, but calling the script accomplishes the same in one method that returns a bool value.
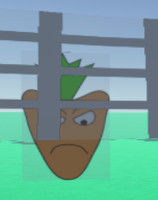
Since making the models for my games is always a crunch for my Ludum Dare games, I decided to use a similar approach to DOOM for my entry this time. The enemy colliders are capsules, but the display is handled by a child plane object with the enemy image texture applied to it. The capsule mesh renderer is removed and a LookAt action is applied so that the child plane is always facing the player. It is important to remember to set the transparency of the texture to the alpha value, and for the generated material to have the shader changed from “opaque” to “transparent”. Otherwise, the enemy will appear to be on a black plane.
Getting a simple FPS up and running using Unity and Playmaker is relatively easy. There is a “MouseLook” action which handles making the player’s view follow the mouse. It is important to remember to set the Y sensitivity to a negative integer to give it standard FPS controls. Otherwise, it will have airplane joystick styles controls where moving the mouse down will move the player’s view upward. It is also important not to use “MouseLook2”. Unfortunately, I thought that was the correct one to use (it limits how far you can turn right and left), so I lost valuable time trying to get that action to work.
The targeting reticle is a simple plane, that was placed 10 units in front of the player. I learned from previous experience that just simply changing the mouse icon isn’t the best solution, since it can sometime appear jittery. The reticle object is parented to the player, so it always stays in front of the player on the Z axis. To keep the reticle from disappearing when behind an object (such as the ground), I used the text shader which usually makes it draw on top of everything else.
I created a LevelManager game object for handling the loading of each level. For each level, I populate and enemy ArrayList with Prefabs pointing to each of the enemy types. At regular half second intervals, an enemy is pulled from the ArrayList, instantiated, and then removed from the ArrayList. The number of enemies displayed on the screen is calculated from the total number of game objects with the “enemy” tag (found with GameObject.Find(“enemy”).Count) plus the remaining size of the enemy ArrayList.
I wanted to have a unique behavior for each enemy. The carrot was the first enemy behavior that I created. The carrot has the simplest AI, as he just moves towards you. Originally, I had it so that when the “MoveTowards” action completed, the carrot would “attack” by simply subtracting a certain amount from the player’s health (add a negative value using the “Int Add” action). However, this caused some problems like it not handling the player running into the enemy, so I changed the player damage to an “On Collision” event. This triggers a “damage” event on the player FSM. Unfortunately, this limits the player to taking the same amount of damage from every enemy, since an event can’t take a value as a parameter. One of my complaints about Playmaker is that you can’t pass a parameter with an event. I could have a “damage” event and state for every enemy type, but I don’t think that is a very elegant solution.
The corn enemy is stationary, but unlike the carrot, it will shoot projectiles at you. I had to use the “Look At” action again to ensure that the projectile is initially moving towards the player. Then the projectile just simply moves in a straight line by translating along in the positive Z axis in self coordinates. I had envisioned the corn enemy being like a turret in other FPS games like Team Fortress 2.
The tomato is the one flying enemy. I was proud of how this enemy turned out. I had a flying FSM which raises and lowers the tomato as he reaches a maximum or minimum value on the Y axis in world coordinates. However, I wanted this enemy to rise more quickly than he falls. This makes the enemy appear to glide downwards. This enemy also forces the player to act differently by pointing aligning the reticle vertically instead of horizontally. The tomato does not move horizontally, as I thought that would make shooting him too difficult.
The final enemy that I implemented was the celery. This enemy moves to a random position, pauses, and then shoots in eight directions at once. This was the most complex of all of the enemies. I had to write a function which returned a random position in the arena based on a range parameter. To shoot in eight directions, I kept a rotation variable, and for each projectile I instantiated, I added 45 (degrees) to the rotation variable. Then, each projectile was rotated by that value. It is also important to not spawn the projectile inside of the enemy, otherwise it will instantly collide and bad things will happen. The eight way shot actually looks a lot better in the overhead Scene view than the FPS view. I was thinking about having a replay mode at the end of the level which shows the action from different perspectives.

On the second day, I focused on the graphics and audio. Since I was going for a cartoon style, I used Inkscape for making the enemy vegetable graphics. To save time, I used the same eyes and mouth vector graphics for all of the enemies. I used the free form pen tool to create the paths for each of the vegetable bodies. I set the stroke size to 4 pixels to give it a classic cartoon look with a thick black outline. I exported each of the enemies to a PNG file, and then applied those textures to the enemy planes. I had envisioned that the enemies would look like something out of Aqua Teen Hunger Force.
When the player is hit, I use the camera fade action to make the screen go temporarily red. The fade is a little faster when hit by a projectile. When the player dies, the screen slowly fades to red. The wave number and name are two GUI Text objects that are enabled on the start of each level. After five seconds, the GUI Text object is disabled. The level names are returned by a function containing a switch statement that returns a String, which takes the current level number as a parameter.
I used GarageBand on my Mac again for composing the music. There have been a few changes to GarageBand since the last time I used it, and many new instruments have been added. I was going for a classic sci-fi movie type music, and I think I was able to achieve that with the synthesizer instruments.
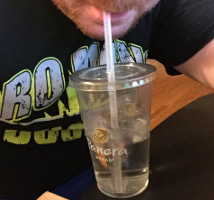
All of the sound effects were recorded myself. The grunts and groans were my own voice, with the pitch slightly lowered and an echo effect applied. The gun shot was me blowing into a straw submerged into a cup of green tea. I used Audacity to crop out the unneeded portion of the audio. The enemies were also my voice, with the pitch raised and echo effect added.
While I was impressed with what I was able to develop, there are a few things that need to be improved or fixed. Here is a list of issues that I would resolve if I develop this game further.
- Sometimes the targeting reticle gets hidden behind very close enemies. I may be able to modify the layer settings to make it appear in front of the enemies at all times.
- Enemies far away sometimes appear behind the arena walls
- If you look closely, you can see parts of the transparent areas of the enemy plane. I may need to check the texture and material settings.
- I really wanted to have a rectangular health meter instead of a number value. This should be achievable using two GUITexture objects. One for the meter background and one for the health bar.
- I would like to have multiple images for each enemy. I definitely think there should be a “damaged” image when the enemy is shot.
- The enemy damaged sound effect needs some work. I tried making it higher pitch, but I still think it sounds too much like the player being damaged. Add different sound effects for each enemy.
- Particle effect when the enemy is killed. I was thinking about having the corn enemy explode into many popcorn pieces.
- New effects for projectiles.
- The arena needs some work. Maybe have different arenas or levels instead of the one circular arena.
- A gun model and different types of guns.
- Powerups (more damage, auto fire, etc).
- Sometimes the health goes to a negative value. When the player dies, the health is clamped to a low of zero, but this needs to be handled sooner (as the player is damaged). If a meter is implemented, the negative value would cause problems (health bar would be displayed backwards?).
- Make some enemies take multiple shots before being killed.
- Have a replay after the level is completed which shows the arena from various camera angles. This will require that I actually make a character model. Also, the billboarding effect for enemies would need to be modified, otherwise the enemies will look like flat planes.
- Needs a better “story”
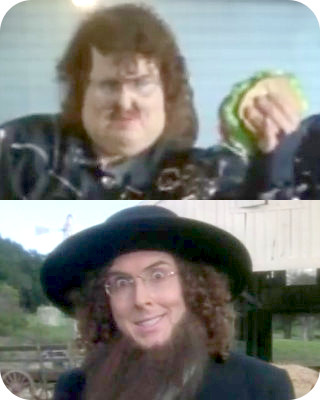
In conclusion, I was happy with what I was able to create in 48 hours. Actually, according to my streaming video statistics, I only spent about 12.5 hours making this game, which is probably lower than the amount of time that I usually spend on a Ludum Dare entry. However, I think my Unity, Playmaker, Garage Band, and overall game development skill have improved a lot over the last three years. Therefore, I am able to create a lot more in less time. After my first Ludum Dare entry about the Amish and this entry about food, I’m starting to feel like the Weird Al of video game development.