I really pushed myself to the limit for this Ludum Dare 36 game development competition. Looking back at the length of time for all of my live streams on YouTube, I calculated that I spent over 22 hours of development time over two days for this event. Since there is no voting or rankings this time, I felt more encouraged to do my best work since my game will only be played by those who genuinely want to play the game. The game that I developed is called Ancient Adventure, which has gameplay based on classic adventure style games.
The premise of the game basically came from some of my discussion points on the latest episode of the Knoxville Game Design chat podcast, which I am a frequent contributor. On that podcast, we discussed Anodyne, and I made several points about how they got the classic Zelda formula wrong. The following is a list of some of the points that I made, and how I implemented those in Ancient Adventure.
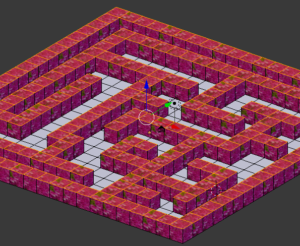
A “compass” upgrade showing where the key items are located.
I created a compass item, which I call the all seeing eye which displays on the mini-map the location (in red) of all of the collectible artifacts. With the mini-map for this game, I tried to make my map more intuitive, by having all of the rooms grayed out initially, and the rooms that the player has visited in a brighter shade of gray. The player’s current position is highlighted in green.
Keeping with the ancient Egyptian theme, I used the classic eye hieroglyphic. It’s the eye that is a popular tatoo and similar to the mage symbol in World of Warcraft. After some research, I found that this is actually called the “Eye of Horus”, which is a symbol of health and protection. The full myth of Horus can be read on Wikipedia. Ironically, the Eye of Providence, which is depicted on top of a pyramid and on the back of the United States dollar bill, has nothing to do with Egyptian mythology. Using this theme made me wonder why there are relatively few games and movies based on Egyptian mythology, since there are numerous games based on Norse and Greek mythology. The only game that comes to mind is Age of Mythology, which is actually based on a collection of ancient religions. There seems to be a lot of untapped material in Egyptian mythology which could be made into games. In the English language, we named our planets based on Roman gods and the days of the weeks based on Norse gods. The best known reference to Egyptian mythology in our culture is probably the Steve Martin King Tut sketch on Saturday Night Live. I wonder if Egyptian mythology has been written out of our history because the culture was overly oppressive, using slavery to build pyramids to their gods, which was at odds with the Abrahamic religions (Judaism, Christianity, and Islam). I will admit that I would have never made a game based on ancient Egyptian culture, if it had not been for the “Ancient Technology” theme for this Ludum Dare.
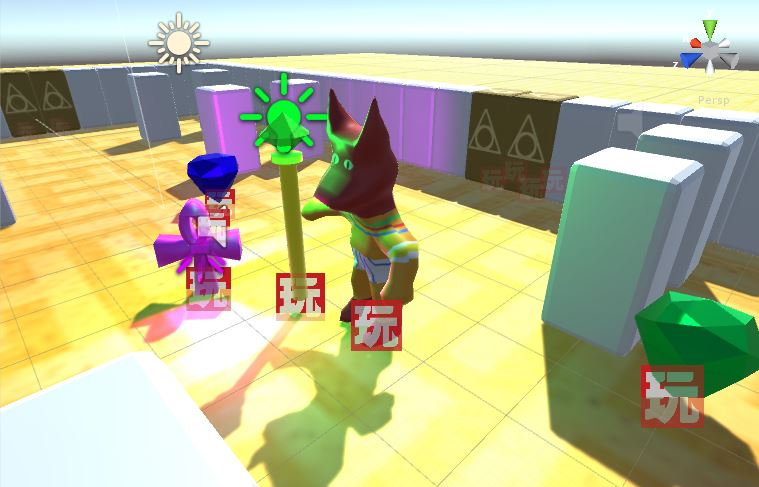
The point of gathering collectibles.
I used the Egyptian Ankh as the ancient artifact that must be collected to become the supreme being. It is a quick and simple objective and story, but it is at least something that gives a little exposition of the game. I just had in my mind one of the typical gods from Egyptian mythology, who has the head of a dog-like creature and the body of the human. Since there were many Egyptian gods, collecting these artifacts would turn you into the “supreme being”. It’s not a very noble objective, but I think it’s something players can wrap their heads around, since many ancient myths are about gods fighting each other to become the strongest and most powerful. Again, after some research about the ankh, I learned that it is actually a symbol of life. So if I had it to do over again, I probably would have made the ankh the symbol used for the health meter (i.e. “hearts” in Zelda) and made the collectible something different. In this game, the health meter is represented by a bird creature (at least that’s what I intended it to look like) which was used in many Egyptian hieroglyphs. The important thing was to have a symbol which was symmetric, since I intended to split the icon in half to represent a half unit of health remaining. Unfortunately, I didn’t have enough time to represent half health units, so I just doubled the number of full health units. Under the hood, the health value is just an integer anyway.
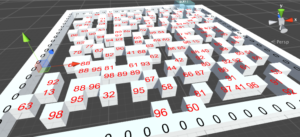
I tried to ensure that all of the collectibles were spread evenly across all of the rooms. The right side of the map is heavy on ancient artifacts. This is balanced by having the staff upgrade on the left side of the map. It is possible to gather the artifacts without getting the staff upgrade, but having the upgrade makes completing the game much easier. Also the all seeing eye item is in the first room to the left, making it an item that should be picked up early in the game to assist with finding the ancient artifacts, which is the primary goal of the game. I put the all seeing eye in the room to the left, since players of the classic Zelda game are accustomed to starting out left being a dead end.
How to tell if you have collected all of the required items in a level.
Below the health meter, the number of ancient artifacts (ankhs) the player has collected is displayed. The icons are initially displayed as blacked out, which reinforces to the player that there are eight to collect. As the items are collected, they are filled with the purplish color that I decided to use for the ancient artifact item. For the pickup in the game world, I used the same two rotating spotlight effect again, which looked really nice in my game Kitty’s Adventure.
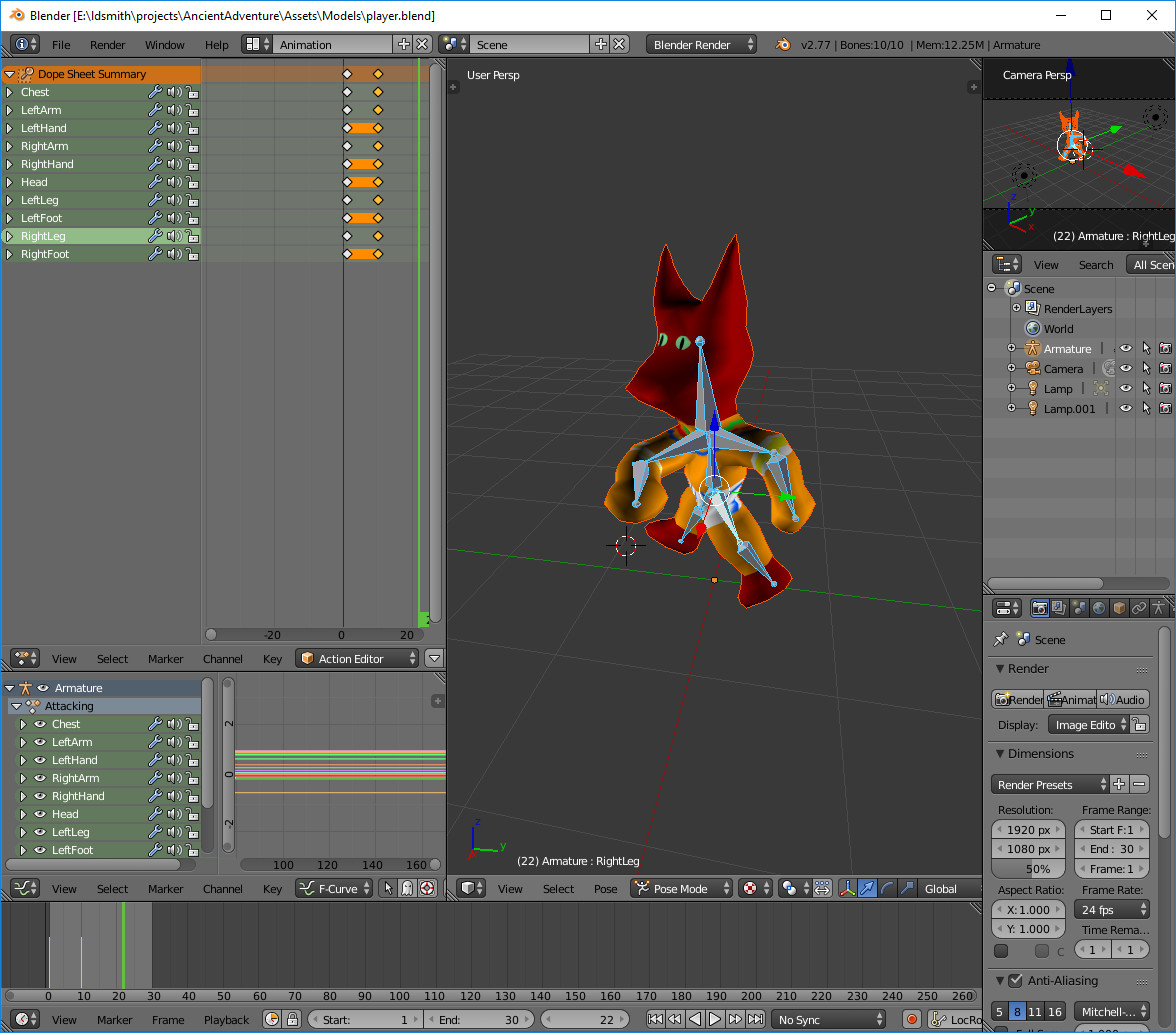
Weapon attack swinging animation.
In classic Zelda fashion, the player starts with no weapon and is defenseless until the player picks up a weapon. In this game, I decided to make the player’s weapon a staff.
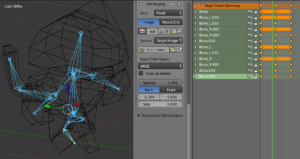
In the early stages of development, I spent more time (about 5 hours) than I had desired on getting the staff swinging, collision detection, and animation working. I had to decide if I wanted to animate the staff swing in Blender or the Unity Mecanim interface. I decided to go with Mecanim, and I found that the benefits to be great, because the Mecanim animation also animates the capsule collider and all of the children objects with it. Since I had a light source added to the end of the staff, the light source moves with the swinging staff, which is a really awesome looking effect! The major issue that I had with Mecanim was moving back to the idle state after the swinging animation was completed. I set a Mecanim boolean value to start the swing, but there was no way to set the boolean back to false after the animation completed. The swing animation would just keep repeating. After looking at some Unity Mecanim tips, I learned that a Mecanim trigger (different from a collider trigger) could be used instead of a boolean value, which would set the animation state back to idle after the attack animation completed, which solved my repeating swing animation problem.
By default, the staff had a mass value, which would cause enemies to be deflected when it. It was a nice effect, but it would also push the player back slightly as well. I made a design decision to set the mass of the staff to zero to eliminate the recoil effect on the player. I think it may also reduce the possibility enemies getting pushed into the wall.
In Blender, I modeled a simple staff with a gem on top. There is one upgrade to the staff, which doubles the attack power. The enemies that normally take two hits to defeat are killed with one strike. The upgraded staff is a simple texture swap and a change in the color of the light source. Originally, I had the standard power staff using a green colored gem and green light, and the upgraded staff as a blue gem with blue light. However, I thought the blue color was too close to green and it didn’t show up very well, so I changed the upgraded staff color to red.
One check that I had to add was to not populate an item that has already been picked up in that room. For the ancient artifacts, I had to keep a list of the rooms that had collected artifacts. If the room number is in the collected artifact list, then an artifact item should not be instantiated in that room. The same goes for the staff pickups. If the player’s staff collected boolean is true, then don’t instantiate a staff pickup. If the staff’s power has been upgraded, then don’t instantiate the staff upgrade.
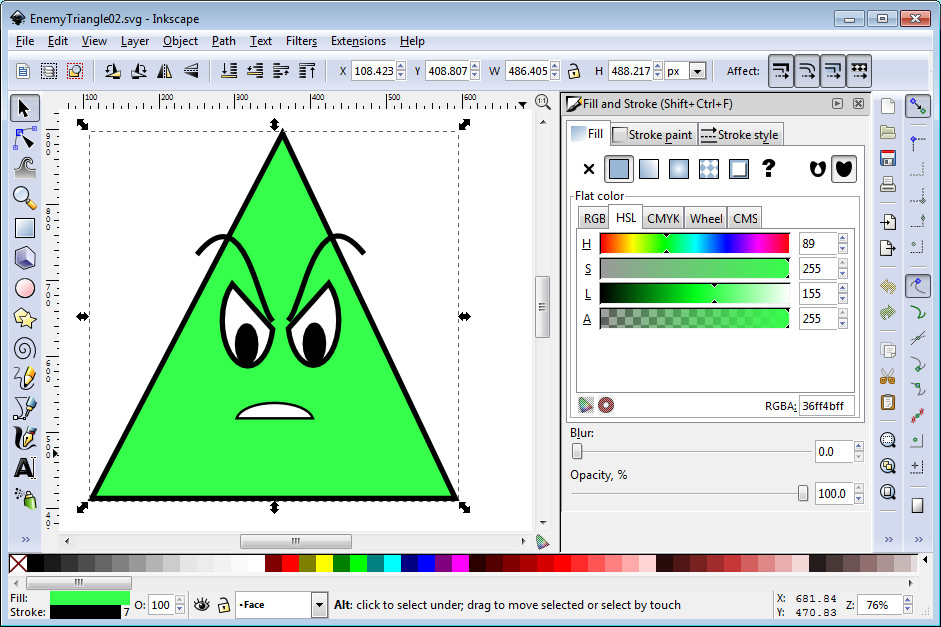
The purpose killing enemies.
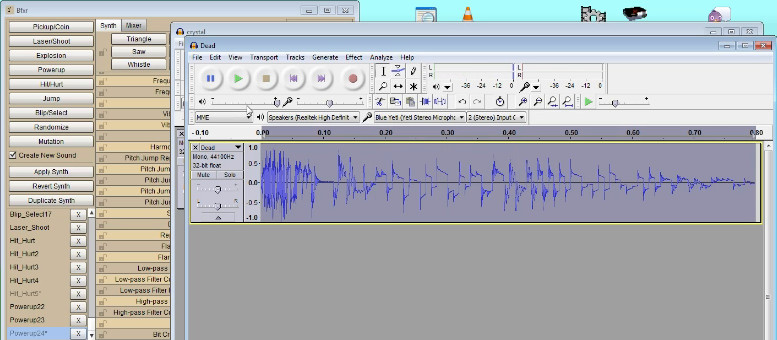
In Ancient Adventure, the player is forced to kill all of the enemies in a room to proceed. Once the enemies are defeated, the doors are lowered which allows the player to proceed. The number of enemies remaining is determined by taking the child count of the EnemyGroup Unity GameObject. When the room is setup, enemies are always assigned to the EnemyGroup GameObject by using the SetParent method on the tranform property of the enemy GameObject. If it is equal to zero, then the method which lowers the doors is called. One problem that I came across is that this led to the door lowering method being called on every frame after the enemies are defeated, which caused problems with the door sound effect being started on every frame. To resolve this, I had to create a boolean value which tracked if the door lowering method had been called, so it is only called once when the enemies are defeated. The door sound effect was created by me flipping the pages of a book over my Blue Yeti microphone, and then lowering the pitch in Audacity. I was impressed with how much it sounded like a huge slab of rock being lowered into the ground.
When the door is lowered, the Exit GameObjects are accessible. These are simple GameObjects with cube trigger colliders. When the player triggers it, then all of the child GameObjects under the Room GameObject are destroyed, and then the GameObjects for the next room are instantiated and parented to the Room GameObject. The player is moved to the opposite side of the room, to give the illusion of transferring to the adjacent side of the next room.
One problem the Exits originally presented was that the enemies could go through them (because it is a trigger instead of a standard collider). Since I wanted to keep all of the enemies inside of the room, I added the doors, which had a regular cube collider, which kept the player and enemies inside. I had to move the exits back one unit outside of the room (determined by the exit row or column), because the player could still trigger the exit when touching door.
Another problem with wall colliders in general was enemies getting stuck in walls. In my code, I had it so that when an enemy collided with a wall, it would make a 180 rotation on the Y world axis, and then start moving the other way. However, the enemies were still getting stuck. After some debugging, I realized that after the enemies did the 180 turn, they were still getting a collide event on the next frame. Therefore, I had to wait until the OnCollisionExit event was called for the enemy on the wall, before I would accept another OnCollisionEnter event. There is still a small bug that occurs sometimes, when the enemy collides with a wall, and then immediately turns, placing them in a direction where they can not exit the wall. The enemy turn behavior is defined in a separate Playmaker FSM, which is independent of the wall collision FSM. Usually, after a few turns the enemy will eventually be put in a direction so that it can exit the wall. Again, the chance of an enemy turning during a wall collision at the same time is fairly small to being with, but it is noticeable when it happens, which would lead to players thinking that the game is buggy. Sometimes it seems like gamers put every tiny glitch (whether it be game breaking or not) under a microscope.
Currency system.
While I was developing the game, I had so many ideas that I eventually had to write the down in a text file, and I ranked them from most important to least important. The currency system was a fairly low priority, but I was able to add a gem display value and have the enemies sometimes drop gems when they are defeated. I used the Blender gem generator to make the gem meshes, which turned out a lot better than I expected. The way the light reflects off of the edges looks almost too perfect. There are two classes of gems which add 1 (green) or 5 (blue) gems to your total. The gem dropped is based on the strength of the enemy defeated. Unfortunately, I didn’t have time to implement a shop or things to buy with your gems, so it is purely there as a score value. The gems dropping when an enemy is defeated, along with the health drops, also give more of a purpose to killing the enemies.
What could be made better?
There is really no elegant way to do a 2.5D Zelda clone. If you do a completely overhead view, then you are only seeing the top of the player’s head. If you do an angled view, then there are issues with things popping in that should be outside the player’s field of view. There have been many articles written about this, with one solution being an overhead view with all of the items rotated at an angle. I decided to use the angled camera, and I just use a camera fade when the character enters another room. With the angled camera, to keep the realism, all of the rooms would need to be instantiated in the player’s field of vision, which would not be very efficient. Also, it would be presenting the player with more information than they need to see. The player should only be focused on the current room. One possible solution may be to create very tall walls around the room, to keep them from seeing outside of the current room, which would keep the realism. Another option would be some sort of fog around the room, which would prevent the other rooms from being visible.
I defined all of the rooms in text files, which are assigned as text assets. Walls are 1’s, doors are 2’s, enemies are lowercase letters, and item upgrades are uppercase letters. Using text files makes creating the levels fairly simple in a text editor. The file contents are parsed using the string Split function and the resulting strings are looped over and read as character arrays. Ideally, these text files should use a better format such as XML, but that would increase the size of the level files and the bulkiness of using an XML parser would probably not be beneficial for load times. Alternatively, the level definitions could be turned into bit strings, since each cell can only have a limited number of values. However, it would make it much less manageable, since it wouldn’t be editable in a text editor. The bit string level definition approach would be good for an online version of the game, if the level data was variable and had to be passed between client systems.
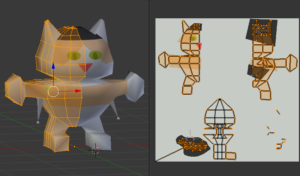
Since the character model was created in Blender and the staff swing animation was created with Unity Mecanim, the arm and staff don’t always line up properly during the swing animation. I could try to resolve this by recreating the character model swing in Mecanim as well, so that the arm properly aligns with the staff. Trying to animate removable components on a character model has been a problem that I’ve had that I’ve never found a good way to solve.
There really aren’t any Easter eggs in the game, but there were some subtle influences from other media. On the Game Over screen, the maniacal laugh was a reference to the game over screen from Zelda II: The Adventure of Link. On the game completed screen, I tried doing my best Val Kilmer Iceman impersonation of his Top Gun “You are still dangerous” line. Some of the room layouts were obviously influenced by the dungeon designs in the original Legend of Zelda for the 8-bit Nintendo Entertainment System.
Overall, I was satisfied with the game that I developed for the Ludum Dare 36 competition. Since I have a solid core engine and gameplay, I plan to develop this game further and release the game on various platforms.