Delivery Kid

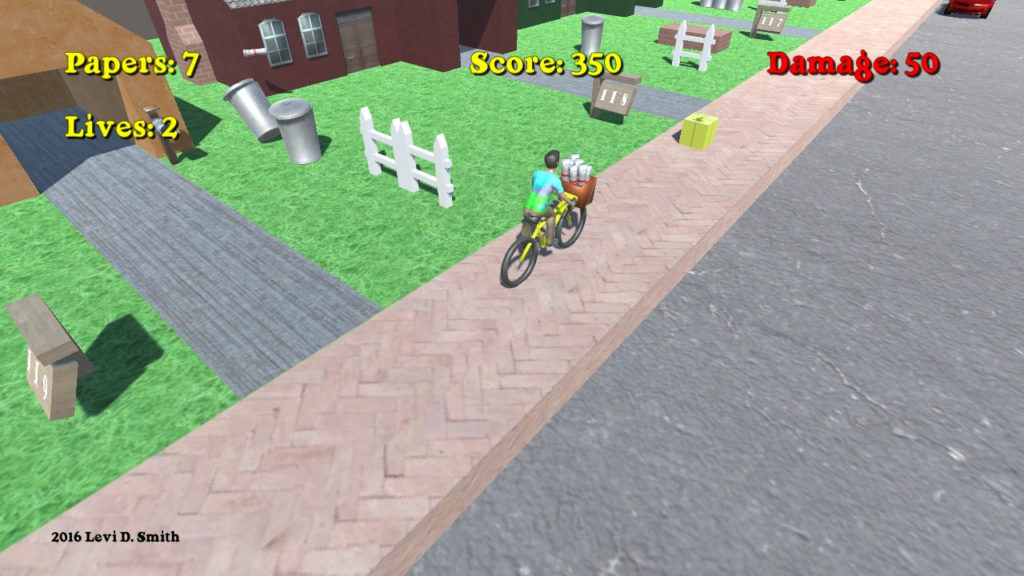
Delivery Kid is a game with classic arcade gameplay.  Deliver newspapers to all of the subscribers.  Avoid hitting obstacles or the delivery kid will be fired.  Break windows and topple garbage cans for bonus score.  Are you good enough to complete deliveries through the entire week?

Game Design

For this game, I am analyzing the gameplay of the source material and will attempt to implement that gameplay in a 3D world using Unity.  I am documenting my thought process before I implement each component in order to capture all of the game’s rules in writing.  First of all, I identified all of the objects in the game, and I implemented those objects with primitive 3D Unity objects..

Player – The player will be represented by an object with a capsule collider.  The capsule collider will allow the player to smoothly move up ramps and other objects.  The player will move forward in the world Z axis at a constant rate.  If the user presses up on the controls, then the player will move faster.  If the user presses down on the controls, the the player will move slower, but not completely stop.  The camera will be parented to the player, so that the camera always follows the player.

The player will have a Rigidbody so that it responds to physics, and the X and Z rotation axes will be frozen.

The player starts with three lives.  One life is deducted whenever the player collides with a house or enemy.  The game is over when the player’s available lives falls below zero.  The number of player lives will be displayed on the screen.

The player will have a Playmaker FSM with one state that controls the player movement, using the Get Axis Vector action which stores the user’s input into a Vector3 variable.  The player’s location is then translated by that vector in world coordinates.

House – There will be various houses placed in a row on the right side of the bounding box.  The objective will be to deliver newspaper to the target houses.  Target houses will have a brighter color to differentiate them from the other houses.  Each target house will have a mailbox.  The house will initially be implemented with a box collider, with a short box trigger surrounding it for the yard.  If the player fails to deliver the newspaper to the target house, then it will no longer be a target house on the next level.

Newspaper – The objective is to throw newspapers so that they land in the yard trigger area of the target houses.  The player will throw newspapers in the negative X axis towards the houses by pressing an action button on the keyboard, gamepad, or mouse.  Some force will need to be applied to the newspaper in the positive Z direction, since the majority of the screen is filled with the world in front of the player.  The Z force could possibly be based on how fast the player is moving forward.  Newspapers can also be used as weapons to stun enemy characters.  The newspaper will contain a sphere collider.

The player starts with a stock of 10 newspapers.  One is subtracted whenever a newspaper is thrown.  The player cannot throw any newspapers when their stock is zero.  The number of newspapers in the players stock will be displayed on the screen.

Newspaper Refill – The newspaper refill object will set the player’s stock back to 10 newspapers.  Newspaper refills will appear randomly next to houses.

Mailbox – One mailbox will be available for each target house.  Bonus points are awarded for landing a newspaper in the mailbox.  The front of the mailbox will have a box trigger.  When a newspaper enters the trigger, then the newspaper will stop moving by setting the kinematic value to true.  The mailbox will also have a regular collider that surrounds the mailbox object.

LevelManager – There will be a set number of houses for each level.  After the player passes the final house, the level is completed.  The Level Manager will instantiate the player when the level starts.  At the start of each level, the LevelManager will instantiate the Player object.

For the first level, the LevelManager will instantiate twenty houses.  Ten random houses will subscribers and the other ten houses will be non-subscriber houses.  The subscriber information will be stored in an array of booleans.  During the game, another boolean array will track which houses have been delivered a paper.  The index for that house will have their delivery set to true if a newspaper is delivered to the mailbox or delivery area.  After the level, the subscriber array will be compared with the delivery array.  Any subscriber who did not get a delivery will be set as a non-subscriber.  The game is over if all houses become non-subscribers.

If the player successfully delivers newspapers to all of the houses that are subscribers, then the player will have a perfect delivery and one of the non subscriber houses will be chosen at random and converted to a subscriber house.

The level number will start at zero and increased by one after reaching the exit object.  The level number corresponds with a day of the week, which will be displayed before the beginning of each level.

Enemies – Various types of enemies will try to attack the player.  If an enemy collides with the player, then the player loses a life.  When all player lives are lost the game is over.

Obstacles – When the player collides with an obstacle, they will lose one life.  Unlike enemies, obstacles do no move.  Below is a list of obstacles.

  • Trash Can – Originally 100 points;  I think it should be 100 breakage points for unsubscriber
  • Fence – This could be a part of the house, but I decided to make it a separate non-moving object
  • Yard Sign – Another non moving object.  It displays the house number which starts at 120 and decrements by one for every house.
  • Breakdancer and Radio – Stationary objects.  Breakdancer stops spinning if hit with a newspaper
  • Brick Barbeque – Stationary object in yard.
  • Fire Hydrant – Stationary object that is always in the sidewalk.
  • Car – Cars move in the negative Z direction in world coordinates on the road at a constant velocity.  Cars spawn at the end of the street at regular intervals.  Cars also spawn at the second and third intersections at random intervals and move in the positive X direction.
  • Jackhammer Guy – Always spawns on the sidewalk or in the road.
  • Dog – The dog chases player if player gets too close.  The dog move slightly slower than the player, giving the player the chance to escape.
  • Grates – Grates are always on the edge of the road next to the sidewalk.


Lot – The lot one is gameplay unit where one house resides.  There will be a large plane representing the ground area that is not covered by the houses.  The lot is the gameplay area where the player can move.  The lot consists of the yard around the house, the sidewalk, and the road.  This object has a plane collider to prevent the player from falling through the world.  There are also two cubes spanning the length of the lot, which are placed on the left and right side side of the ground plane, which are required to keep the player from leaving the gameplay area.  The mesh renderer and mesh filter are removed to keep the user from seeing the invisible walls.

Intersection – An intersection is a road that runs horizontally with no houses.  There is an intersection at the start of the level, and then intersections after the fifth and tenth lot.  The player will need to avoid cars in the second and third intersections.  The intersection will also have left and right boundaries to prevent the player from leaving the gameplay area.

Exit – The exit is placed after the last house, and when the player collides with the exit the game will proceed to the level complete state.  The exit is an invisible cube collider, and it must be big enough to completely block the player’s path to prevent the player from moving around it.

Score Points – Not an actual object in the world, but there will be a global variable which tracks the number of points that they player has accumulated.  Below are the point values associated with various tasks.

  • Regular paper delivery: 100
  • Mailbox paper delivery: 250
  • Hit enemy (lawnmower) with newspaper: 100
  • Hit breakdancer: 350

A separate point value is kept for breakage bonuses.  The breakage values are listed below.

  • Break window: 100
  • Break window combo: +25 for each additional window on same house (100 for first window, 125 for second window, 150 for third window, and so forth)

Videos


Released

Kitty’s Adventure

Kitty's Adventure collectible letters added

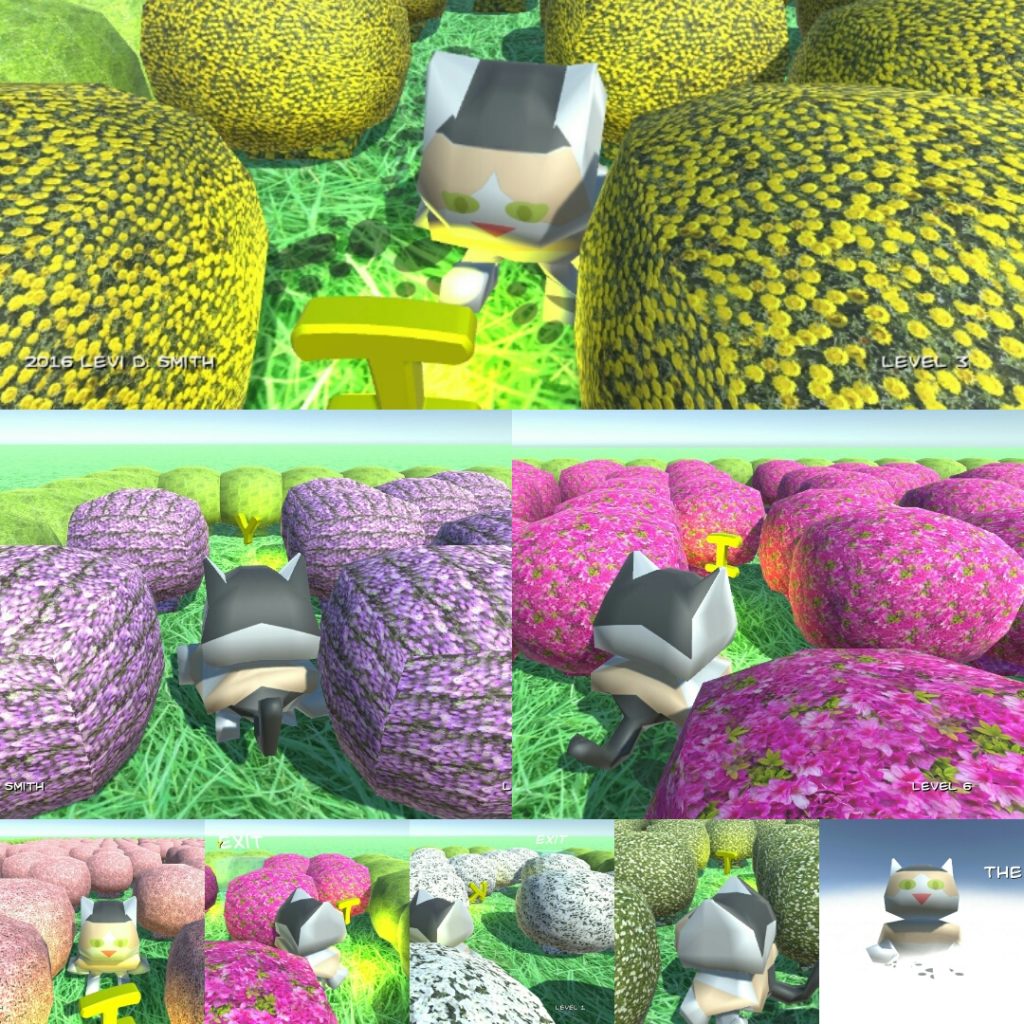
Kitty’s Adventure is a game developed in remembrance of Kitty.  Kitty is lost in the maze and only you can help her escape!  Guide Kitty to the exit of each maze.  Every level is a uniquely generated maze configuration.  As you complete the levels with Kitty, the maze complexity increases.

Development Process

Kitty's Adventure Texture Mapping

I began development by making a simple cat model in Blender.  Next, I textured mapped my model by UV unwrapping the model, by mostly using the “Project from View” operation while selecting specific faces of my model.  I exported the UV layout, and then I created the texture map in Gimp.  I used the dropper tool get the fur color from a real photo of Kitty.  I ended up adding a little more saturation to the colors, as the texture looked a little faded when mapped onto my model.  I used the reflect modifier, so that I only had to model and texture map the left side of the body.

Kitty's Adventure Blender animation

I created an armature for my model, with bones for the body, arms, legs, head, and tail.  Then I created three animations for my character, which are standing, walking, and jumping.

Kitty's Adventure Maze

Next, I created a simple maze in blender by scaling a plane object, and then subdividing it by 20.  Then I selected all of the faces that would be walls, and then extruded those upwards by about 1.5 units.  I downloaded a flower texture from CGTextures and mapped it as the wall texture.

In my Unity project, I imported my cat model and maze model.  I made a capsule game object for the player, and parented the cat model to the Player game object.  I used Playmaker for controlling the movement of Kitty with the Get Axis Vector and Translate actions, using “XZ” as the Map to Plane option.  It is important to add a mesh collider to the maze model, otherwise Kitty will walk through the walls.

I created four scenes for this game.  The “memory” splash screen shows a brief photo of Kitty that fades in and out.  The Camera Fade In and Camera Fade Out actions accomplished that effect.  However, I had to disable all of the GUIText and GUITexture objects after the fade out, otherwise you would see a flicker for a frame before the next scene is loaded.

I added the title screen last.  It just displays the game’s title and waits for the user to press a mouse button to start the game.  I added my Kitty model with the walk animation and I applied a constant rotation action to make Kitty spin.  It doesn’t look very natural, so I may go back and modify it later.

Kitty's Adventure Unity

The game scene is where the bulk of the gameplay occurs.  I added entrance and exit objects, which are just cubes with triggers.  The entrance really isn’t used now, but walking into the exit cube with transition the game to the final screen.  It took me a little while to get the perfect height for the maze walls.  If the walls are too tall, then you can’t see Kitty at times.  If the walls are too low, then it makes the maze too easy to solve and looks unnatural (why wouldn’t you just step over the walls?).

I also wanted to use controls similar to a Mario 64 style game.  Playmaker provides a Smooth Camera Follow action, but it makes the camera always stay behind the character, and only works well when using a control scheme where you press up to go forward, down to go backwards, and left and right to rotate.  The control scheme I wanted to use is pressing up to go into the screen, down to go to out of the screen, and left and right to go to the sides of the screen.  The camera would need to be set to the position of Kitty with an added offset and never rotate.  I couldn’t parent the camera to the player game object, because it would have the camera turn wildly whenever the player’s rotation changed.  When the walls were too tall, I would have problems of being able to see through some walls, since the camera was inside of the walls.  Ensuring that the camera was always positioned above the top of the walls resolved this problem.

After Kitty reaches the exit, then it transitions to the final game over screen.  I have a simple congratulations message with Kitty jumping up and down.  At first, the player could still control Kitty on this screen, so I disabled the movement FSMs when the scene is loaded.

Kitty's Adventure Prim's Algorithm

At this point, I had a working game, but it was not very complex and it used the same maze every time.  I did some research, and I found that Prim’s algorithm can be used to generate mazes.  I created a new test scene, just for programming the maze layout.  I created a new object and attached a new PrimsMaze script to it.  The script takes a game object (maze wall prefab) and the number of rows and columns to use in the maze.  I found a good video explaining how to make a maze using Prim’s algorithm, so I wrote a C# script using the method described in the video.

The maze generation works pretty well.  I set the exit to the last open space in the last row, although that really isn’t the most elegant solution and could result in problems if there are no open spots in the last row (my Unity editor crashed more than once due to not being able to find an open spot, resulting in losing all work since the last save).  One nice thing about Playmaker is that it will detect and break out of infinite loops, however infinite loops in a script will result in the entire Unity editor hanging.  There used to be a trick where you would attach the MonoDevelop editor to the Unity process and then change the variable causing the loop, but I couldn’t get that to work with the Visual Studio editor.

Now every time someone plays the game, they get a unique maze.  The maze complexity also increases as the player completes the levels.  I created a Playmaker global variable to hold the level number, which is incremented at the end of every stage.  I recently discovered that Playmaker global variables are accessible from any scene, which is really helpful to keep data (like level number) persistent across scenes.  I created a new function in my maze generation script, which has a switch statement that determines how many rows and columns to place in the maze based on the level number.  After level six, it uses the default row and column values.  I need to do some tests to see how many wall objects I can have before the game experiences slowdown.

There are a few more features I want to add to the Kitty’s Adventure game.  Obviously, I need to add music and sound effects.  I’ve also had the idea of adding paw prints on the ground as Kitty walks around the maze, which would be like breadcrumbs showing the areas where you have already been.  There are plenty of obstacles that could be added to the maze.  It would also be nice to have a timer showing how long it has taken to complete each maze.

Developer Commentary


Released

Mutant Veggie Arena

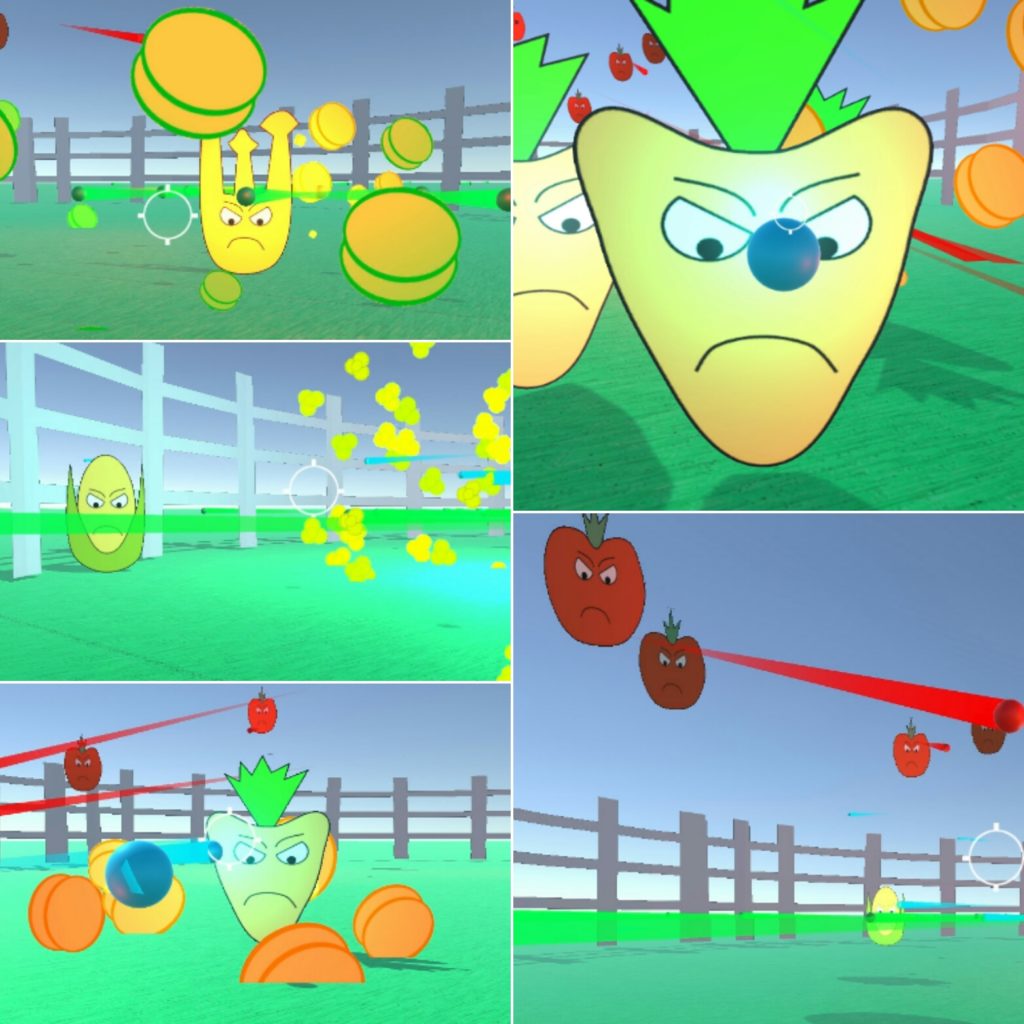
Veggies have been exposed to radiation which has caused them to mutate and become angry.  In Mutant Veggie Arena, you must stop the mutant veggies from taking over the world!  Turn the carrots, corn, tomatoes, and celery into chopped salad!

Mutant Veggie Arena

Mutant Veggie Arena Post Mortem

For my Ludum Dare entry this time, I decided to create a first person shooter style game involving giant mutant vegetables for the “growing” theme.  Based on view counts, my first person shooter that I developed for the 7dFPS a year ago is by far my most successful game on Itch.io.  However, for that game I used existing assets from the Unity Asset store.  For this game, I would need to create everything in under 48 hours.
DOOM programming gurus
A few days ago, I started playing some of the old FPS games that I owned as a teenager.  The first FPS games I ever played were Wolfenstien 3d and DOOM II on my 386 computer. Back then, the 3D graphics were revolutionary compared to the sprite based games on 8-bit consoles.  Soon after playing those games, I picked up a “Tricks of the DOOM Programming Gurus” book from the computer store.  As I began learning how to make DOOM levels, I learned that all of the enemies and items were sprite based.  The sprites are just turned toward the player, which keeps them from appearing flat.  This technique is called billboarding, and it is used in games for saving on processing power for numerous low resolution objects, such as a crowd in a football stadium.  Long time DOOM players will notice that the level names in Mutant Veggie Arena are parodies of the original DOOM difficulty levels.

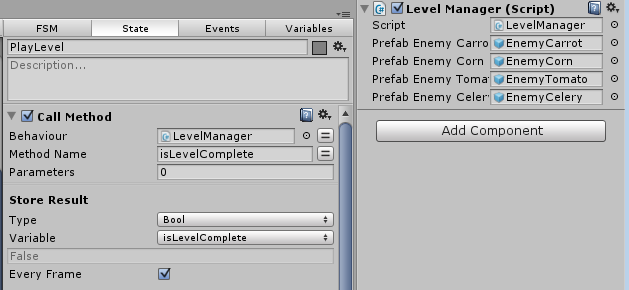
For this Ludum Dare, I wanted to focus on gameplay and AI.  I spent the entire first day just working on making the engine and configuring the enemy behaviors.  I saved all of the enemy graphics, sound effects, and music for the second day.  This was risky, but I’ve found that I can spend more time than needed on the artwork if I do it first, since I can be a perfectionist at times.  I used Unity and Playmaker again for this entry.  I’m really starting to feel how to make the right balance between Playmaker and Unity scripts.  All state management is handled in Playmaker as well as simple calculations (such as subtracting a constant value from the player’s health).  However, anything more complex is more easily handled in a Unity script written in C sharp.  The method can be called using the “Call Method” action, and then pulling the script component from the assigned object to the “behavior” slot on the action parameter.  The only problem is that a FSM on a prefab can only call methods in scripts assigned to other prefabs, and non-prefab FSMs can only call scripts assigned to objects that are not prefabs.  In the example below, I call the isLevelComplete method in the LevelManager script that is assigned to the LevelManager object.  This is because I must count the total number of object with the “enemy” tag, count the number of enemies that are in the queue to be spawned, and compare that to zero.  To do that calculation in FSM would require multiple actions and multiple states, but calling the script accomplishes the same in one method that returns a bool value.

Call Method behavior

Since making the models for my games is always a crunch for my Ludum Dare games, I decided to use a similar approach to DOOM for my entry this time.  The enemy colliders are capsules, but the display is handled by a child plane object with the enemy image texture applied to it.  The capsule mesh renderer is removed and a LookAt action is applied so that the child plane is always facing the player.  It is important to remember to set the transparency of the texture to the alpha value, and for the generated material to have the shader changed from “opaque” to “transparent”.  Otherwise, the enemy will appear to be on a black plane.

Getting a simple FPS up and running using Unity and Playmaker is relatively easy.  There is a “MouseLook” action which handles making the player’s view follow the mouse.  It is important to remember to set the Y sensitivity to a negative integer to give it standard FPS controls.  Otherwise, it will have airplane joystick styles controls where moving the mouse down will move the player’s view upward.  It is also important not to use “MouseLook2”.  Unfortunately, I thought that was the correct one to use (it limits how far you can turn right and left), so I lost valuable time trying to get that action to work.

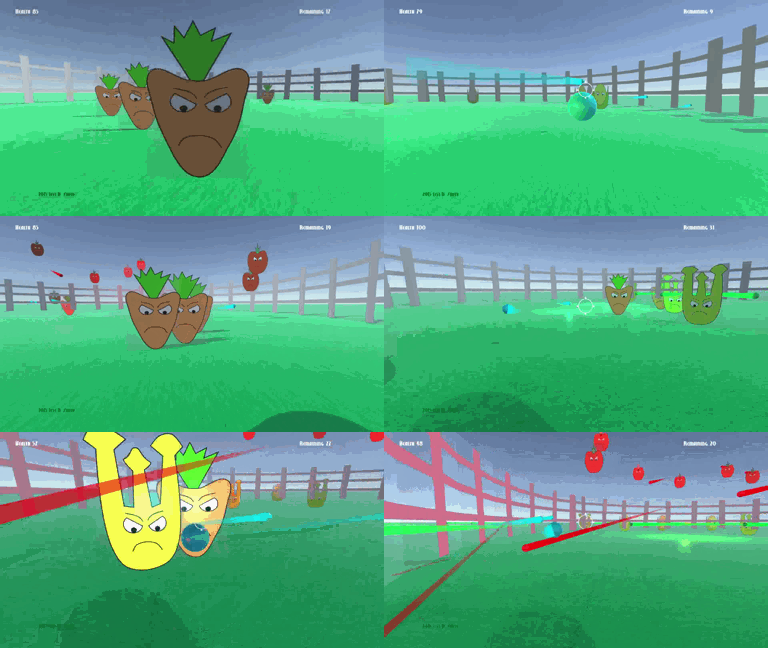
Mutant Veggie Arena gameplay

The targeting reticle is a simple plane, that was placed 10 units in front of the player.  I learned from previous experience that just simply changing the mouse icon isn’t the best solution, since it can sometime appear jittery.  The reticle object is parented to the player, so it always stays in front of the player on the Z axis.  To keep the reticle from disappearing when behind an object (such as the ground), I used the text shader which usually makes it draw on top of everything else.

I created a LevelManager game object for handling the loading of each level.  For each level, I populate and enemy ArrayList with Prefabs pointing to each of the enemy types.  At regular half second intervals, an enemy is pulled from the ArrayList, instantiated, and then removed from the ArrayList.  The number of enemies displayed on the screen is calculated from the total number of game objects with the “enemy” tag (found with GameObject.Find(“enemy”).Count) plus the remaining size of the enemy ArrayList.

I wanted to have a unique behavior for each enemy.  The carrot was the first enemy behavior that I created.  The carrot has the simplest AI, as he just moves towards you.  Originally, I had it so that when the “MoveTowards” action completed, the carrot would “attack” by simply subtracting a certain amount from the player’s health (add a negative value using the “Int Add” action).  However, this caused some problems like it not handling the player running into the enemy, so I changed the player damage to an “On Collision” event.  This triggers a “damage” event on the player FSM.  Unfortunately, this limits the player to taking the same amount of damage from every enemy, since an event can’t take a value as a parameter.  One of my complaints about Playmaker is that you can’t pass a parameter with an event.  I could have a “damage” event and state for every enemy type, but I don’t think that is a very elegant solution.

The corn enemy is stationary, but unlike the carrot, it will shoot projectiles at you.  I had to use the “Look At” action again to ensure that the projectile is initially moving towards the player.  Then the projectile just simply moves in a straight line by translating along in the positive Z axis in self coordinates.  I had envisioned the corn enemy being like a turret in other FPS games like Team Fortress 2.

The tomato is the one flying enemy.  I was proud of how this enemy turned out.  I had a flying FSM which raises and lowers the tomato as he reaches a maximum or minimum value on the Y axis in world coordinates.  However, I wanted this enemy to rise more quickly than he falls.  This makes the enemy appear to glide downwards.  This enemy also forces the player to act differently by pointing aligning the reticle vertically instead of horizontally.  The tomato does not move horizontally, as I thought that would make shooting him too difficult.

The final enemy that I implemented was the celery.  This enemy moves to a random position, pauses, and then shoots in eight directions at once.  This was the most complex of all of the enemies.  I had to write a function which returned a random position in the arena based on a range parameter.  To shoot in eight directions, I kept a rotation variable, and for each projectile I instantiated, I added 45 (degrees) to the rotation variable.  Then, each projectile was rotated by that value.  It is also important to not spawn the projectile inside of the enemy, otherwise it will instantly collide and bad things will happen.  The eight way shot actually looks a lot better in the overhead Scene view than the FPS view.  I was thinking about having a replay mode at the end of the level which shows the action from different perspectives.

Aqua Teen

On the second day, I focused on the graphics and audio.  Since I was going for a cartoon style, I used Inkscape for making the enemy vegetable graphics.  To save time, I used the same eyes and mouth vector graphics for all of the enemies.  I used the free form pen tool to create the paths for each of the vegetable bodies.  I set the stroke size to 4 pixels to give it a classic cartoon look with a thick black outline.  I exported each of the enemies to a PNG file, and then applied those textures to the enemy planes. I had envisioned that the enemies would look like something out of Aqua Teen Hunger Force.

When the player is hit, I use the camera fade action to make the screen go temporarily red.  The fade is a little faster when hit by a projectile.  When the player dies, the screen slowly fades to red.  The wave number and name are two GUI Text objects that are enabled on the start of each level.  After five seconds, the GUI Text object is disabled.  The level names are returned by a function containing a switch statement that returns a String, which takes the current level number as a parameter.

I used GarageBand on my Mac again for composing the music.  There have been a few changes to GarageBand since the last time I used it, and many new instruments have been added.  I was going for a classic sci-fi movie type music, and I think I was able to achieve that with the synthesizer instruments.

bubble sound

All of the sound effects were recorded myself.  The grunts and groans were my own voice, with the pitch slightly lowered and an echo effect applied.  The gun shot was me blowing into a straw submerged into a cup of green tea.  I used Audacity to crop out the unneeded portion of the audio.  The enemies were also my voice, with the pitch raised and echo effect added.

While I was impressed with what I was able to develop, there are a few things that need to be improved or fixed.  Here is a list of issues that I would resolve if I develop this game further.

  • Sometimes the targeting reticle gets hidden behind very close enemies.  I may be able to modify the layer settings to make it appear in front of the enemies at all times.
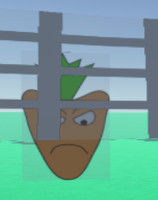
  • Enemies far away sometimes appear behind the arena wallsfence problem
  • If you look closely, you can see parts of the transparent areas of the enemy plane.  I may need to check the texture and material settings.
  • I really wanted to have a rectangular health meter instead of a number value.  This should be achievable using two GUITexture objects.  One for the meter background and one for the health bar.
  • I would like to have multiple images for each enemy.  I definitely think there should be a “damaged” image when the enemy is shot.
  • The enemy damaged sound effect needs some work.  I tried making it higher pitch, but I still think it sounds too much like the player being damaged.  Add different sound effects for each enemy.
  • Particle effect when the enemy is killed.  I was thinking about having the corn enemy explode into many popcorn pieces.
  • New effects for projectiles.
  • The arena needs some work.  Maybe have different arenas or levels instead of the one circular arena.
  • A gun model and different types of guns.
  • Powerups (more damage, auto fire, etc).
  • Sometimes the health goes to a negative value.  When the player dies, the health is clamped to a low of zero, but this needs to be handled sooner (as the player is damaged).  If a meter is implemented, the negative value would cause problems (health bar would be displayed backwards?).
  • Make some enemies take multiple shots before being killed.
  • Have a replay after the level is completed which shows the arena from various camera angles.  This will require that I actually make a character model.  Also, the billboarding effect for enemies would need to be modified, otherwise the enemies will look like flat planes.
  • Needs a better “story”

Weird Al

In conclusion, I was happy with what I was able to create in 48 hours.  Actually, according to my streaming video statistics, I only spent about 12.5 hours making this game, which is probably lower than the amount of time that I usually spend on a Ludum Dare entry.  However, I think my Unity, Playmaker, Garage Band, and overall game development skill have improved a lot over the last three years.  Therefore, I am able to create a lot more in less time.  After my first Ludum Dare entry about the Amish and this entry about food, I’m starting to feel like the Weird Al of video game development.

Videos

Mutant Veggie Arena Let’s Play Videos


Released