My Raspberry Pi Arcade

Overview

For some time, I’ve been hearing about the many things that can be created with the Raspberry Pi.  A few weeks ago, I purchased the Model B from the Amazon store for about $39.  After three days it arrived on my doorstep.  I haven’t had the time to do anything with it, but today I decided to get it running.  This is not a device that you can plugin and start using immediately.  I will cover the process that I went through to get my Raspberry Pi device running.  You can do many things with the Raspberry Pi, and I have chosen to create a simple arcade system as described by this article on Adafruit.

Raspberry Pi Model B

Hardware

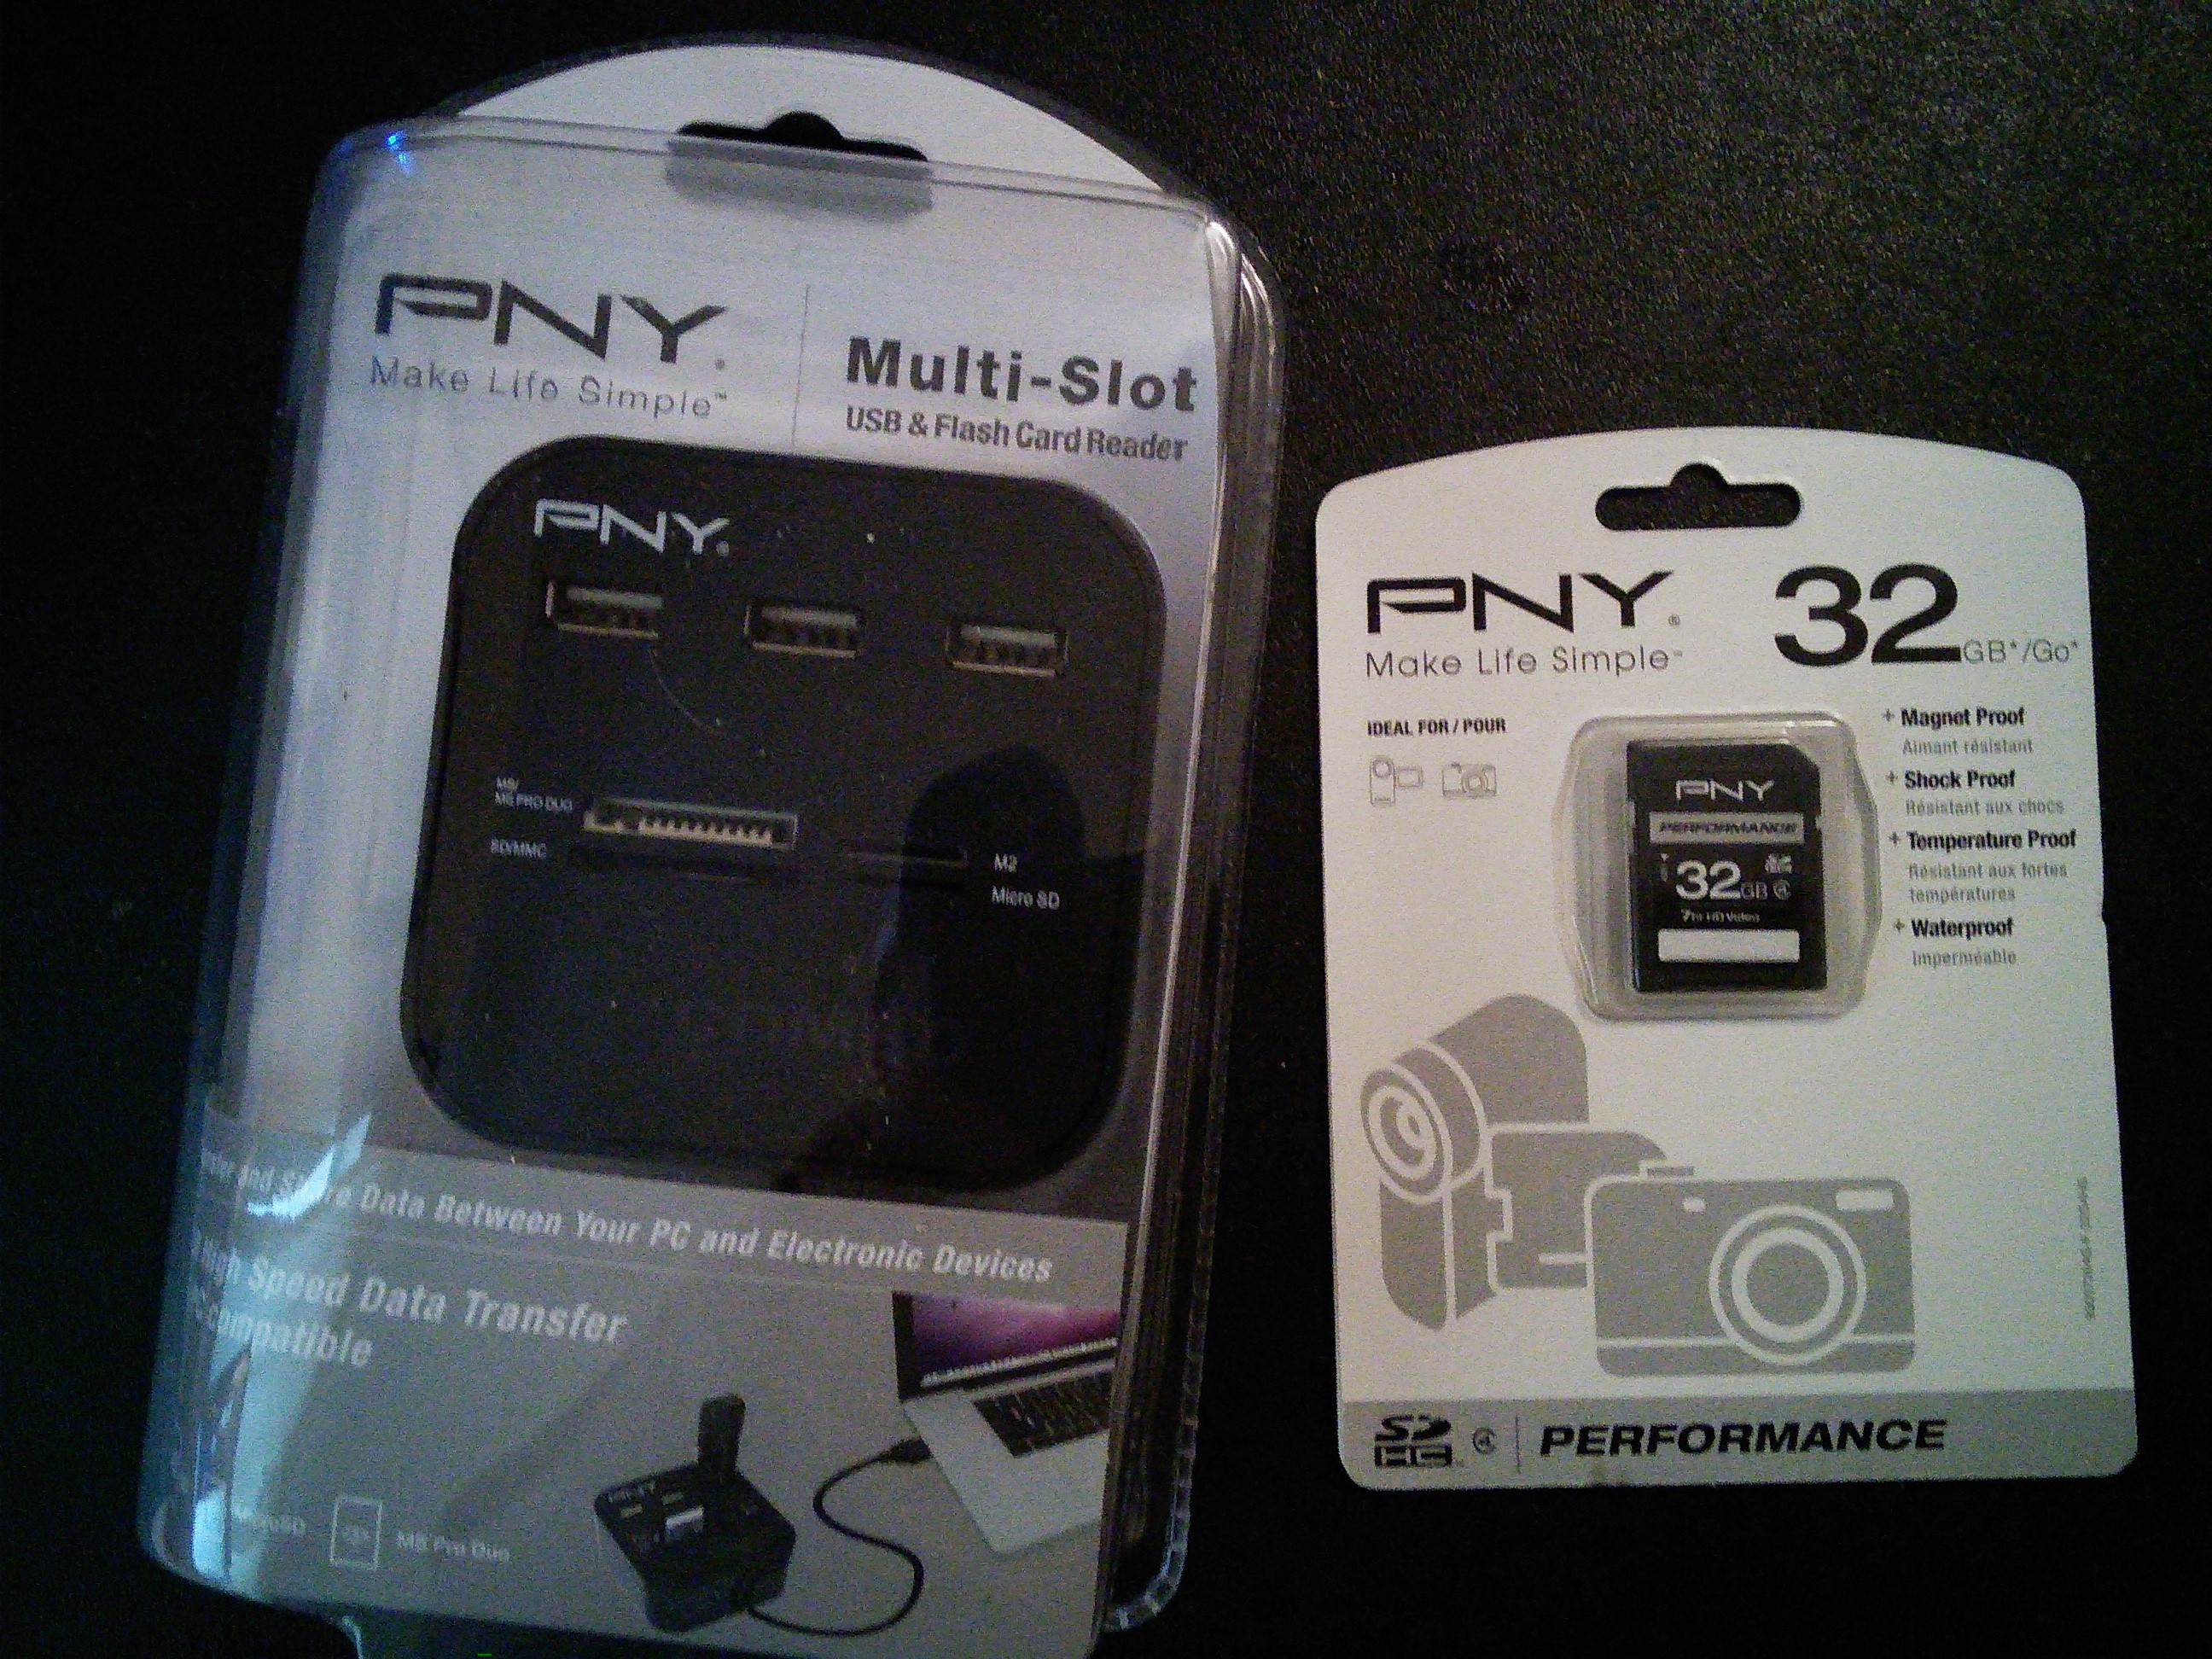
First, you will need an SD card and a method for writing an operating system image file to the card.  A 32 GB SD card and SD card reader from Wal-Mart set me back about $55.  These could probably be found cheaper online, but I was willing to pay a few extra dollars to walk out of the store with it in my hands today.  Since I will be emulating games, I needed to ensure that my card had enough storage to hold the game image files.


Don't forget the SD card and reader
Don’t forget the SD card and reader

A micro-USB power supply is also required, which does not come with the Raspberry Pi.  I will be using my phone charger, which is capable of 5.0 volts and 2.1 amps, which is sufficient for the Raspberry Pi.

Be sure that your Micro-USB power supply is capable of supplying 5 volts

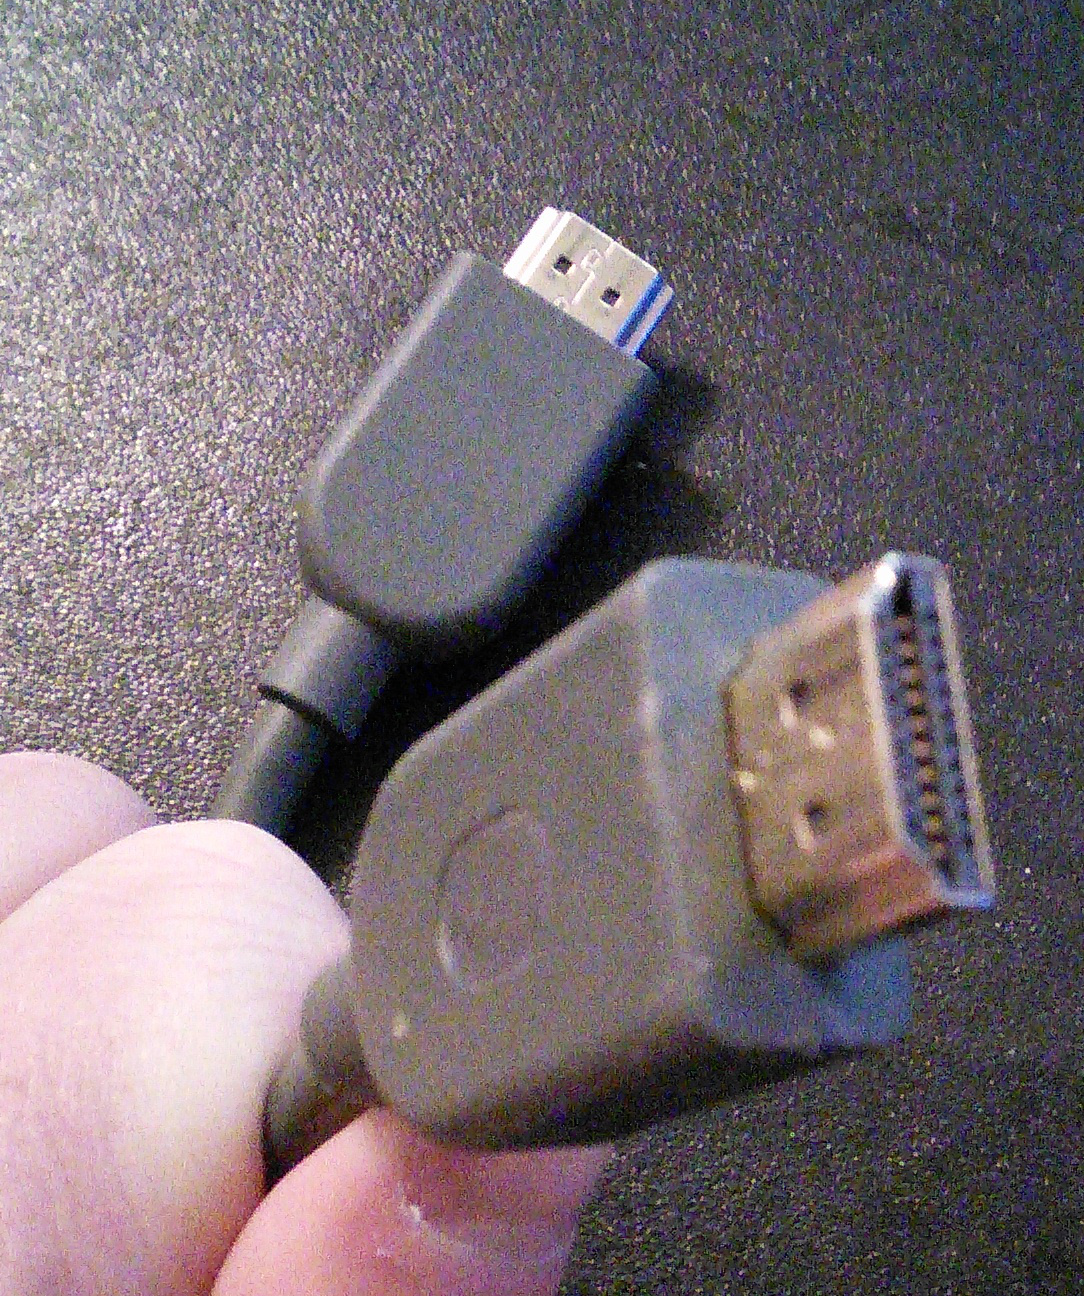
An HDMI cable is required as well, for connecting your Raspberri Pi to your display device.  I am using the HDMI cable from my XBox 360.

HDMI cable is required for connecting you Raspberri Pi to the display device


Finally, a USB keyboard and USB mouse will be needed for interacting with the Raspberri Pi.


Any modern USB keyboard and USB mouse should work

After getting the necessary hardware, the operating system for the Raspberry Pi will need to be downloaded.  The Raspberry Pi download site offers many options, and I chose to go with Raspbian.  This distribution has been recommend to me by others,  and it is also the recommended OS from the Adafruit article.  I downloaded the 2014-01-07 version of the Rasbian “Debian Wheezy” software, which was 780 MB in size.

External SD Card Reader


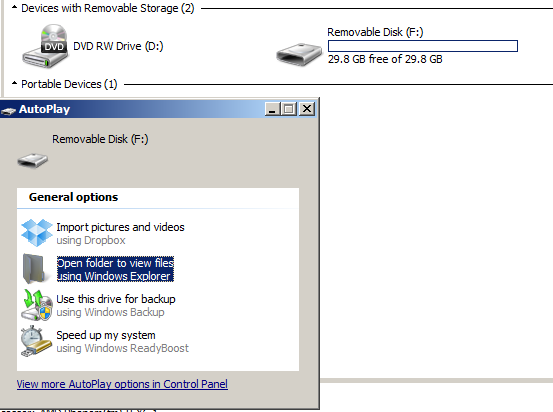
After connecting my SD card reader to my desktop PC using the USB cable, Windows automatically installed the appropriate drivers for the SD card reader.  When I inserted the SD card into the reader, it recognized the card and opened a dialog window to view the contents of the SD card.

new_device


 Software

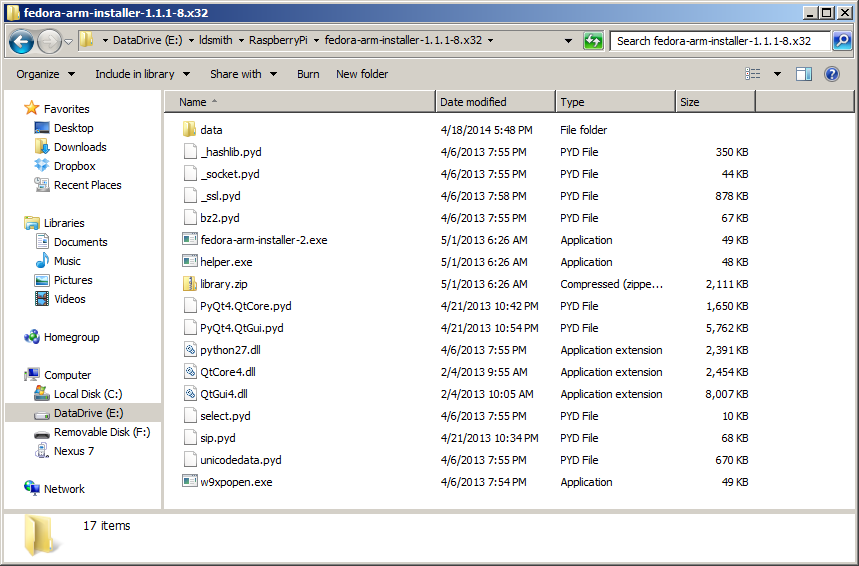
In order to install the Raspbian operating system on the SD card, I downloaded the Fedora ARM Installer, which is a 10 MB zip file.  I created a “RaspberryPi” folder on my desktop system, and extracted the contents of the Fedora ARM installer to that folder.

Extracted contents of Fedora ARM Installer

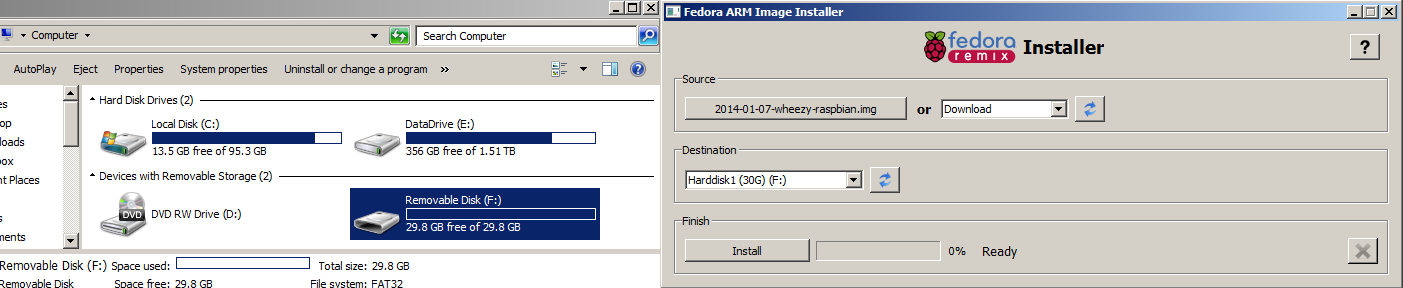
To run this application, you MUST right click the fedora-arm-installer-2.exe file and select “Run as administrator”.  The application will run without administrator privileges, but it will not be able to detect your SD card device.  If prompts for running DiskPart are displayed, then it is not running as administrator.

fedora_arm_admin
Don’t forget to run as administrator

After the program starts, the user interface will display.  Answering yes will allow it to make the necessary changes to install the operating system image on the SD card.  Next, the Raspbian zip package was extracted into my RaspberryPi folder.  After it was extracted, there was one file named 2014-01-07-wheezy-raspbian.img in the folder.  I used that file as the “Source” in the Fedora ARM Image Installer.  Next, I selected the SD card drive as the Destination.  The file size in parenthesis should roughly match the size of the SD card.  In my case, my SD card is 32 GB and the device display in the Fedora ARM installer shows 30 G.  The device description in my case displayed “Harddisk1”, which is not important.  It is important that the drive letter (F: in my case) matches the drive letter of the SD card device.  If it doesn’t match, then STOP and select the correct device or you could risk formatting your hard disk and losing all of your data.  When I ran the Fedora ARM installer it didn’t give me the option of selecting my local desktop drives (such as C:) as the Destination, so it may have some precautions built in to prevent it from reimaging your local drives, but you should still double check to verify that you are writing to the correct destination.

fedora_arm_interface2

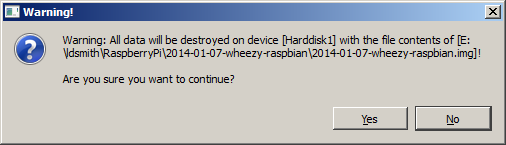
After I verified that everything was correct, I pressed the Install button to write the image to the SD card.  When the warning message displayed, I confirmed that it was the correct device and selected “Yes” to write the Raspbian image to the SD card.


Be sure that you are overwriting the correct device!

Writing the image to the SD card took a few minutes.


Writing the image to the SD card takes some time.

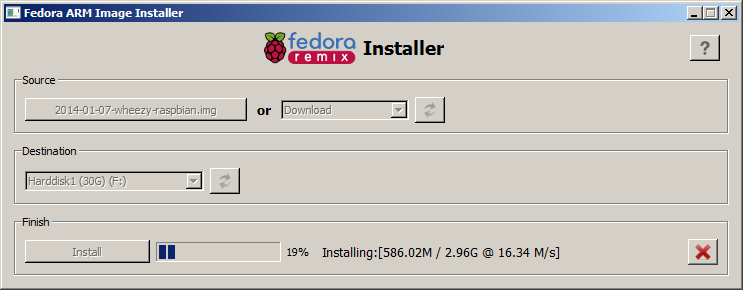
Once the “Install Complete” message displays, the imaging is complete and the SD card can be removed from the card reader.

Booting up the Raspberry Pi

Insert the SD card into the slot in the back of the Raspberry Pi.


Slide SD card into back of Raspberry Pi

Connect the keyboard, mouse, and HDMI to the front of the Raspberry Pi.  Finally connect and plugin the micro USB cable to power on the Raspberry Pi.

Connect the keyboard, mouse, HDMI, and micro USB power supply


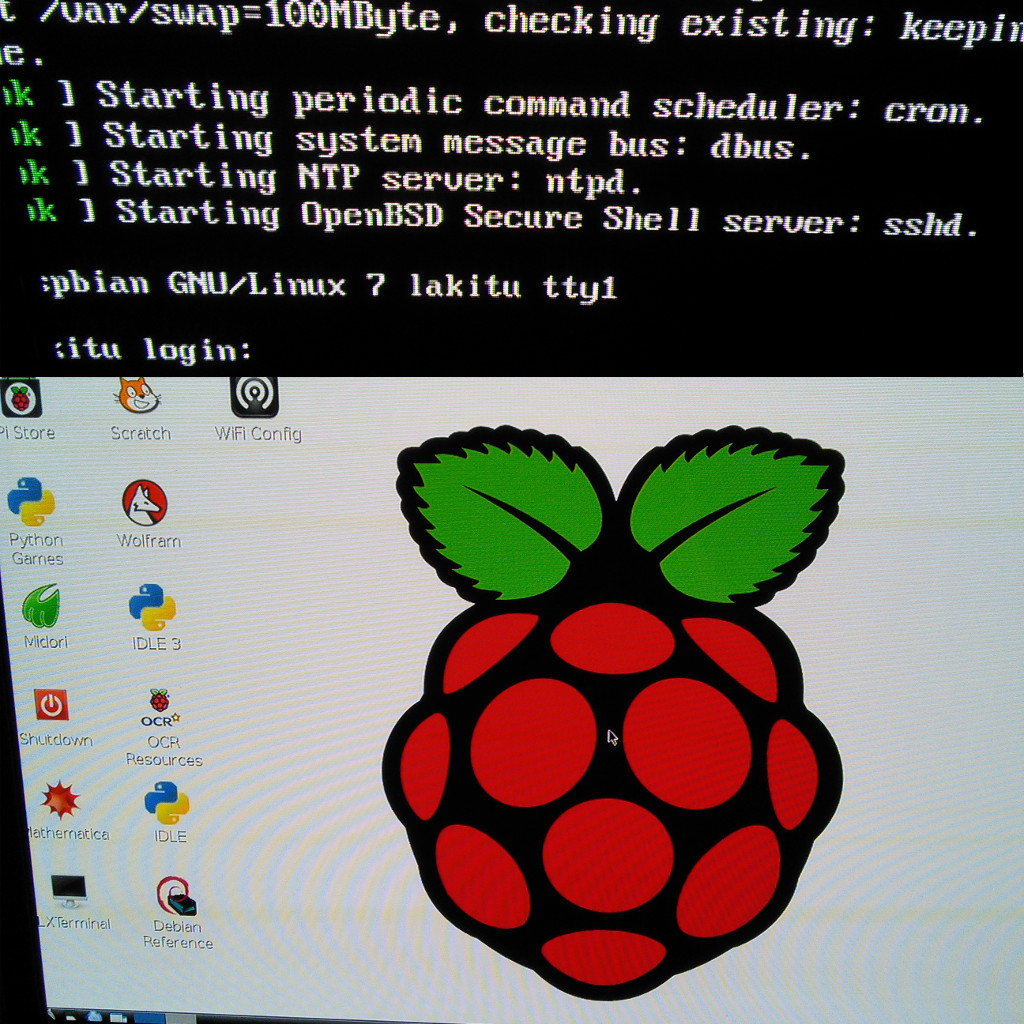
Once powered, the screen should display the Raspberry Pi boot up sequence.

Raspberry Pi Booting Up


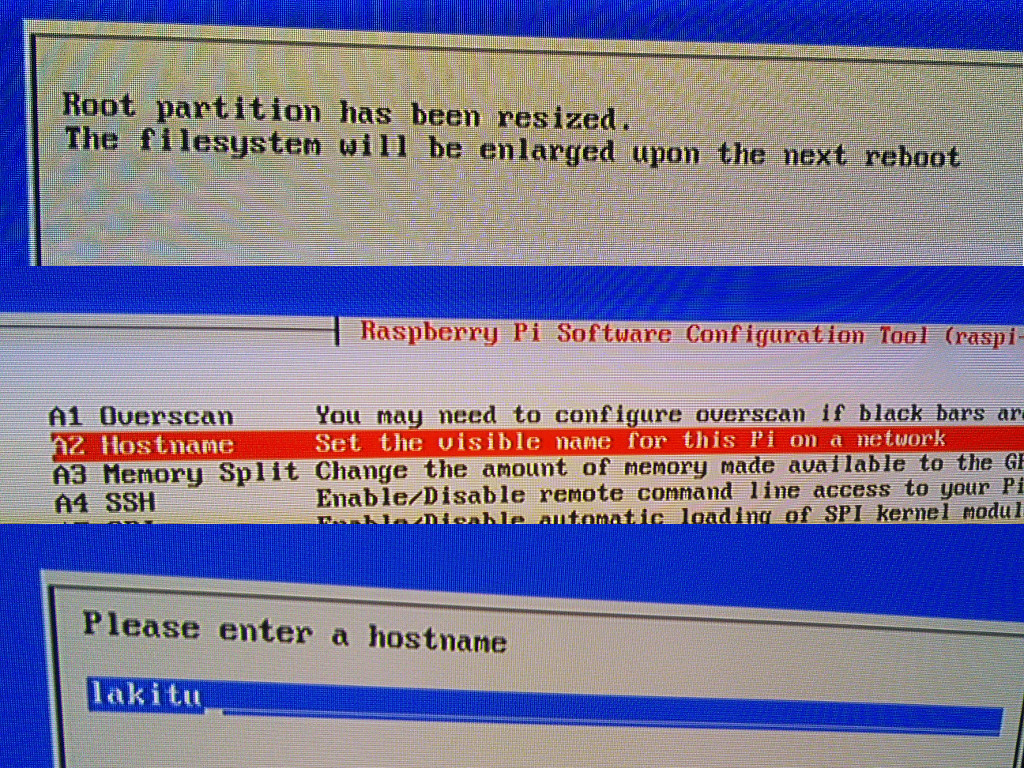
After the Raspberry Pi has booted, the raspi-config menu will display.  First, I selected “Expand Filesystem”.


raspi-config main menu

A message about the root partition being resized and enlarged on the next reboot displayed.  To give the Raspberry Pi device a unique name on the network, I selected 8  Advanced Options, then selected A2 Hostname.  I was then able to enter a new name for the device.

hostname

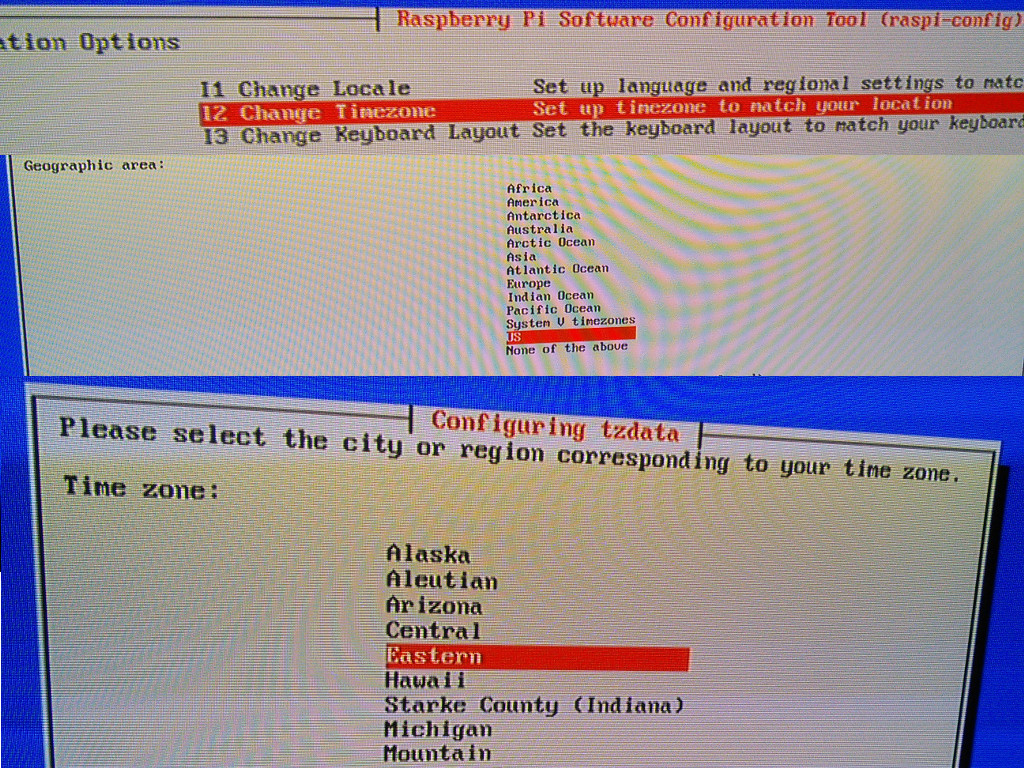
Next, I selected 4 Internationalisation Option, and then selected I2 Change Timezone.  It takes it a while to move to the next screen, so don’t press anything until the Geographic area screen is displayed.  I selected US, and then selected Eastern on the next screen.  There were some confirmation messages displayed at the bottom of the screen that the time zone had been changed, and then it transitioned back on the raspi-config main menu.

timezone

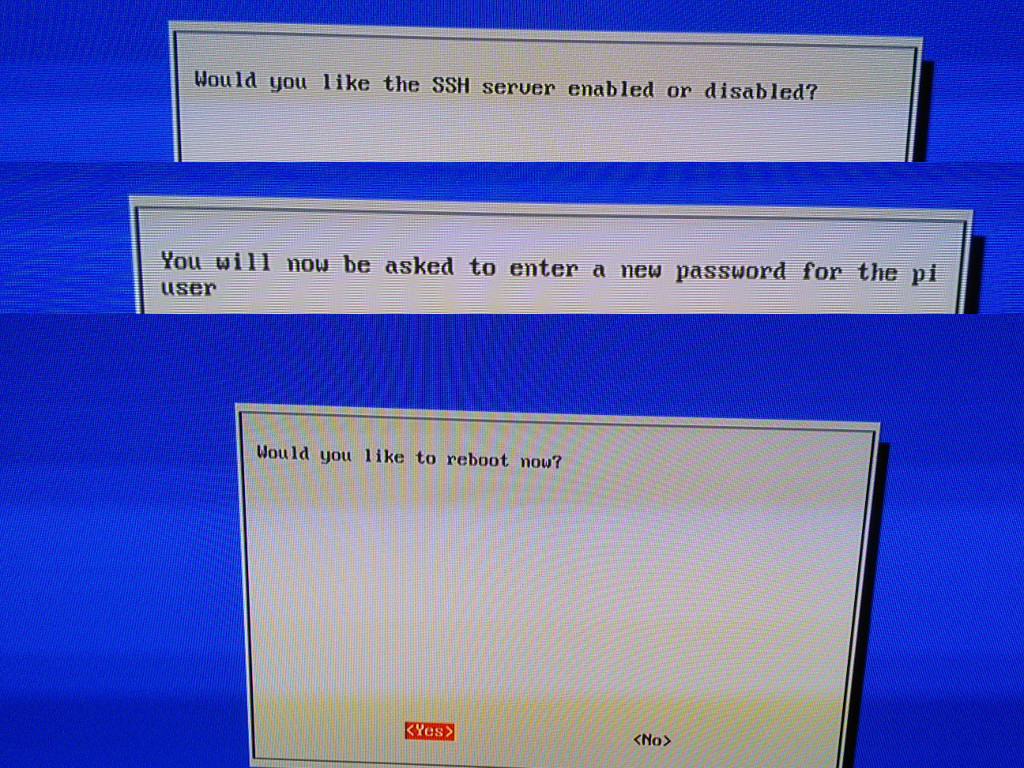
Then I selected A4 SSH and enabled the ssh server.  This allows administration of the Raspberry Pi over the network through ssh.  Finally, from the main menu I selected 2 to change the password.  It will display a prompt at the bottom of the screen, and the characters will not echo as the password is typed.  It will prompt you to confirm the password that was just entered.  Now from the main menu, the right key was pressed twice to select Finish.  It will prompt to reboot, which I confirmed.

ssh

After restarting, the Raspberry Pi will display a command prompt to login.  If the login prompt is cutoff on the display, then run sudo raspi-config and change the option for overscan to enabled.  Once logged in, I ran the startx command to bring up the graphical desktop.

desktop

After the desktop was started, I connected a wired ethernet cable from my router to the Raspberry Pi to enable connectivity to the Internet.  Once the networking cable is connected, then additional green and yellow lights will illuminate on the Raspberry Pi.  I noticed that if the networking lights on the Raspberry Pi are not illuminated, then disconnecting and reconnecting the networking cable seems to solve the problem.  This sometimes happens after the Raspberry Pi is  powered off.  I did have a wireless networking USB adapter that I could have used instead of wired networking, but the Raspberry Pi only has two USB slots, which are currently used by the mouse and keyboard.

Raspberry Pi with Networking

Downloading the arcade software

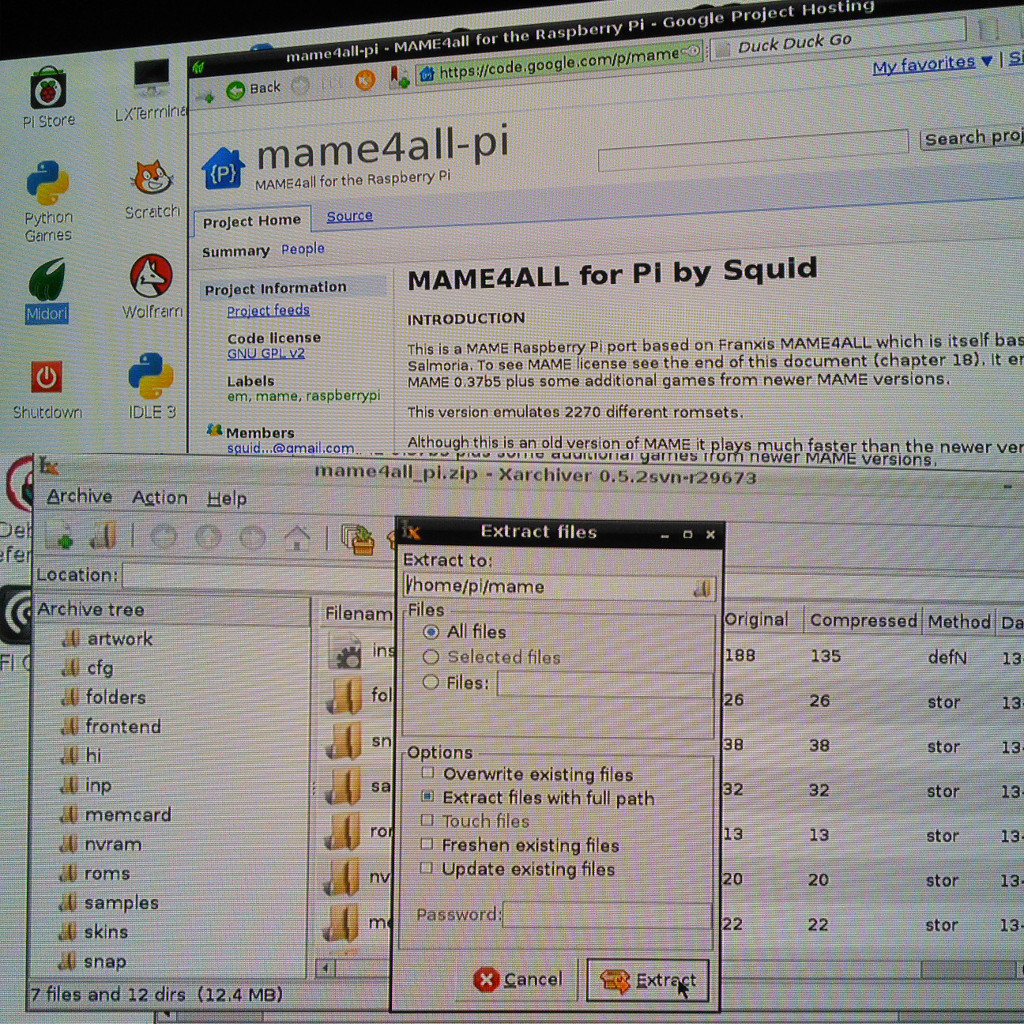
Now that I had a working desktop, I started the Midori web browser on the Raspbian desktop, and I downloaded MAME4all from the project page on the Google code webiste.  Then I downloaded the mame4all_pi.zip file using the Open option, and then I extracted the contents of the zip file to a folder called mame in my home directory.

mame4pi

The mame executable should already be built, so after changing to the mame directory using LXTerminal, I just typed “./mame” and it successfully started.  Unfortunately, after the title screen displays, the main menu did not detect any ROMs.  I went to a site called mamedev.org/roms which had a collection of free and legal ROMS which can be used for testing.

mame_title

I just picked a game called Circus, confirmed that I am using it for non-commercial use, chose the Open option.  For some reason, whenever I tried Save As it would just create a file with 0 byte size.  After it opens in the Xarchiver, I extracted the contents to the ~/mame/roms folder.  All of the files must be extracted to the roms folder.  After the files were extracted, I ran the game by typing ./mame circus from the mame directory.  This successfully started the circus game.  For some reason, when I just ran ./mame the main menu still couldn’t find the game.

roms

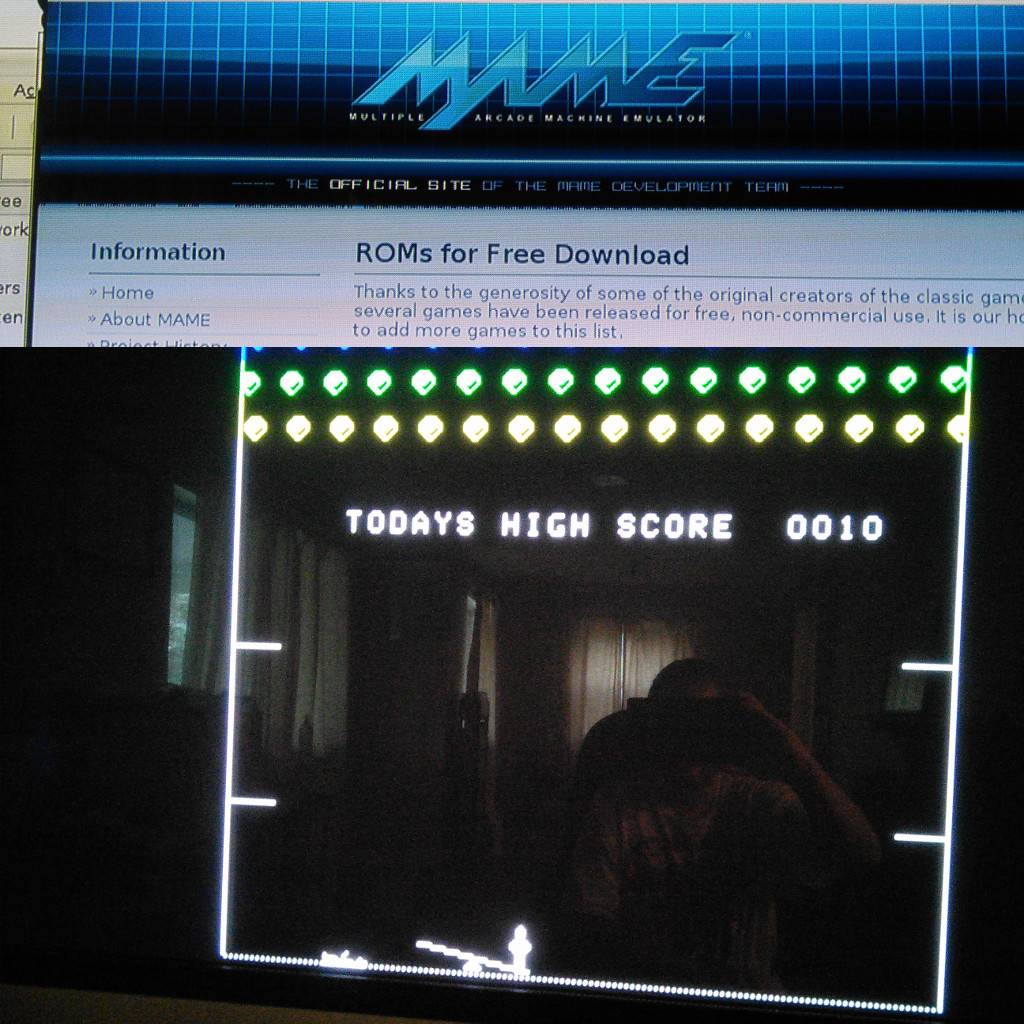
The controls for mame games can be found on the mame4all-pi project page.  Pressing 5 on the keyboard adds credits.  After credits are added, pressing the 1 key will start a one player game.  The objective of this game is to use the left and right keys to move the see-saw to bounce the menu upward to collect the gems.  If one of the men misses the see-saw, then the player loses a life.  Mame has many other useful options from the command line, which can be displayed by running ./mame –help

Notes

Be sure to go into raspi-config and select 4) Internationalization options, select I3 Change Keyboard Layout, and set the keyboard to “Generic 101-key PC” and keyboard layout to “English (US)” format.  Otherwise, you will have a hard time typing symbols like pipe ( | ) and many keys like the “at” sign and double quotes will be out of place.

To get my Raspberry Pi to start mame on boot, I had to create an /etc/init.d/arcade script which runs my arcade.sh script.  I used this page as a guide.

My ~pi/arcade.sh script:

sudo mame/retrogame/Adafruit-Retrogame-master/retrogame &

mame/mame <rom image>

Remember to “chmod ugo+x” your script files.

Edit using “sudo vi /etc/init.d/arcade” otherwise you will not be able to save the file.


ANSI_GFX_ADVNTR – It’s a Small World

For this mini-LD, I decided to create a game in the style of the BBS door games that I played when I was a teenager in the mid-90’s. We had a 64 line BBS in Atlanta called INDEX (Information, News, and Data Exchange), which was huge at the time, since most BBSes only had one or two lines. This meant that when all of the telephone lines were tied, you had to wait for someone to hang-up before you could dial-in with your modem to play any games. However, these were the first games that I had ever played online, which had a persistent world and where you could interact and compete against other players online. These online DOOR games were really the precursor to current day MMOs.

Two of my favorites were L.O.R.D. (Legend of the Red Dragon) and Trade Wars 2002. I did a few web searches on these old games for inspiration, and I came across the Wikipedia page for Seth Able, the original creator of L.O.R.D. and in-game bard character. I looked through the list of his projects, and noticed a recent game called Growtopia. I knew I had heard about that game before somewhere. Then I realized that it was on the Ludum Dare website, and Seth Able (now Seth Robinson) is actually a Ludum Dare administrator. I guess the game development community is really a small world after all.

I wanted to use ANSI style graphics, but I knew I didn’t have time to implement a full networked game running through a VT100 terminal, so I decided to go with C and SDL and export my ANSI graphics into PNG images. To get the BBS DOOR game aesthetics, I created all of the artwork in AcidDraw using DOSBox running under Ubuntu Linux. Then I took a screenshot of that image using Gimp, cropped, resized, and then exported to PNG. It was much simpler to do it this way, rather than trying to write a complete VT100 terminal emulator in a weekend. However, I do have all of the original .ANS art files, so those could be used to port my game into a real BBS DOOR game.

Creating ANSI graphics using AcidDraw.

I started out by making the title screen and then the village, which is the hub for the game world. From the village, you can access the Inn, Blacksmith, explore regions, or view stats. I tried structuring my code like my other games, with a game loop that calls an Update event handler and Draw method for each screen. However, since C is not object oriented, I had to make sure that the names for the Draw and Update methods on each screen were unique, so I prepended the screen name before each method. Then in my main game file, I keep a state variable which determines which screen is active, and then calls the appropriate Draw and Update method based on a switch statement using the state variable.

I had two files that contained data structures, which are the Player and Enemy. To keep things simple, I avoided pointers and just had one instance for each. The characteristics for the enemy is loaded when the battle event is activated. It is important to declare the data structure variables as “extern” in any other files which use them, which is something that I had forgotten over the years. All of the structure definitions and function prototypes are defined in corresponding .h header files, which makes includes much simpler when everything is laid out correctly. The only headache is keeping the method prototypes in the header files and the method definitions in the game code in sync. If you add a method parameter or change the method name, you’ve got to change it in both places. I’m thankful that we no longer have to do that in languages like Java and C Sharp.

The game plays much like classic BBS DOOR games. You can rest at the Inn to regain your health, for a small price. The blacksmith will “upgrade your weapon”, but for now it just raises your attack power. I would like to add unique weapons and armor in a future release. On the stats screen you can view your health, gold, level, experience, and points required to level up.

The player starts out with two areas to explore, the meadows and forest. As the player progresses through the game, they will open up new areas to explore with more difficult monsters to defeat. Aside from the monster battle, there are three unique events while exploring: 1) The player can find money. 2) The player can encounter the old woman, who will either heal you or steal some of your money. 3) The player can interact with the merchant. Buying items from the merchant will open up new areas to explore from the village. Some merchants may refuse to talk to you unless you have a special item to show them. I had much bigger plans for the items acquired from the merchant, but I had to scrap those ideas for the sake of time.

I did learn (or re-learn) a few lessons while making this game, which is my first SDL game since I wrote Legend of Tux back in 2009. First of all I met my old friend the Core Dump, after trying to use an attribute that was set to NULL. Then after I thought I was done with the game, I noticed that the menu would sometimes go blank. After viewing the system processes, I noticed that I had a memory leak. Obviously, a simple game like this one shouldn’t take 2 Gigabytes of memory. I determined that the probable culprit is the method call which creates a texture from a character string, TTF_RenderText_Solid. I’m assuming that the menu went blank because the program ran out of memory to allocate new SDL_Surfaces for the menu text, so it wasn’t able to blit the text surface to the screen. This problem was fixed by calling SDL_FreeSurface on the SDL_Surface containing the text, after it has been blitted to the screen.

Finding memory leaks in Linux and Windows.

After I had the game completed, I wanted to make a Windows version so more people could play it. The most straightforward way of doing this would be to install Cygwin on Windows, and then compiling with SDL on Windows. That’s the way I’ve created Windows exectuables in the past, but it is a hassle to have to switch operating systems to do a secondary build. Therefore, I thought I would try my hand at using a cross-compiler to create the Windows binary under Linux. I found a good tutorial on Ryan “icculus” Gordon’s website, which explains how to build an SDL cross-compiler on Linux. First, I installed mingw32 for Linux from the Ubuntu Software Center. Then I used the install script from the tutorial. It was helpful since it automatically installs almost everything you need, however it does mess up some of the directory structures. For instance, the “i586-mingw32msvc-sdl-config –cflags” command puts “SDL” in the -I (include) parameter. In my code files, I include “SDL/SDL.h”, so having “SDL” in the include parameter will generate numerous compiler errors because it will be looking for the headers in “include/SDL/SDL”. I could have fixed this by changing the includes in my code files to just “SDL.h”, but that would have broken the compile for the Linux build. Therefore, I just explicitly put the output of “i586-mingw32msvc-sdl-config –cflags” as the compiler parameter, removing the extra “SDL”. The other problem with the installer script is that it put all of the optional SDL library headers (like SDL_ttf.h and SDL_image.h) in the “include” directory, so I had to move all of those up to “include/SDL”. See the Makefile included with the source code if you want to see the final compile command for Windows.

I really enjoyed this project, since it brought back memories of the games that I played back in high school. It also made me thankful that programming technologies have evolved over the years.

Play ANSI_GFX_ADVNTR now or watch the gameplay video with my commentary below.


Bomb Squad Day One

With the first day of Ludum Dare 27 almost complete, I have made a good start on my entry Bomb Squad. The objective is to disable as many bombs as possible before they explode. When a bomb appears, you have 10 seconds to disable it.

bombsquad02

I originally planned to have the player enter a sequence of wires to cut to disable the bomb. Implementing this wouldn’t be too difficult, but the problem would be displaying the wires to cut to the player. I would rather not have to display a sequence of buttons over the bomb, but trying to display small wires on a bomb would make it too hard for the player to see the sequence. I thought about having a popup view display whenever the player gets close to the bomb, which would show the sequence. However, I decided for now just to color the entire bomb with just one color that needs to be disabled. I think this is a good design decision, since 10 seconds is not a lot of time to run over to the bomb and disable it, especially with multiple bombs active at the same time.

The controls are simple, with the control stick and arrow keys moving the player. Once the player gets close to a bomb, the countdown number will turn green, indicating that it is the bomb that the player is trying to diffuse. If the player enters the correct color, then the bomb is diffused. The mapping between colors and the game pad buttons and keyboard keys are displayed in the upper right corner of the screen. If the player selects the wrong color, then the bomb will explode and the player’s suit will take damage. If the countdown reaches zero, the player will also take damage if they are near the bomb.

bombsquad03

The amount of damage the player will take is dependent upon how close they are to the exploding bomb. If the player is directly on top of the bomb, then their suit will take 20% damage. The player takes 2% less damage for each world unit they are away from the explosion. The player will also be thrown backwards from the explosion, using Unity’s create explosion force method.

Last night, I created three tracks using Garage Band on my Mac system. In my opinion, it’s a little more difficult to use than Pxtone Collage, but it has better instrument samples. However, most of the instruments sound like John Tesh new age music. I also recorded some voice samples, which announces the title, game over, and level complete. Using Bxfr, I created sounds for the bomb exploding and a beep for disabling the bomb. I’ve always had problems getting 3D sound working, but I was able to get it to sound right by changing the volume rolloff in Unity from logarithmic to linear. Now explosions on the left will come out of the left speaker, explosions on the right will come out of the right speaker, and the volume will correspond to how far away the player is from the explosion.

So what’s left? The terrain textures are really blurry, so I really need to fix those. I haven’t had this problem in the past, so I think it must be due to using as 1024×1024 texture size. I will try recreating it will a 256×256 texture. I tried changing the tiling options for the texture, but it didn’t help. I would also like the touch up the player model, since I think the arms are too long and the hands are too big. There also needs to be more contrast in the suit, since it’s hard to tell the difference between the dark blue and gray. Also, the model needs to be scaled down in Blender to about half the size, since I have to scale it down in Unity. However, I learned that any mesh or scaling changes in Blender can really mess up the model, especially if it has already been rigged, animated, and texture mapped.

I would also like to add various “junk” around the play area (like cars, signs, and trees), which can also be damaged by the bombs when they explode. There will be a dollar value attached to each item, and after each level the player will get a total property damage value. The objective will be to keep the property damage value low. However, the physics engine started acting strange when I added a few test objects, by throwing the player up in the air when the player collided with an item. Overall, the player model seems to be stiff as well when it is affected by an explosion, probably because I’m just using a simple box collider for the player. Finally, I need to update the explosions, since I am just using a default Unity particle system right now. I would also like smoke to appear after the bomb has exploded, which could make it harder for the player to see the game area, which would give extra incentive to not let bombs explode.

One other problem is still passing data between scenes in Unity. This is a problem that I’ve always had with Unity, and have solved it before by passing the persistent data to the DontDestroyOnLoad method. However, it is not possible to associate that object with the newly created objects when a level is loaded. I’ve heard that it is possible to pass data between scenes using a player preferences object, so that may be the route that I take to solve the problem. This will be essential to pass the game score data to the level complete scene, as well as incrementing the level number after a level is complete.