Play it Again Sam

Wrapping Up Level Design

Created 20 new levels, which use the 7 and 8 resistors.  Now I have a total of 80 levels.  If each level takes 30 seconds to play, then it would make the total time to play through all the levels 40 minutes.  This is not counting the replay time, which I’m sure some people will want to do to get the best ranks in all the levels.

While playtesting, I noticed a few issues with some of the levels that I have noted:

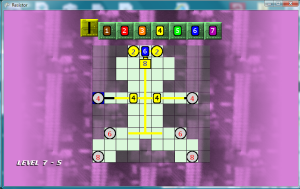
Level 7-5:  The 6 LEDs block the 8 LEDs, so the maximum luminosity can never be achieved.  Either remove the 6 LEDs, lower the 8  LEDs to 6 or below, or add tiles to make the 8 LEDs accessible without connecting to the 6 LEDs.

Level 7-8:  There is no way to activate the 1 LEDs without first lowering the 6 LEDs and 4 LEDs to one.  Again, this makes it impossible to get the maximum luminosity.

Level 7-9:  There is no way to activate the 5 LED without lowering it to four.

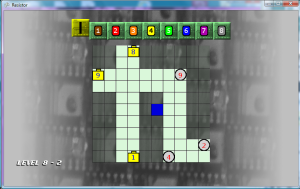
Level 8-2:  Accidentally added 8 and 1 batteries, when I intended for those to be LEDs.


Scales of Difficulty

I still feel like there needs to be something extra in the game.  I did have the idea to add capacitors, encoders, and logic gates, but it is too late now to make major changes in the game engine.  Those will have to wait for Resistor 2.  If I make any changes to the engine (even just moving the starting location of the cursor), then I will have to recalculate the time ranks for all of the stages, which is something I don’t want to do.  I think this is the right level of difficulty to reach the largest player base.  Most players probably make up their mind in about 10 seconds of first starting a game on whether or not the game is too difficult to play.  If the game isn’t easy to pick up, people will put the game in the “too hard” pile in their minds and give up on it.  On the other hand, I don’t want a game that is so easy that players will get bored with it.  This is definitely a delicate scale to balance, and that scale is different for each person.  I would rather error on the side of being too easy, because players may go ahead and play through the boring parts to see if there is something better coming.  If the game is too hard, then people will drop it and never play again.  However, there is a niche out there for very difficult games (Super Meat Boy, I Want to be the Guy), but that is only a very limited number of players compared to the overall pool of game players in the world.

Replay Option Added

One of the things that frustrated me while I was playtesting the game, was that if I did not get the best ranks on a stage then it would automatically send me to the next stage.  I really wanted to play the same stage again, so I could get the best ranks.  This made me have to quit, go back to the level select screen, and then scroll all the way back down to the level I was playing.  This was very aggravating, so on the GameWinScreen I added two options, “Replay” and “Next”.  Next is default, so the player still only has to press the confirm button to move to the next stage.  Pressing left will select “Replay”, which will just load the current stage again, so that the player can try to get better ranks.  These options don’t appear until the game win pause has expired (after all of the ranks have displayed).

This also sheds light on another problem, that on the Level Select screen it can take quite a while to scroll down to the later levels.  In a way, this is a good thing that there are so many levels to display, it takes some time to get to the bottom.  This reminds me of the game “You Don’t Know Jack” for the XBox 360, which had over 70 total episodes, so it took forever to select one of the later levels.  What I really need to do is have the trigger or bumper buttons jump up or down 10 levels on the level select screen.  The benefit of this is minimal, so I probably won’t take the time to implement that feature now.

Menu Backgrounds

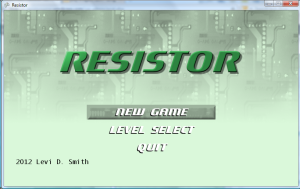
Spent some time touching up the menu selector graphics.  This can really be a time drain, because I can spend hours on the graphics and it still not look perfect to me.   One reason I really don’t like doing graphics is because there is no right or wrong answer.  There’s just people’s preferences, which will be different for each person.  Added the bevel effect for all selectors.  I changed the main menu selector to a box, but I wasn’t happy with the color of the selector.  If it’s too light, then you can’t read the menu text.  If it’s too dark, then it contrasts too much with the rest of the screen, drawing attention away from the title graphics.  Fortunately, I can change the color programmatically, so I don’t have to change the graphic each time in Gimp.  Just as I was about to give up, I used a less saturated shade of green (selected from the scrolling background image), which looks fairly good as the selector color.


I went ahead and changed the font color for the 5 resistor to black, because white was a little hard to see.  Currently, only the 4, 5, and 9 resistors have black text.

Trailer Video

In order to submit this game to the contest, I have to submit a trailer video.  Therefore, I took a shot at making my first trailer video with its own cheesy indie game song.


Blog Cleanup

Went through all the posts in this blog and added categories, so that all of the posts related to Graphics, Engine, Game Saves, Level Design, and Audio can be quickly displayed and accessed.  A Video Update category was also added, to easily display all posts with video content.  Casual and Technical categories were added, so that the casual audience can view  posts targeted towards them.

Simple Change Casues Larger Problem

 Pause Problem

Added a pause screen to the game, which I thought was going to be a simple change.  I created a new class that extended the Screen class, implemented the draw and confirm button methods, so that it just returns back to the game when the confirm button is pressed.  However, when the level ends it uses the time that the level was finished minus the time that the level was started to get the value for the time rank category.  With the pause screen implemented, the time calculation for rank does not exclude the time while the game was paused.  Therefore, I will have to come up with some method of tracking the time when the game was paused, and subtracting that off the game time.  Alternatively, I could re-write all the time based code and just keep a variable that tracks the number of updates in the game level screen since the level was started (since the updates on the level screen won’t be called while the pause screen is active).  I think it is too late for that, plus it depends that each update is really 1/60th of a second which may not be the case, so I’ll just have to keep track of the amount of time that the game was paused, and pass that value to the game level screen class after the pause is complete so it can be subtracted off the total time.  What a pain.

I also had to create a new variable in the main update loop to track the previous screen, because coming from every other state (title screen, level select, game win, game over), going to the GAMELOOP state just required the game level screen to be loaded and set to active.  However, I do not want the level to be loaded if the user is just continuing from a pause.

I created a new method in the PauseScreen class which returns the total time (in milliseconds) spent on the pause screen.  This value is then passed to the addPauseTime method that I created in the GameLevelScreen.  One positive thing from doing this is that I found that the total time was being derived in multiple locations in the GameLevelScreen class.  Therefore, I removed that extra code and then used my getTime method in its place.  I just had to subtract off the pause time, which is now stored in an instance variable.

Added two options “Resume” and “Quit” to the pause screen.  Resume goes back to the level screen and quit goes back to the main menu.  This may be a little misleading, if the player expects quit to completely close the game.  I may have to think about rewording that later.  I was able to reuse much of the display and logic code from my delete records screen.  Also, I was finally able to remove the Back button control from the level select screen, since the player can now exit to the title screen from the pause menu.

Added Effects

Made minor tweaks to the delete records subscreen, to correctly place the selector image.

Also updated the drawPieceSelection method in the GameLevelScreen to give more spacing between the selectable pieces.  Created a new background image for the selectable pieces, using another portion of one of my computer card photos.  By default, the background image uses green as the color parameter, but if it is the selected piece, then it uses yellow and is vertically offset by 8 pixels.  This gives the player a color based and location based change to signify the currently selected piece.

Other Updates

Removed the ability to select Quit on the main menu by pressing the Back button, and changed it to the Cancel button.  Now, the only function that the Back button serves is to delete the records.  I think having this rarely used button only assigned to a critical function is good.  This way, the user won’t get confused between the roles of the Back button and the Cancel button.  This also re-enforces the concept that the Cancel button (and only that button) backs out of a menu.

Added spoon sound effect when moving between levels on the level select screen.  Added the plop sound effect when the user select a level on the level select screen.

I tried putting the star graphic for the star rank in multiple places on the game win screen.  First I placed it at the bottom of the ranks, but it looked like it could have been just for the time rank.  Then I put it under the “Complete” text, but it looked odd there as well.  It also didn’t look very good to the right of the “Complete” text.  Since I didn’t like how it looked in any of those places, I decided to put two stars on the screen which circle around the text in a rectangular pattern.  It also gives more liveliness to a pretty much “dead” screen.

The Game Over screen has also be updated to use the improved graphics, basically by copying most of the code from the pause screen.  It’s easy to forget about updating the Game Over screen, since I actually rarely ever see it.

Found that I could use the Rectangle object in place of the Vector2 object to place a sprite on the  screen as well as size it.  This is perfect for my cooldown overlay, which makes the cooldown overlay size proportional to the cooldown duration left.  That means that overlay shrinks (from bottom to top) as the cooldown period continues.  I’m not sure if the Rectangle scales or crops the sprite, since I’m just using a white block with a black transparent color as the overlay.  This may be sometime I look into if I try to get the animated flow working.

Added 10 more levels to the game, bringing the current total to 60 levels.

Week 6 update video.

Amateur Foley Artist

Gathering Sound Effects

Now is a good time for me to start gathering sound effects for the game.  I could have went to one of the sites that offer free creative commons sounds effects and downloaded what I needed there, but one has to be careful to read the license for each sound effect to ensure that it is covered by a creative commons license that allows it to be included in a work that is sold for profit.  Right now, I’m just creating this game for the contest, but if the game is popular I would be willing to sell copies of it for money (sorry RMS).  I’m trying to make the development of this game as open as possible without sharing the source code, because I believe I read once that sharing source is not allowed by XBox Indie games.  I also didn’t want to make another credits screen, which would be filled up with URLs with links to sounds effects.

My iPod Touch was used for recording all of the sound effects as voice memos.  The sound quality isn’t the best, but it does the job.  I wouldn’t mind going back later and recapturing the sounds using a high quality recording system.  Using a tip that I found on the Internet, I was able to export all of the sound effects through iTunes directly into WAV (MP3 was also an option) so I can edit the sound effects in Audacity.  To change iTunes to export as WAV (default is AAC which is useless), there is a setting under Import CD that must be changed.

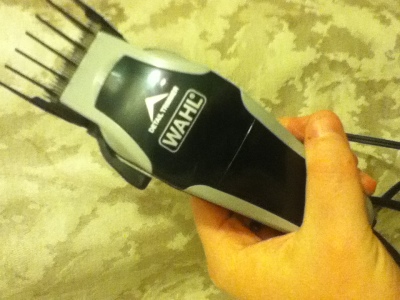
Now is the fun part of capturing sounds.  My clippers and hair trimmers were used to make buzzing sounds.  These can be used for error sounds.


Running water at full pressure almost sounds like electricity.  I doubt anyone would notice the difference, unless they read this post.  Futher modifications in Audacity will also give it a more electric sound.  This will probably be a constant sound that plays as wires are filling.   I think Audacity has an option for making an audio file seamless, so it can be looped multiple times without any breaks in the audio.


Ice makes a nice chrunching and breaking sound, without all the mess of breaking a real glass.  This will probably be the sound when an LED breaks.  I know it should probably be a burn out for fizzling sound, but I think the breaking sound will be more dramatic.


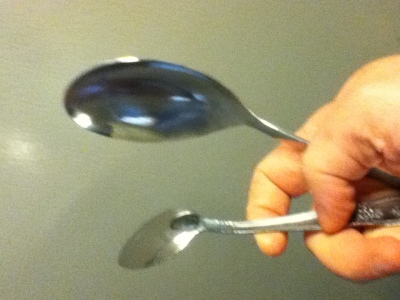
Two spoons were used to make a nice ringing sound.  The spoon hitting the glass makes a longer vibrating ringing sound.  These will probably be used as a confirmation sound effects.


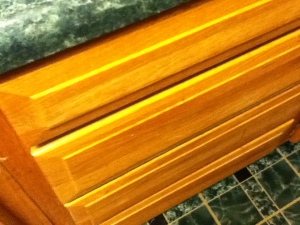
A drawer slamming makes a good sound, which can be used for a cancel event.


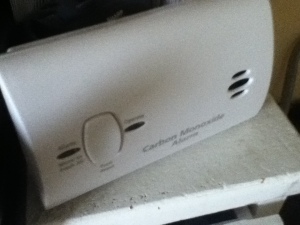
The test on this CO detector makes a nice beeping sound.  I could imagine that sound being used as the ranks at the end of the level are displayed.


I’m not sure if this will make the final cut of sound effects in the game, but a shaken Pepto Bismol bottle makes a great liquid type sound.  I’ll probably find some way of working it in the game.

Background Images

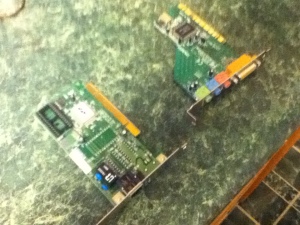
While I was at it, I went ahead and used my iPod Touch to take picutres of an old sound card and network card that I had in storage.  After some touching up in Gimp, these should make great background images.


Minor Graphics and Input Fixes

Set the default cursor position for the level to 5,5 because it really bugged me that the cursor starts off the board on the first level in the upper left corner.  It also minimizes the distance that the cursor must move from the starting position to any other space.  The position of the game board has also been centered on the screen (SCREENWIDTH – (iTotalCols * CELL_SIZE)) / 2, (SCREENHEIGHT – (iTotalRows * CELL_SIZE)) / 2 = (640 – (10 * 32)) / 2, (480 – (10 *32)) / 2.  This is a very helpful formula that I’ve used for centering objects in many games.  Fortunately, I already defined a board offset variable as a Vector2, so I just needed to add that formula to that offset variable.

By simply adding one line of code, I was able to disable the ability to place a piece on a empty space.  I still allow the player to move the cursor to empty spaces, primarily due to the fact that the starting position of the cursor (5,5) may be in an empty space.  This happens on level 4 (donut level) where there is empty space in the middle of the board.

Fixed the resistor graphics so that it can be superimposed over the default wire images.  Increased the maximum pieces to 10 (1 + 9 resistors).  Now all resistors are selectable.  The currently selected piece has a red background.  Later, I will probably make only certain resistors available on each level.  For example, there’s really no point in having a 9 resistor on a level where the maximum battery and LED value is 2.  The selected piece can now be changed by using the left and right bumpers.

Now displaying the selectable pieces at the top of the screen, but I’ve got to be careful that it isn’t cut off on the television screen.  I think I remember reading that 20% of each side of the screen image is not displayed on the television.  Added right/left bumper pressed/released abstract methods to the Screen class, which made me implement it in all the Screen subclasses.  Added methods to increment and decrement the selected piece, which is called by the action button (X) press and the bumper button presses.


Fixed the GamePieceResistor class so that the Elex value can’t be lowered below zero.  LEDs can be activated with a zero value wire, but it won’t add any points to the total luminosity score at the end of the level.

Made minor modification to the level 3 board, so that the last two LEDs are placed further back on the game board.

The Level Select screen now takes the player to the selected level once the confirm button is pressed.

Changed the cancel button to set the selected piece to the wire (index 0).  The Back button now takes the player back to the main menu.  The Back button will probably be disabled, after I create a Pause menu.

Noticed an issue on the XBox 360 that doesn’t happen when running the game through the PC.  If I set the MediaPlayer sound to zero (for mute), then it must be set back to 100 for sound to play through the XBox again.  Just commenting out the line that set the sound volume to zero will still keep the sound muted.

Went through and manually played the five levels that I have so far, and used my score for the S ranks.  I just created values for the A, B, and C ranks, which seemed appropriate.  All these values are stored in arrays in the LevelDefinition class.  I updated the getPieceRank, getLuminosityRank, and getTimeRank methods to return the appropriate values based on the current level.  Forgot that I was passing the time as milliseconds, which took a little while to debug.  Dividing the time value by 1000 before passing it to the getTimeRank method fixed that problem.

Changed the message from “YOU WIN” to “LEVEL COMPLETE” after completing a level.

Removed the fill frame number from currently filling cells.