
Over the Christmas holiday, I’ve been working on wrapping up the Turn Back the Clocks 4 game for my Dream Build Play 2017 entry. The three things that I planned to accomplish were creating more levels, XBox Live integration, and updating the leaderboards.
Creating additional levels was my first priority. Fortunately, with my level parser code, making new levels is a trivial task. I use a text editor (Notepad++) to lay out all of the clocks, mines, and slot in each level. For the first level, I wanted to just introduce the player to the main objective of the game, which is activating the clocks. So the first level is just filled with clock objects. The other two mechanics in the game are the bonus wheels and mines. I wanted to introduce these to the player each in a separate level. I decided to introduce the bonus wheel in the second level, because I consider it to be a positive stimulus. If you hit the slot target with a ball, then you get the bonus well. Therefore, I introduced the mines in the third level, since it has a negative result. Hit the mine with a ball and it explodes. Using text files to lay out levels has worked really well in my other games. It eliminates the need for a bloated level editor and the levels can be quickly and easily changed. The downside is that there is only so much information that you can store in a single character. However, it works well for games like this where the objects don’t have any additional properties.
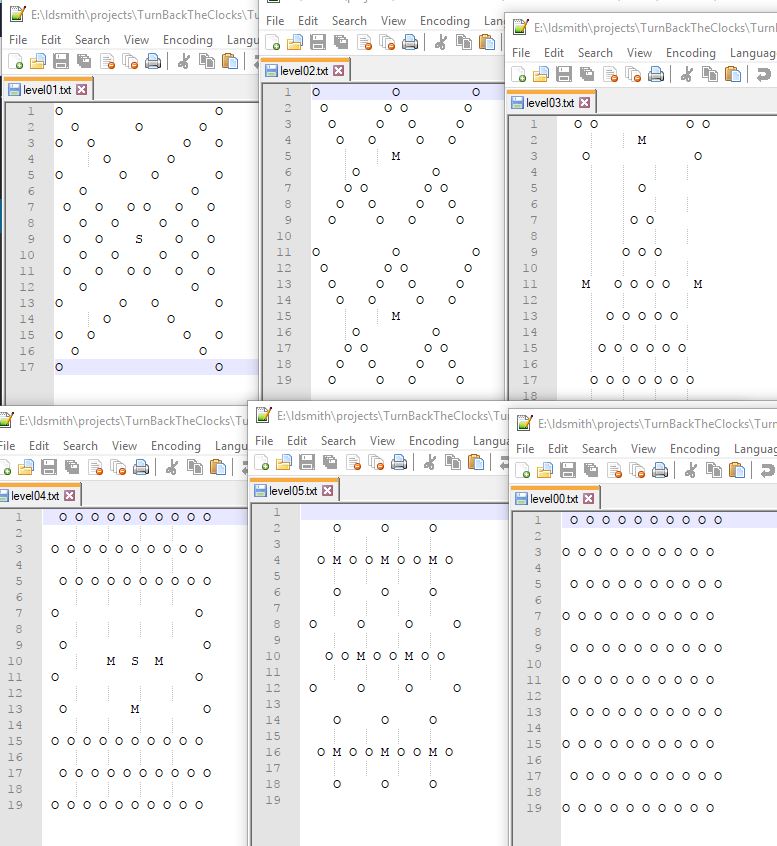
The one thing that I really considered when making levels was the amount of interactivity between the objects in the level. Some levels I had to rework just because it was possible to shoot a ball to the bottom without it hitting anything. Another problem arose when I would have a bonus slot on the level without anything above it, so that the player just needed to line up the cannon with the slot to get the bonus every time. With a lot of the levels, I had to do a lot of trial and error by playing each one multiple times. I didn’t want the bonus wheels activating all of the time, but I didn’t want it to be so hard that that it was rarely activated. I tried to make it so that the bonus was activated about once each time the level is played. Due to time constraints, I currently have six levels, which feels about right for this competition. I had originally planned to make twenty levels, but I think the player would have a good understanding after six levels. After the competition is over, I would like to go back and add more levels.
I wanted to fix the leaderboards in the game, so that the scores were stored on a per level basis. Currently, the game calls a PHP file on my server with the player’s name a score as parameters after each level is completed. To separate the scores by level, I would need to modify the scores table in my MySQL database to add a column to hold the level number. This wouldn’t be too difficult, but I would also need to rework the PHP code to accept level number as a parameter. Also, it appears that I may not be able to send an HTTP request to my server when my game is deployed on the XBox One. I’m guessing the UWP applications may be sandboxes from contacting any external servers. There is a way to store scores for a leaderboard using the Microsoft infrastructure, but I really haven’t gotten a chance to try it yet. If I do eventually use the Microsoft leaderboard services, I would definitely have to consider modifying my code so that I could switch between using my server or Microsoft’s leaderboards. It seems like it should be possible, since I would just need to add an “if” statement in my Leaderboard class to control where the name and score data is sent.
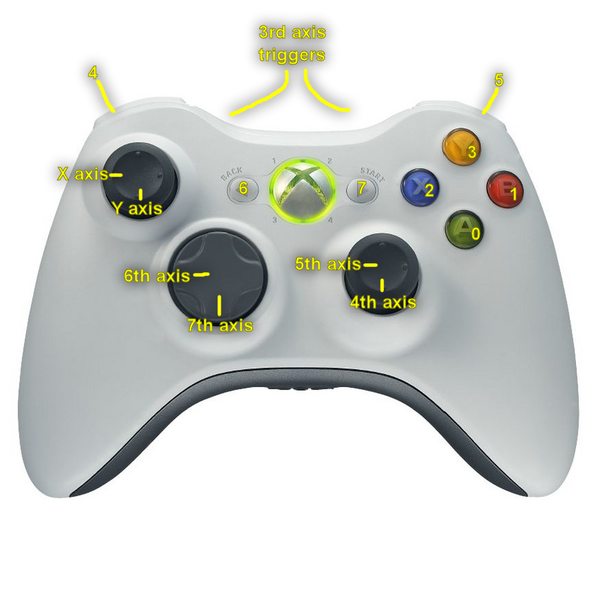
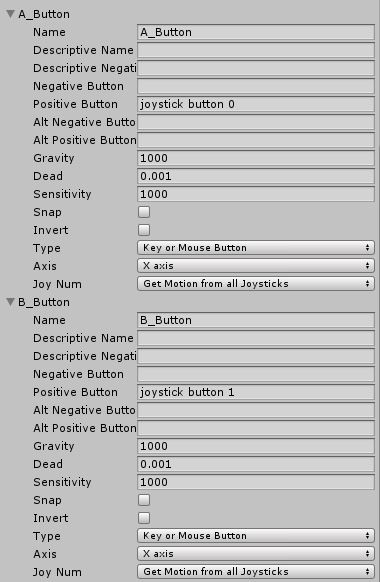
The most important change that I needed to make was adding the XBox Live services. Actually, I believe I could submit my game as a Windows 10 desktop app and not integrate XBox Live. However, it is required to publish to the XBox One Creator’s platform. I’ve been through this process before with my first XBox’s Creator’s game, Kitty’s Adventure. The first thing that I do is make sure that the game is playable with an XBox controller. To do this, I had to add additional button mappings in my Unity Input settings. I added virtual buttons for each of the colored buttons (A, B, X, Y). I found this diagram a few months ago, which is a good reference for how each button on the XBox controller maps to each joystick index. I noticed in the past that when a Unity game is deployed on the XBox One, the UI controls don’t seem to work. So to get around this, I add button icons next to each of the Unity UI buttons, and then write Input handler code, which calls the same method that is executed from the button press action.
The rest of the XBox Live integration involves little actual programming. The general steps for XBox Live enabling a Unity game can be found in the Windows Dev Center documentation. Of course, the build target must be set to UWP, which generates a Visual Studio project. Here are some pitfalls and gotchas that I’ve experienced from this game and my previous game.
- If you get a message like “failed to process xbox live directorynotfoundexception”, then change the Scripting Backend from IL2CPP to .NET. This should also fix the problem with Unity C# Projects not being selectable on the build window.
- Before deploying the game in Visual Studio, make sure that Master x64 is selected in the configuration box dropdown. If I remember correctly, if those two settings aren’t selected, your build will fail with the local certification tool.

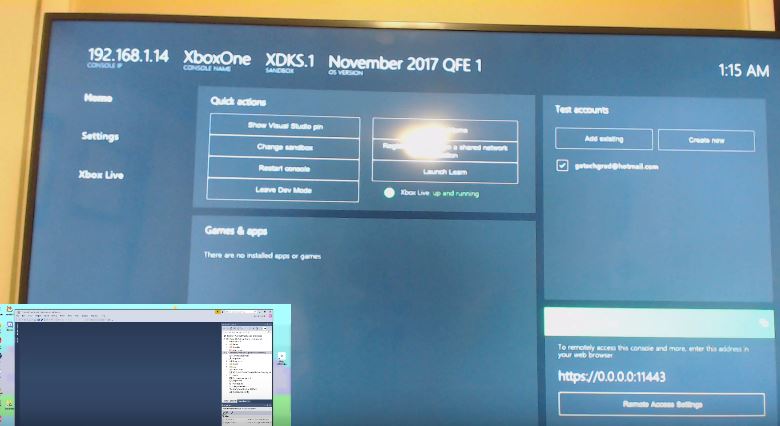
- When deploying to XBox One in developer mode, make sure that your XBox is connected by a wired networking cable. It won’t work if your XBox is just connected by WiFi. If it doesn’t display an IP like 192.168.x.y (it’s something like 0.0.0.0), then plug in your XBox One to the same router as your development PC with Visual Studio. You may also have to restart the XBox One as well after the wired networking has been connected.
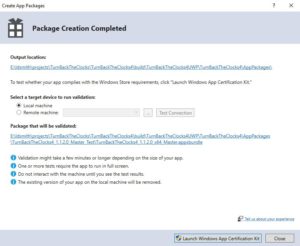
- To build an appxupload package to upload to the Windows Developer site, you have to choose Project > Store > Create App Package. It’s really important to note that in the Solution Explorer you must have the line with the name of your project plus (Universal Windows) or below selected. If you have any line above selected (such as Assembly-CSharp) selected, then the Create App Package will be disabled in the menu. I spent quite a bit of time figuring that out.

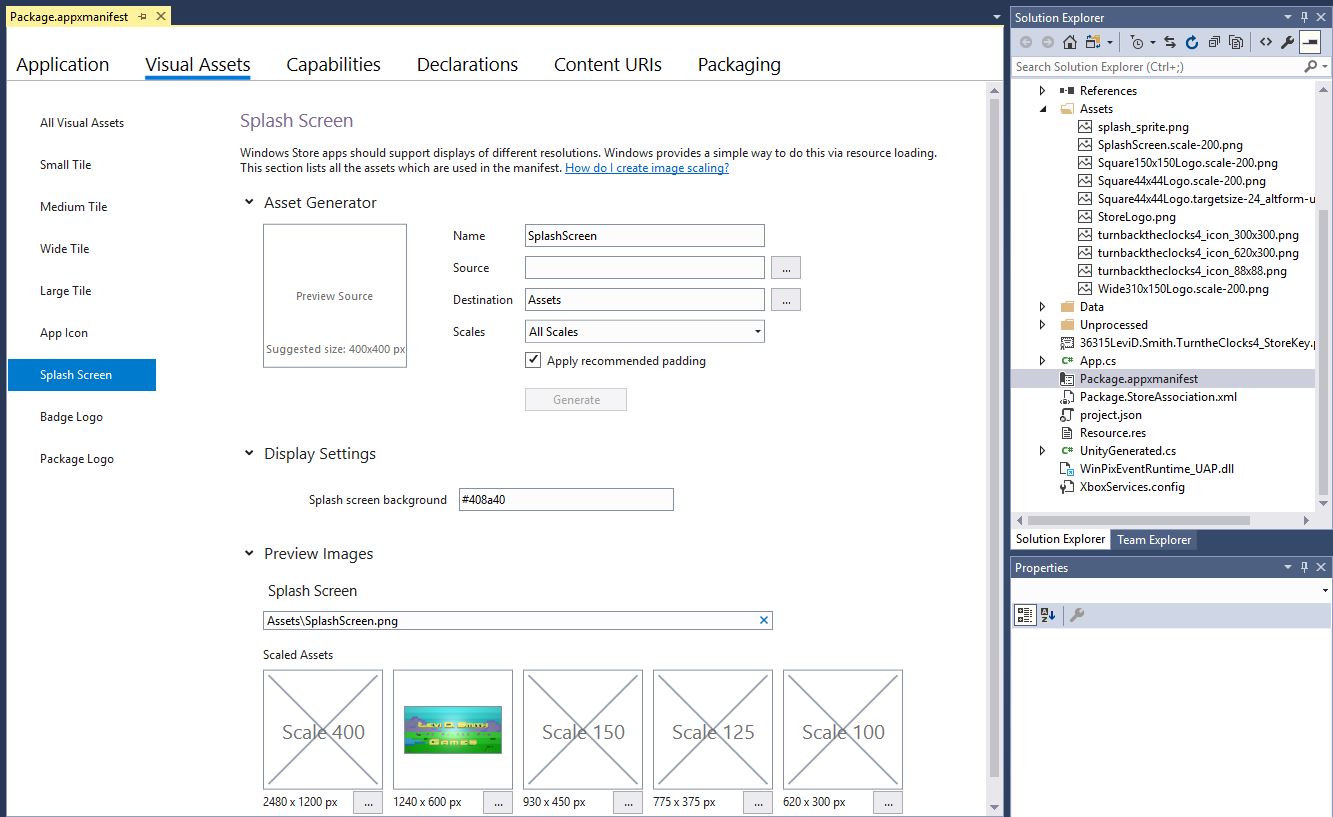
- If you want to change the default splash screen (I think it’s a white screen with a gray box and “X” by default), the select the Package.appxmanifest in the Solution Explorer, select the Visual Assets tab, select Splash Screen and set select an image for the 1240×600 px image. You can also set the background color as well under Display Settings. I used Gimp to select the green color from the bottom of my splash screen image, and then selected the color editor to get the hexadecimal value, which I copy and pasted into the Splash screen background field in Visual Studio. You can also set the other images as well, but it is possible to set those on the Windows Developer site before submitting your game for certification.

- On the Windows Developer site, make sure to go under Services > XBox Live and press the Enable button for the Creator’s program. I actually had a problem with this page going into an infinite load when I used the name “Turn Back the Clocks 4”, however it would work for my other games. Trough trial and error, I narrrowed the problem down to the words “Turn Back”. Therefore, I just named my game “Turn the Clocks 4”, and then set the name on the XBox enable screen to the correct name.
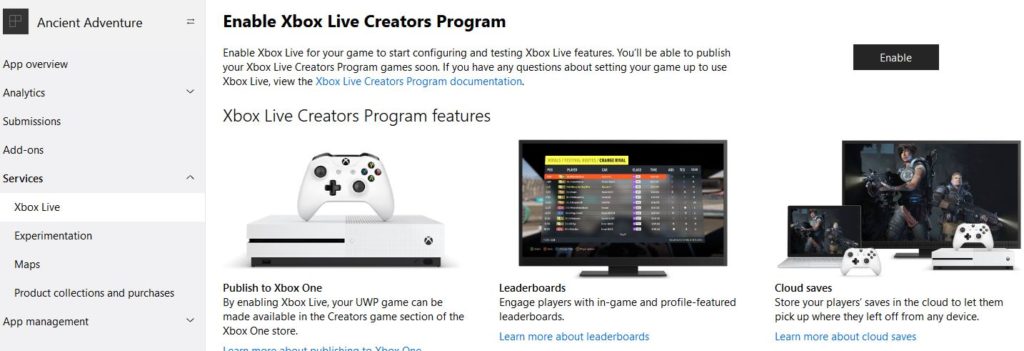
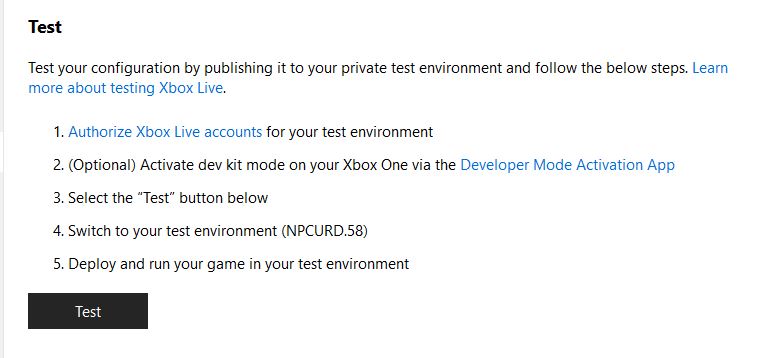
- Before submitting the game’s package, it is important to run the Test on the XBox Live screen. Otherwise, you will get an error about a missing XBox Configuration when you try to submit the appxupload package.
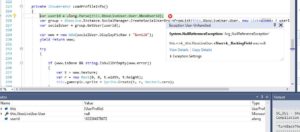
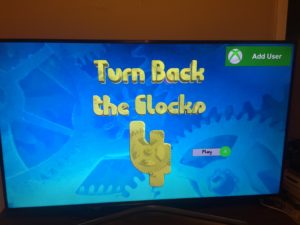
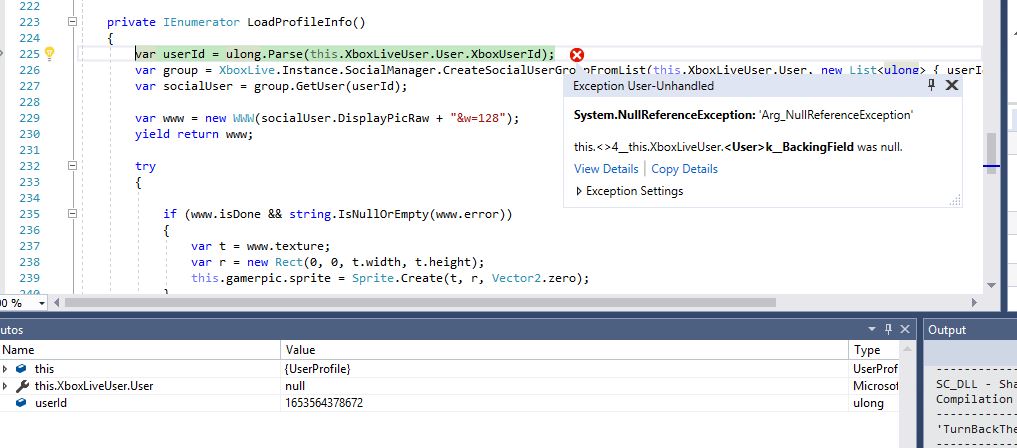
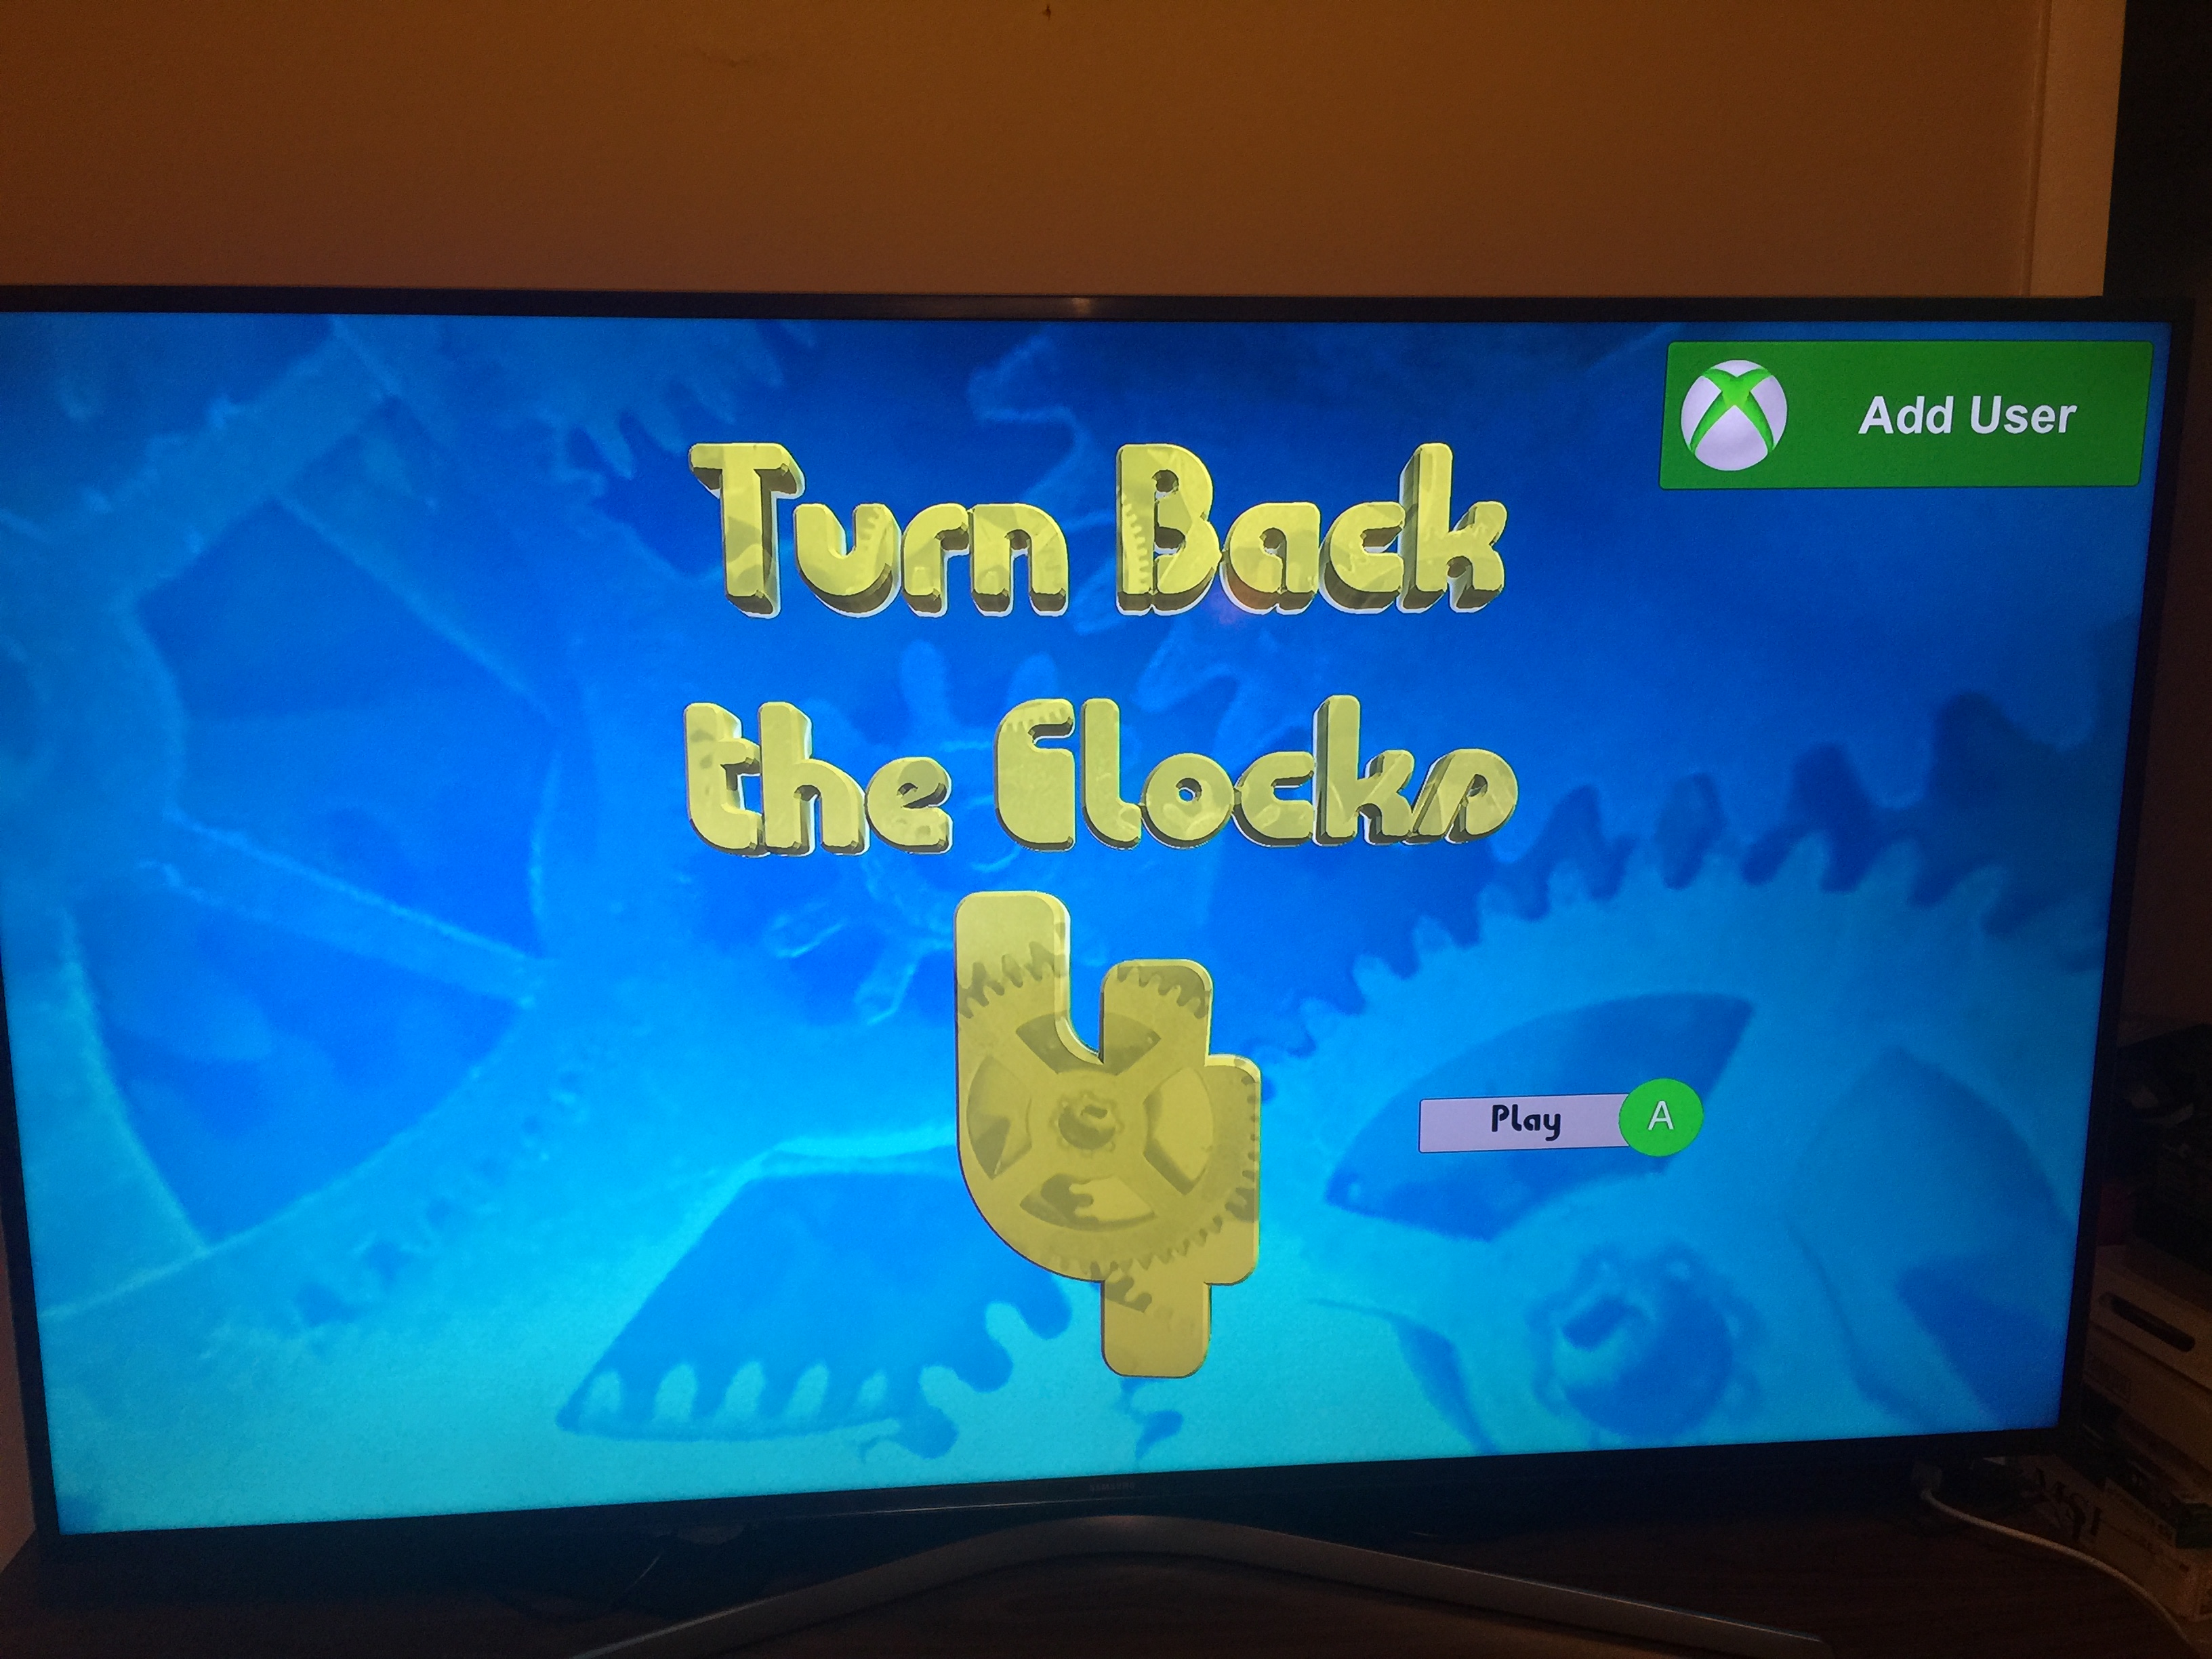
- When deploying to the XBox for the first time, I always seem to get a NullReferenceException on the userID assignment line in LoadProfileInfo. I can press the Continue button in Visual Studio, and it will proceed with no problems. However, it just displays the Add User button on the title screen when the game starts on XBox One. I think this is the same thing that happened with my Kitty’s Adventure game (it was called veto error), and gamertag display works correctly after it is deployed to the marketplace, but it doesn’t work when deployed through on XBox One in Dev mode.
- Whenever building using the Master configuration or making a Windows Store package, it’s time to go make a sandwich. It takes a really long time. I haven’t timed it yet, but it feels like it takes about ten minutes or longer each time.


After going through all of the steps, I was able to build the package to upload on the Windows Developer site. It passed the Certification tool as well. However, it must also pass a second certification after it has been loaded to the site, which I think may actually be reviewed by a real person. As I’ve learned with my previous game, it is possible to pass the local certification tool, and then fail the certification after it has been submitted to the Windows Store.
