Shape Quest

Shape Quest

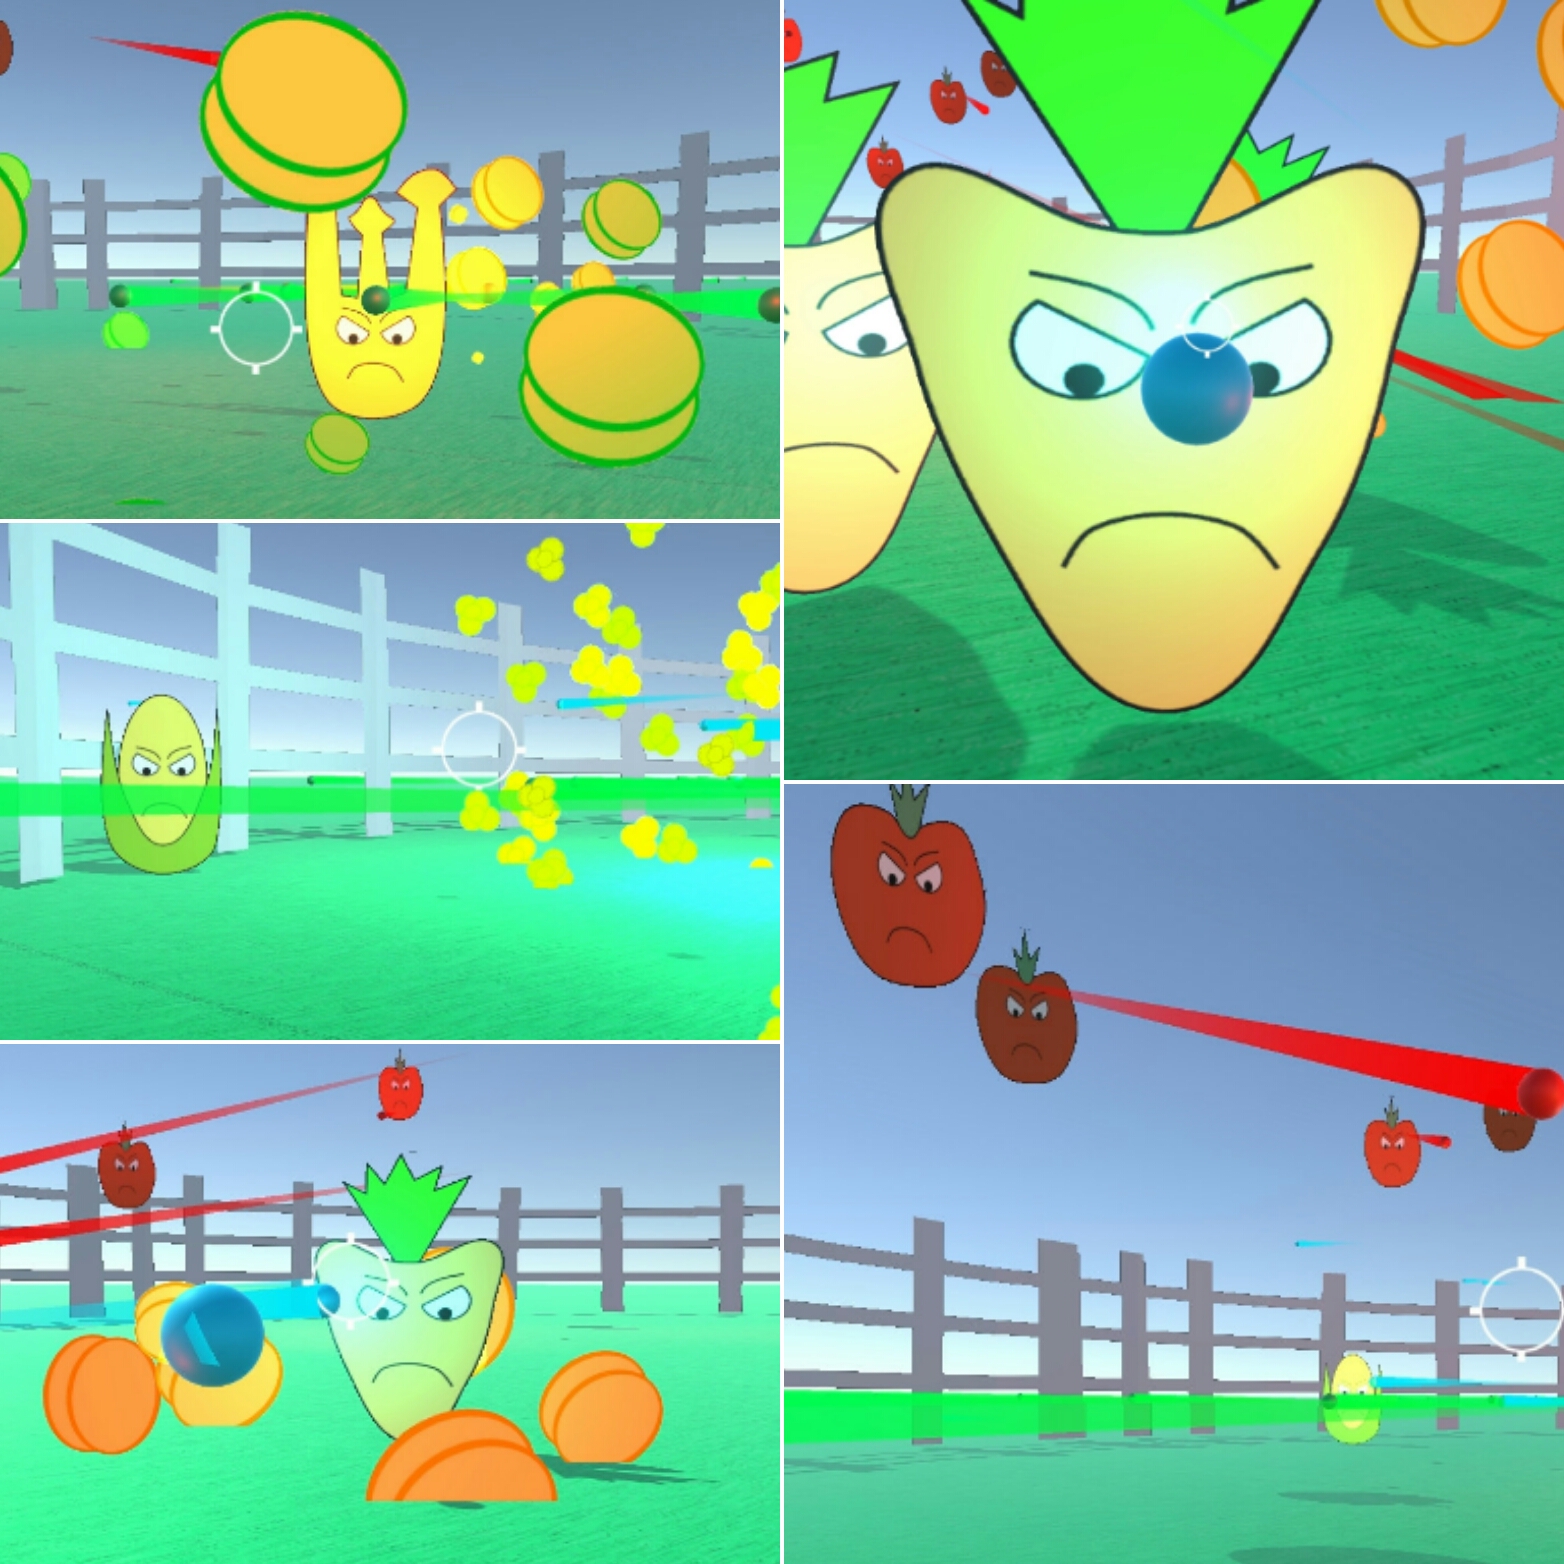
Help Mister Square save Shape Land by returning the super spinning power artifacts. Avoid touching all enemies.

Shape Quest Official Videos

Post Mortem

Ludum Dare 35 was my tenth time participating in the full Ludum Dare 48 hour game development competition.  The theme this time was “shapeshift”.  I knew fairly early that I wanted to make a game with controllable shape characters.  My original idea was to have three shapes that you could switch between, and each shape would have a unique ability or power.  I had envisioned having three playable shapes, which were the square, triangle, and circle.  The gameplay was going to be similar to Trine, where the player would need to switch between the three to solve puzzles.

I wanted to take a break from Unity and create a game in some other engine this time.  I had heard a lot about Godot, so I planned to use that engine for this competition.  Godot is a free and open source game engine that is very similar to Unity.  Before the weekend, I worked through some Godot tutorials, so I was able to move a simple sprite around on the screen.  In Godot, instead of GameObjects, it has Nodes which have similar properties such as position, rotation, and scale.  Godot can be used to make either 2D or 3D games.  It has a scripting language that is very similar to Python, where tabs and spaces are significant.  Unfortunately, I wasn’t ever able to fully understand the physics system.  In Unity, physics is fairly simple.  You attach a RigidBody component and one (or more) colliders to your GameObject, and then you are good to go.  In Godot, there are three types of physics objects (KinematicBody, RigidBody, and StaticBody).  Your object has to have a CollisionShape or CollisionPolygon as well, and everything has to be parented correctly under your main object.  It was very confusing, especially with the bounding boxes, and it just never did work correctly for me.

After about four hours into development, I knew I wasn’t going to have the time to successfully make a game in Godot.  Therefore, I fell to my backup plan which was to make a GameMaker game.  I had heard a lot of bad things about how GameMaker handles things like collisions.  Although, I have been impressed with some games that I’ve played recently, such as Crashlands, which was created in GameMaker.

Shape Quest GameMakerFortunately, most of my initial development was creating the vector graphics for the game characters, so switching to GameMaker didn’t sacrifice too much work.  I had worked through some GameMaker tutorials before, but this was my first time creating a full original GameMaker game.  The GameMaker development environment is very similar to Stencyl, which I used to create Dream World for Ludum Dare 30.

All of the graphics were created with Inkscape.  I made a simple tree, which was composed of the union of three circles for the leaves, and a simple path for the trunk.  I created other obstacles such as rocks (rounded gray rectangles) and water (curved blue bezier lines) I created a red square, green circle, and blue triangle characters, which all had two frames of walk animation.  I had originally envisioned the heroes to use an additive color model, while the enemies used a subtractive color model (magenta, yellow, and cyan).  I abandoned that idea, since a yellow circle looked much better like an emoji.  I created a purplish trapezoid as the first enemy.  I also had the idea of making the heroes parallelograms with sides of equal length, while the enemies would have sides of unequal length.

Shape Quest InkscapeWhen I first started designing the movement of the playable character, I used the default GameMaker actions.  The problem with this method, is that the character is stopped whenever one of the movement keys is released.  So the player could be holding two movement keys (such as up and right arrows), but the player would completely stop whenever either of those keys are released.  For instance, the character would expect to keep walking right if the up key was released.  Also, with the default GameMaker movements, the chacter would move when the key was initial pressed, and would pause for a moment before it would continue moving.  This is similar to typing into a text document, when a key is held down.  First it adds the character, then pauses, then repeatedly adds the character multiple times.

To resolve this, I found a tutorial on making a platformer in GameMaker, so I just modified that method to work with a game in overhead view with no jumping.  This method keeps track of a horizontal a vertical movement speed, and the speed values are modified based on which keys are held down.  Now, the movement controls felt much more accurate and responsive.

Now that I had everything necessary to create a level, there needed to be a goal.  I made a simple cyan diamond as a crystal.  To differentiate it from the other world objects, I made it spin and flash between cyan and white.  Adding custom scripts to GameMaker objects is fairly simple, and the GameMaker API is well documented.

The first enemy that I created was the purple trapezoid.  It simply just moves vertically on the screen until it collides with an object, then it reverses direction.  When the player collides with an enemy, the player is returned to the starting position.  If I had more time, I could have added a health meter so the player wouldn’t have to restart after being hit just once.  I gave the enemies angry faces with two frames of animation, which reminded me of the boxer profiles in Mike Tyson’s Punch-Out!!.

The second enemy that I created was the yellow circle, which was modified from my previous green circle hero.  I just had to remove the arms and legs.  The yellow circle just moves in a random direction for two seconds and then changes to a random direction and moves for another two seconds.  This behavior is very easy to create in GameMaker, and I had remembered implementing the behavior in the “Catch the Clown” tutorial that comes bundled with GameMaker.

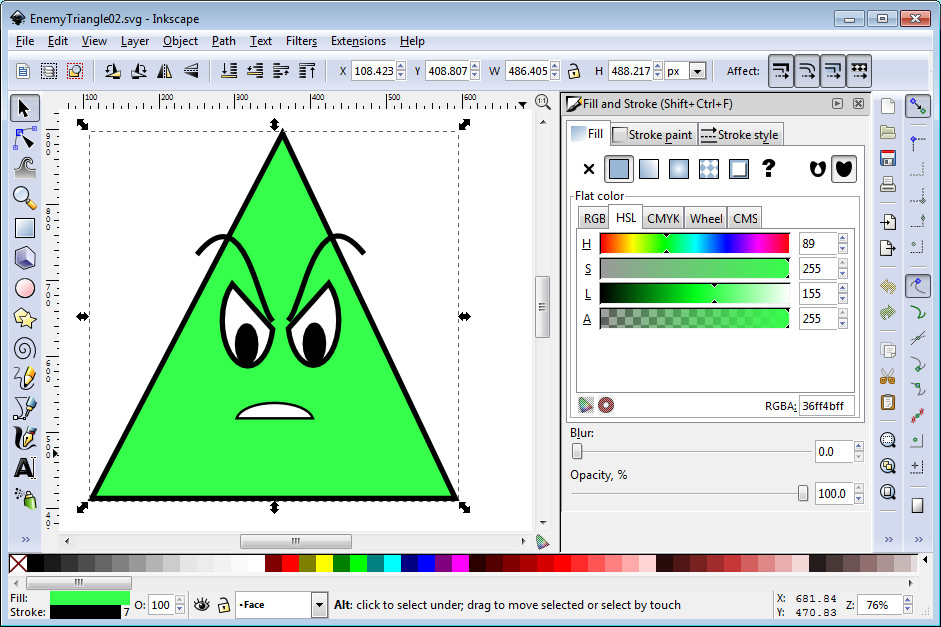
The third character I created was the green triangle.  I wanted this to be a water dwelling enemy that shoots projectiles at the player.  This behavior is similar to the Zora in the original Legend of Zelda.  If the player stands in one position for too long, then they will be shot, so the player has to keep moving to stay out of the line of fire.  The third level becomes more difficult with four green triangles shooting at the player at once.

The final enemy that I created was the orange pentagon.  Originally, I had made the pentagon cyan, but I thought that would be too confusing with the cyan crystal goal, so I changed the color.  The orange pentagon shoots in four directions at once and randomly changes location after every shot.  These characters are similar to the Wizzrobes in the original Legend of Zelda, except they shoot in four directions.  Their projectiles can be easily avoided, as long as the player doesn’t stand directly horizontal or vertical from one of the orange pentagons.

For the music, I used GarageBand again on my MacBook Pro.  A few weeks ago, I had read an article on Gamasutra about music theory, and to watch the number of steps and skips, so hopefully my music sounds a little better for this game.  I usually try different instruments until I find something that sounds good.  I use the command + left mouse button to add new notes to the piano roll.  I’ve found that it is much easier to modify the lengths and positions of the notes in Piano Roll editor than the Score editor.  I used the C major key, so I just made sure I just stuck with all of the “white keys”.  Overall, I think it took about an hour to create the music.  Like I’ve done with my previous games, the title screen music is just the game music slowed down with some of the instruments modified or dropped.

Shape Quest audio
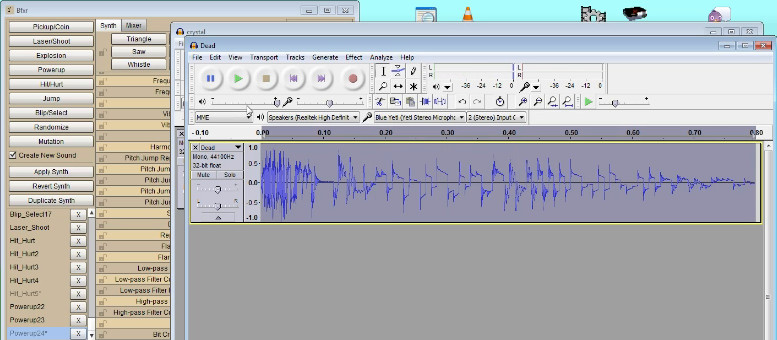
I used BFXR for creating the sound effects when the player is hit or when the crystal is collected.  I used Audacity for touchup work.  I also recorded my voice again for the title screen and game complete screen.  I used Audacity to add a bit of an echo sound.  Unfortunately, my voice sounded a little faint against the background music, and I never found a way in GameMaker to make it louder.

There are many ways the game can be improved.  First, I would like to give the player a method for attacking the enemies.  I would also like to have a way to move from room to room, instead of collecting crystals.  I would also like to have various items, money for purchasing new equipment, and many more enemies.

Finally, I played the game MANY times to ensure that all five levels were completable and also not too easy to finish.  I made both Windows desktop (EXE) and HTML5 (web) builds, and uploaded to Itch.io and GameJolt.  I think the Windows build is the better experience, but I know some people only prefer playing the web version.  It just seems like there is more lag and dropped frames in the web version.

Overall, I was happy with the simple game that I was able to make in GameMaker.  I really appreciate everyone who has played it already.  It already has over 60 votes, which is by far the most votes of any of my Ludum Dare games have received.


Let’s Play Videos


Released

Mutant Veggie Arena

Veggies have been exposed to radiation which has caused them to mutate and become angry.  In Mutant Veggie Arena, you must stop the mutant veggies from taking over the world!  Turn the carrots, corn, tomatoes, and celery into chopped salad!

Mutant Veggie Arena

Mutant Veggie Arena Post Mortem

For my Ludum Dare entry this time, I decided to create a first person shooter style game involving giant mutant vegetables for the “growing” theme.  Based on view counts, my first person shooter that I developed for the 7dFPS a year ago is by far my most successful game on Itch.io.  However, for that game I used existing assets from the Unity Asset store.  For this game, I would need to create everything in under 48 hours.
DOOM programming gurus
A few days ago, I started playing some of the old FPS games that I owned as a teenager.  The first FPS games I ever played were Wolfenstien 3d and DOOM II on my 386 computer. Back then, the 3D graphics were revolutionary compared to the sprite based games on 8-bit consoles.  Soon after playing those games, I picked up a “Tricks of the DOOM Programming Gurus” book from the computer store.  As I began learning how to make DOOM levels, I learned that all of the enemies and items were sprite based.  The sprites are just turned toward the player, which keeps them from appearing flat.  This technique is called billboarding, and it is used in games for saving on processing power for numerous low resolution objects, such as a crowd in a football stadium.  Long time DOOM players will notice that the level names in Mutant Veggie Arena are parodies of the original DOOM difficulty levels.

For this Ludum Dare, I wanted to focus on gameplay and AI.  I spent the entire first day just working on making the engine and configuring the enemy behaviors.  I saved all of the enemy graphics, sound effects, and music for the second day.  This was risky, but I’ve found that I can spend more time than needed on the artwork if I do it first, since I can be a perfectionist at times.  I used Unity and Playmaker again for this entry.  I’m really starting to feel how to make the right balance between Playmaker and Unity scripts.  All state management is handled in Playmaker as well as simple calculations (such as subtracting a constant value from the player’s health).  However, anything more complex is more easily handled in a Unity script written in C sharp.  The method can be called using the “Call Method” action, and then pulling the script component from the assigned object to the “behavior” slot on the action parameter.  The only problem is that a FSM on a prefab can only call methods in scripts assigned to other prefabs, and non-prefab FSMs can only call scripts assigned to objects that are not prefabs.  In the example below, I call the isLevelComplete method in the LevelManager script that is assigned to the LevelManager object.  This is because I must count the total number of object with the “enemy” tag, count the number of enemies that are in the queue to be spawned, and compare that to zero.  To do that calculation in FSM would require multiple actions and multiple states, but calling the script accomplishes the same in one method that returns a bool value.

Call Method behavior

Since making the models for my games is always a crunch for my Ludum Dare games, I decided to use a similar approach to DOOM for my entry this time.  The enemy colliders are capsules, but the display is handled by a child plane object with the enemy image texture applied to it.  The capsule mesh renderer is removed and a LookAt action is applied so that the child plane is always facing the player.  It is important to remember to set the transparency of the texture to the alpha value, and for the generated material to have the shader changed from “opaque” to “transparent”.  Otherwise, the enemy will appear to be on a black plane.

Getting a simple FPS up and running using Unity and Playmaker is relatively easy.  There is a “MouseLook” action which handles making the player’s view follow the mouse.  It is important to remember to set the Y sensitivity to a negative integer to give it standard FPS controls.  Otherwise, it will have airplane joystick styles controls where moving the mouse down will move the player’s view upward.  It is also important not to use “MouseLook2”.  Unfortunately, I thought that was the correct one to use (it limits how far you can turn right and left), so I lost valuable time trying to get that action to work.

Mutant Veggie Arena gameplay

The targeting reticle is a simple plane, that was placed 10 units in front of the player.  I learned from previous experience that just simply changing the mouse icon isn’t the best solution, since it can sometime appear jittery.  The reticle object is parented to the player, so it always stays in front of the player on the Z axis.  To keep the reticle from disappearing when behind an object (such as the ground), I used the text shader which usually makes it draw on top of everything else.

I created a LevelManager game object for handling the loading of each level.  For each level, I populate and enemy ArrayList with Prefabs pointing to each of the enemy types.  At regular half second intervals, an enemy is pulled from the ArrayList, instantiated, and then removed from the ArrayList.  The number of enemies displayed on the screen is calculated from the total number of game objects with the “enemy” tag (found with GameObject.Find(“enemy”).Count) plus the remaining size of the enemy ArrayList.

I wanted to have a unique behavior for each enemy.  The carrot was the first enemy behavior that I created.  The carrot has the simplest AI, as he just moves towards you.  Originally, I had it so that when the “MoveTowards” action completed, the carrot would “attack” by simply subtracting a certain amount from the player’s health (add a negative value using the “Int Add” action).  However, this caused some problems like it not handling the player running into the enemy, so I changed the player damage to an “On Collision” event.  This triggers a “damage” event on the player FSM.  Unfortunately, this limits the player to taking the same amount of damage from every enemy, since an event can’t take a value as a parameter.  One of my complaints about Playmaker is that you can’t pass a parameter with an event.  I could have a “damage” event and state for every enemy type, but I don’t think that is a very elegant solution.

The corn enemy is stationary, but unlike the carrot, it will shoot projectiles at you.  I had to use the “Look At” action again to ensure that the projectile is initially moving towards the player.  Then the projectile just simply moves in a straight line by translating along in the positive Z axis in self coordinates.  I had envisioned the corn enemy being like a turret in other FPS games like Team Fortress 2.

The tomato is the one flying enemy.  I was proud of how this enemy turned out.  I had a flying FSM which raises and lowers the tomato as he reaches a maximum or minimum value on the Y axis in world coordinates.  However, I wanted this enemy to rise more quickly than he falls.  This makes the enemy appear to glide downwards.  This enemy also forces the player to act differently by pointing aligning the reticle vertically instead of horizontally.  The tomato does not move horizontally, as I thought that would make shooting him too difficult.

The final enemy that I implemented was the celery.  This enemy moves to a random position, pauses, and then shoots in eight directions at once.  This was the most complex of all of the enemies.  I had to write a function which returned a random position in the arena based on a range parameter.  To shoot in eight directions, I kept a rotation variable, and for each projectile I instantiated, I added 45 (degrees) to the rotation variable.  Then, each projectile was rotated by that value.  It is also important to not spawn the projectile inside of the enemy, otherwise it will instantly collide and bad things will happen.  The eight way shot actually looks a lot better in the overhead Scene view than the FPS view.  I was thinking about having a replay mode at the end of the level which shows the action from different perspectives.

Aqua Teen

On the second day, I focused on the graphics and audio.  Since I was going for a cartoon style, I used Inkscape for making the enemy vegetable graphics.  To save time, I used the same eyes and mouth vector graphics for all of the enemies.  I used the free form pen tool to create the paths for each of the vegetable bodies.  I set the stroke size to 4 pixels to give it a classic cartoon look with a thick black outline.  I exported each of the enemies to a PNG file, and then applied those textures to the enemy planes. I had envisioned that the enemies would look like something out of Aqua Teen Hunger Force.

When the player is hit, I use the camera fade action to make the screen go temporarily red.  The fade is a little faster when hit by a projectile.  When the player dies, the screen slowly fades to red.  The wave number and name are two GUI Text objects that are enabled on the start of each level.  After five seconds, the GUI Text object is disabled.  The level names are returned by a function containing a switch statement that returns a String, which takes the current level number as a parameter.

I used GarageBand on my Mac again for composing the music.  There have been a few changes to GarageBand since the last time I used it, and many new instruments have been added.  I was going for a classic sci-fi movie type music, and I think I was able to achieve that with the synthesizer instruments.

bubble sound

All of the sound effects were recorded myself.  The grunts and groans were my own voice, with the pitch slightly lowered and an echo effect applied.  The gun shot was me blowing into a straw submerged into a cup of green tea.  I used Audacity to crop out the unneeded portion of the audio.  The enemies were also my voice, with the pitch raised and echo effect added.

While I was impressed with what I was able to develop, there are a few things that need to be improved or fixed.  Here is a list of issues that I would resolve if I develop this game further.

  • Sometimes the targeting reticle gets hidden behind very close enemies.  I may be able to modify the layer settings to make it appear in front of the enemies at all times.
  • Enemies far away sometimes appear behind the arena wallsfence problem
  • If you look closely, you can see parts of the transparent areas of the enemy plane.  I may need to check the texture and material settings.
  • I really wanted to have a rectangular health meter instead of a number value.  This should be achievable using two GUITexture objects.  One for the meter background and one for the health bar.
  • I would like to have multiple images for each enemy.  I definitely think there should be a “damaged” image when the enemy is shot.
  • The enemy damaged sound effect needs some work.  I tried making it higher pitch, but I still think it sounds too much like the player being damaged.  Add different sound effects for each enemy.
  • Particle effect when the enemy is killed.  I was thinking about having the corn enemy explode into many popcorn pieces.
  • New effects for projectiles.
  • The arena needs some work.  Maybe have different arenas or levels instead of the one circular arena.
  • A gun model and different types of guns.
  • Powerups (more damage, auto fire, etc).
  • Sometimes the health goes to a negative value.  When the player dies, the health is clamped to a low of zero, but this needs to be handled sooner (as the player is damaged).  If a meter is implemented, the negative value would cause problems (health bar would be displayed backwards?).
  • Make some enemies take multiple shots before being killed.
  • Have a replay after the level is completed which shows the arena from various camera angles.  This will require that I actually make a character model.  Also, the billboarding effect for enemies would need to be modified, otherwise the enemies will look like flat planes.
  • Needs a better “story”

Weird Al

In conclusion, I was happy with what I was able to create in 48 hours.  Actually, according to my streaming video statistics, I only spent about 12.5 hours making this game, which is probably lower than the amount of time that I usually spend on a Ludum Dare entry.  However, I think my Unity, Playmaker, Garage Band, and overall game development skill have improved a lot over the last three years.  Therefore, I am able to create a lot more in less time.  After my first Ludum Dare entry about the Amish and this entry about food, I’m starting to feel like the Weird Al of video game development.

Videos

Mutant Veggie Arena Let’s Play Videos


Released

Monster Hotel


Monster Hotel

Overview

All of the monsters in Monsterland stopped by the local bar for a few drinks after a hard day of monster work.
Since drinking and driving is not permissible in Monsterland, the monsters need to find their way to the Monster Hotel to stay the night.  As the owner of Monster Hotel, you need to help the drunken monsters find their way to your establishment.

All monsters coming out of the bar are boogey men. Use your powers to transform the monsters to make their way to the Monster Hotel.

Wolf Man – Can dig through ground
Vampire – Allows the monster to land softly from a long drop
Frankie – Blocks other monsters from proceeding

Post Mortem

The game uses the same basic mechanics as the  Lemmings game that I first played on the SNES.  I remember Nintendo heavily promoting the game at the time, as it was featured on the cover of Nintendo Power.  In 48 hours, I knew I couldn’t implement all of the different Lemming abilities.  Therefore, I just picked three of the ones that I remembered.  Those were the digger, the floater, and the blocker.

For this game I used Tiled for generating an XML file containing the positions of the blocks, as well as the entry and exit positions.  The TMX file has to be renamed to TXT and placed in the Resources folder to be able to assign it to a TextAsset which is used by my UnityHelper XmlReader script.  Then the Prefabs are assigned to the script, which does the job of instantiating the Prefab objects at the correct positions.

I created an object which spawns the units at regular intervals.  The units will keep walking in a straight line until they collide with a wall.  I used a capsule collider for the unit, and I set the local Z velocity to a constant value on every frame.  When the unit collided with a object with the wall tag, I would rotate the unit by 180 degrees, which would make the unit walk in the other direction since the local Z is now pointing in the opposite direction.  Unfortunately, it would also detect a collision when the capsule collider touched the ground.  To fix this, I added a box collider in front of the unit which does not touch the ground and fires a trigger when it hits something with the wall tag.  By using a trigger, I ensure that my box does not react to the world physics.  I also added a similar trigger event so that the units reverse direction when bumping into each other.  Otherwise, the units would start stacking on top of each other.  Ideally, I would have the units pass through each other, but that problem would be too difficult to solve under the time constraints.  To keep the units pinned on the Z plane, I set the rigid body constraints on the Z position.

Another problem arose when the trigger box hits two wall blocks at the same time.  This would change the direction of the character, and then immediately change it back to the original direction.  To fix this, I added a small amount of delay to the trigger state so it would only fire on one trigger events.
The digger simply stops and starts digging a hole below his current position.  I determined which block to remove by shooting a ray downward from the unit’s position.  However, this really didn’t create a hole big enough for the units to fall through.  I used the position of the block removed and casted a ray to the left and right of that position, and destroyed the adjacent blocks as well.

The floater unit prevents the unit from dying after a long fall.  I added another collision event which compared the force returned from a collision, and if it is greater than a certain value (force of falling more than three units down) then it would destroy the unit.  When I was testing this, I never noticed the units dying, so it seemed like I was losing units for no reason.  For that reason, I spawned a particle effect where the unit was destroyed.  I just used a standard particle effect, but I wish I could have made a goopy style splatter.  To obtain the floating effect, I simply increased the drag value on the unit’s rigid body.
The blocker was fairly easy to implement.  When that ability is activated, I just increased the mass of the unit so that other units can not push it.  I also set the movement to the standing state, similar to the digger, so that the unit stays stationary.

I increased the available ability types by one for each stage.  That way, the player is not presented with all of the abilities at once.  Using the new ability type is essential for completing the current stage.  If I had more time, I would have liked to had more levels, and levels that would require using a combination of abilities to complete.

I saved the modeling and graphics for last.  In some of my past entries I would spend too much time on the modeling, so this would force me to do it quickly.  Since this is a monster theme, I decided to use a different monster for each ability.  The default creature is the boogeyman, since I think of the boogeyman as being any type of creature.  The Wolf Man is a digger because I think of canine type creatures as diggers.  I made the floater a vampire, since bat type creatures can fly.  I made the blocker a Frankenstein (shortened to “Frankie”) since he is big and immovable.  I wish I could have made a morphing effect when transitioning between abilities.

I used Blender for making the character models. I created a simple half outline in Gimp, and then I used that outline to form my models using loop cuts, resizing, and translating vertex positions.  I created a simple six bone armature and created a simple walk animation in the dope sheet action editor.  I then unwrapped the mesh using the “from view” option which makes painting the texture model much easier (although there is more stretching around the sides).  I exported the layout in the UV editor and painted the texture in Gimp.  I did mess up once by not separating the front and back layouts, so my creature had eyes in the back of its head.  Separating the back layout wasn’t too difficult, so I just had to draw the back side of the creature.

The boogeyman that I designed is just a simple imp type creature.  I used the same mesh for the wolf man, but I gave him pointy ears and I elongated his snout.  I tried giving the vampire wings, and used white face with a black rope with red trim.  I had “the master” from Manos: The Hands of Fate” in mind.  Frankie was given a blocky head and body, which was done by modifying the mesh.  I wasn’t going to spend the time modeling bolts into the side of his neck.

I modified the animations slightly for the monsters.  The vampire flaps his wings.  Frankie holds out his arms and twists his head in a similar fashion to the blocker in Lemmings.

I updated my GarageBand software to the latest version earlier in the week, and I used it on my Mac laptop for composing the music.  I used a B minor signature for composing the music.  I used some organs which sounded creepy and kept modifying the notes until it sounded okay.  I made another similar track which was a little slower for the title screen.

I recorded my own voice making howling, “blah”, and grunting sounds for each of the monster types.  I lowered the pitch and added echo effects to make the sound effects seem more creepy.

Overall, I am happy with what I was able to accomplish in two days.  This entry definitely feels more “gamey” than my previous Ludum Dare entries.  The biggest weakness of this entry is probably the lack of levels, since I only have three and ran out of time to make more.  I will probably make a short trailer and throw it up on Steam Greenlight to see what sort of response it gets.


Released