File Saving Madness

Save Game

Staying true to being a ripoff of Java, C Sharp makes saving files extremely painful just as Java does.  I just want to save the player ranks and the highest level completed, which would probably be 5 to 10 lines of code in Ruby.  This is more confusing in Java, since two or three different writer classes must be created.  In XNA and C Sharp, the method for saving files is poorly documented.  There is some documentation from Microsoft on saving files, but the code is really fragmented on the page, it doesn’t explain where some of the core objects (like StorageDevice) are created, and I could never get the XML serialization to work even though I imported the  XML/Serialization references multiple times and have all the requried “using” statements in the class headers.   They do include a ZIP file of example code, but it doesn’t include the necessary references, and it is really spaghetti code because it tries to perform every single file operation known to mankind in one class file.  Therefore, it becomes an Easter Egg hunt to get it working.  The NeHe tutorials are a good example of how to properly write code tutorials.  This thread gave some additional insight on how to write save game files, but as one poster mentions it is not compatible with XBox360.  Found another tutorial, which seems to be simpler to follow since it doesn’t include all of the XML serialization, which is really overkill for what I’m trying to do now (just writing integers to a file).    This is also becoming very aggravating because it never explains how to actually get a handle to a StorageDevice instance.  These examples  just show the StorageDevice object being passed as a parameter.

Now I know how this guy feels.

So after about an hour of debugging the example StorageDemo code, I was able to get it working in a new game project (still can’t get the [Serializable] error to go away, no matter how many includes that I have, so I just commented it out).  I’m starting to think that it is not possible to display a device selection screen in an XBLIG (XBox Live Indie Game), because I don’t remember any other XBLIGs having a device selection window.  Also, I checked my XBox360 System storage settings, and there didn’t appear to be any data associated to any of the Indie games that I have played.  I know at least two of the Indie games I’ve played have had save capabilities, but maybe it was not done through the standard XBox storage device select interface.  Maybe the device selection capability is blocked in Indie games, just as the Achievement system is blocked.  The Indie games that did have saves either made saving ubiquitous or they have a custom designed save screen.  Ubiquity is great, and that is definitely the saving approach I want to take if possible.  The only problem is that it prevents the player from wiping their data from the System dashboard menu, if the player desires to start the game fresh.

Triumph

So after 4 good hours of reading unhelpful message threads, poor examples, and endless debugging, I was able to develop a solid method for saving text data to a file.  This works for both XBox360 and Windows.  The code is below.  This is ALL that is required!  I don’t have a CLUE why something this relatively simple was made so complicated in the examples!  My code could be improved by adding the ability to read multiple lines (instead of using just one single line).  Comments are welcome to improve this code, but this works for me so I’m not changing it unless there is a REALLY good reason.

Update:  I’ve learned that using a callback method with BeginShowSelector is the best way to read and write to a file.  Also, not specifying the PlayerIndex for BeginShowSelector makes things much simpler, because you don’t have to worry about if the player is signed into a profile. 

Important:  Also required is a call to  add a GamerServicesComponent to the Components collection in the constructor of the main game class.
   this.Components.Add(new GamerServicesComponent(this));

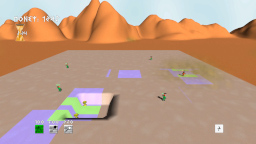
So it’s hard to capture the saving ability in a screenshot, but I now have the save method just writing the maximum level completed to the file.  Below is a fresh instance of the game started, with the max level data loaded from the save file and displayed on the screen.  The max level data was written to the file in a previous game instance.

Ambiguity

Multiple Wire Problem

Noticed a problem that doesn’t happen too often, but when it does it is really annoying.  This is when you place a wire (or resistor) next to two filled wires with different flow values.  For instance, if I place a wire where the blue square is in the first image below, then what flow value should the new wire get?  Should it be a 3 from the left wire or a 5 from the right wire?  Remember, this is my puzzle/arcadey game rules, and not a real simulation so I get to make up the rules.  Currently, it just uses the value of the first check in the if/elseif/else block.  However, this is ambiguous to the player, because the player can’t determine what the value of the wire placed will be.  That’s unless they’re clever enough to figure out that the cells are evaluated in a clockwise manner starting at the top.  So currently the new wire would get a value of 5 from the right wire.  However, if the wire were placed in the blue square in the second image, then the new wire would get a value of 3.  This was confusing me as I play tested the game, so I’m sure it would also confuse other players as well.


Therefore, in the checkStartFilling method in the GameLevelScreen class, I added a loop that calculates the highest value of all the adjacent cells, and uses that highest value for the new wire.  In the two images below, now placing a wire in the blue square will set the new wire’s value to 5 in both cases, since 5 is greater than 1.  It’s not realistic, but a least the player can clearly anticipate what the value will be now.


Connection Problem

This logically fixed the problem, but the display was still misleading, because it would make a complete loop with two different flow values in the loop.


To fix this problem, I updated the draw method in the GamePiece class to only make connections to wires with the same flow value.   The resistor wires are a little tricky, because it’s difficult to determine which wires carried the flow in and which ones carried the flow out.  Another visual distortion happened when two wires with different values were placed next to each other that only had one joining wire each.  Those appeared to connect since the default image for a wire with only one connection spanned all the way across the cell horizontally.  Therefore, I made wire images specifically for only one connection (N, E, S, W) on each side and an image for a no connection wire ( O ) to resolve this issue.  These new images provide a few pixels for a break padding, so that those wires don’t appear to be connected to pieces that they are not connected.  Now as shown the in the screen shot below, with the updated code and images the user can clearly see the flow through each of the wires, and there is no doubt that the value of the wire in the blue square is now 5.

Game Win Screen Updated

Moved the game win display code to the game win screen, to make it consistent with the other screens.  To to this, I had to pass the piece count, luminosity, and time values to the Game Win screen.  Additionally, I had to pass a reference to the level definition object, so that the rank values can be calculated.  I also added a win delay on the Game Level screen, so that there is a one second pause between the time when the last LED is activated and when the Game Win screen is displayed.

More Level Design

Created twenty new levels (21 to 40).  I purposely designed some of the levels to force the player to use the higher level resistors (2, 3, and 4).  I increase the highest level battery used by one for each ten levels.  One flaw that I’m making in level design is making it so that every tile must have a piece to clear the stage.  Technically, this is fine but the user will always get an S rank in pieces used.  Therefore, I should always include a few tiles that don’t have to be used, so that there is a chance for lower piece ranks.


During play testing, I noticed that one level didn’t have any tiles and only objects.  This was due to me exporting the wrong layer as the tile layer.  Going back and exporting the correct layer resolved this problem.


High Level Resistors

The player now starts out with only one selectable resistor (value 1).  Every 10 levels, the maximum selectable resistor increases by one.  This prevents the player from using a high level resistor to lower the initial wire to zero, which would allow the player to quickly complete the level.

(Gray video distortion fixed. Thanks to tip from SHADEE.)

Spamming not Allowed

Cooldowns

Made another gameplay change today.  The fact that the player could pick a high level resistor and spam it to quickly complete the level was really bothering me.  Thefore, I added an array in the GameLevelScreen class which holds the cooldown value for each selectable piece.  When the piece is dropped, the cooldown value for that piece is set to 2 seconds (120 frames).  That value is decreased by one on each update until it reaches zero, then the user may place that resistor again.  So now the user can still use all resistors, but it will take a really long time to complete the stage, which solves the problem of the player winning the stage quickly if all resistors are used.  Using all resistors will also not give the player the best luminosity score.  I could put in a limit on how many times each resistor can be used, but I think that would over-complicate things.

Active Screen

A new abstract method has been defined in the Screen class, which is setActiveScreen.  This is a method that I already had in the TitleScreen class, but I thought it should be included in all Screen classes.  This method is called whenever the Screen gets set as the currentScreen.  Initialization that needs to be done whenever the screen gets control (such as setting pause values) can be set in this method.  This was going to be necessary for both the GameWinScreen and GameOverScreen, so I thought it was best to have it as a common abstract method.  Those two screens now have a pause instance variable that is set to the wait time in the setActiveScreen method, which prevents the player from bypassing the screen until that pause value hits zero.  This will also allow me to just call setActiveScreen on the currentScreen object once when control is passed, and I won’t have to call that method specifically for each Screen subclass instance.  I already had a setCurrentScreen method defined in the Screen class, but it is not abstract and its job is to set the next screen state to -1.  I think having the setActiveScreen abstract method handle the subclass specific code is best for now.

Title Screen Completed

Added a new background image for the currently select main menu item.  Used Gimp to create a free selection shape on top of one of the computer card images.  Used the color tools to make the image grayscale, and then increased the brightness twice.  Then I applied the bevel filter twice, and drop shadow filter once.  Also gave the currently selected item ‘s font a green color, and changed the font to Motorwerk.  Unless there is a good reason to change it again, I’m considering the title screen done.

 Loose Ends

Made a slight modification to the level complete sound effect, so the pitch gradually raises through the sound clip.

Added delay when an LED busts before moving to the Game Over screen.  The LED is now filled with red when it is busted (could use a cool breaking graphical effect later).