I didn’t do any coding tonight, so I worked some on design and conceptual art. Instead of a development update, I thought I would share the designs that I created from my project notebook since I started working on this project.
I’ll admit that I’m not a great artist, but I think I can do good enough to use as a guide for creating the models for the game. Below is a sketch that I drew tonight that will be the basis for the main character in the game. I still haven’t finalized a name for this character. First of all, I knew that I wanted the character to look humanoid, so I used that as a starting point. The coat is long which almost looks like a cape at the bottom. I may end up removing this due to the difficultly (and my inexperience) of rendering loose cloth. Looking into waving flag models may give me some more insight on how to create that effect. I always hate the sexism in video games debate, so I gave the hero a helmet which allows the player to imagine the hero as a man, woman, alien, or whatever.

The next image contains the notes I made while creating the socket system. This isn’t inclusive of all of the abilities, but it gave me a starting point on how implement the system. It’s really helpful to start on paper, that way I can mark out, erase, and add abilities as I get new ideas.

The level editor was and is still fairly simplistic in design. I will need to modify this design some to handle the location of new rooms. I’m thinking about letting the left thumbstick control movement on the room grid, and letting the D-pad move between rooms. If the user uses the D-pad to move to a room that doesn’t exist, then it will prompt the user to create a new room. There will also need to be some work on how to connect a door from one level to another level. For now, I’m thinking about just having one exit for each level to keep it simple. However, I want to make it so that there are a variety of conditions for unlocking the door. Currently, the player just has to defeat all of the enemies to unlock the door.

Below is the original story concept. Again, I marked out and revised portions to make the story more interesting.

The most difficult part of coding this game so far has between switching between rooms. I could have used a standard tile editor to create the worlds, but those make the game world very limited. My room approach allows continuous scrolling to loop around on a level. Additionally, it also allows the possibility of moving vertically and horizontally between rooms at the same time without a break. Most platformers only scroll horizontally or vertically, which requires a break (such as a door) to change the scroll orientation. Also pictured is one of my notes I made when trying to figure out how to handle placement after collision with a block.


I haven’t started creating the game overworld yet, and that may be left out. Below is some simple notes I made for the overworld, which would allow the player to take multiple paths to complete the game. Each level would be a different part of the computer world, which would use real computer hardware and software concepts. Also included are some of the original abilities that I had planned for the game. The last image shows some of the original level design, but this may change significantly if I scrap the two separate zero and one guns.


I haven’t done much enemy AI programming yet, but I did jot down some simple enemy behaviors as shown below.

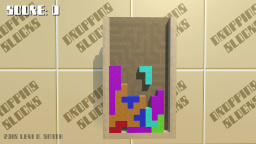
Below is a puzzle that I thought about including, which would require the player to shoot letter blocks based on the ASCII character code. Other puzzles would require the player to shoot switches based on the RGB values. I think these puzzles would be educational, but maybe to difficult or confusing for most players.

Lastly, this is an image of the original design that I created for the game. Almost all of this will be left on the cutting room floor, but I may use some of the binary concepts as puzzles or a minigame.