Indie Game Booth Analysis

Yesterday, I attended the Momocon anime, comic, and gaming convention at the World Congress Center in Atlanta, Georgia.  The convention was well organized and executed for the most part, and I can honestly say that it was a more worthwhile experience than DragonCon (also in Atlanta) for me, coming from a gaming and developer background.  While DragonCon focuses on everything Sci-Fi and Fantasy, ranging from Star Wars to Lord of the Rings, Momocon has a leaning towards all things Japanese and Otaku in nature.

I mostly attended the video gaming related sessions.  The first one I stepped into was Localization of Games presented by Sam Mullen, the Localization producer for Sega of America.  His presentation shed light on many topics relating to translating Japanese games so that they can be brought to American markets.  This covered the process of working with hired translators, incorporating translated text in a game, managing the schedule to account for translation times, and analyzing the outcome scenarios when releasing a game.  He also addressed questions about whether to remain true to the idiosyncrasies of Japanese culture or Americanize the game so that it is more familiar to the American audience.

Another panel that I attended was “Breaking Into the Game Industry”.  I was really disappointed that this was mostly about writing resumes and interviews.  I was expecting a session on how to pitch your game to publishers, how to setup a gaming business, how to market your game, and other things like that.  Later in the day, I attended the Senran Kagura Panel.  While that session was really humorous, it really didn’t go into depth of the game’s development aside from the backstory of the designer Kenichiro Takaki and the design of the characters.  I also wanted to attend “One Man’s Journey Through Animation”, which was presented by Ke Jiang who worked on the PS3 game Journey.  Unfortunately, I was eating lunch during the start of that session and it was already over by the time that I had arrived.

One of the main reasons why I made the trip to Atlanta was to see the Indie game booths at Momocon.  I submitted one of my games for the Indie Game showcase, but unfortunately it was not selected.  Disappointingly, there was no visible mention of the Indie game showcase, but maybe they are presenting the winners at another time (I only attended on Friday).  There were about ten indie game booths on display which wasn’t bad, but it really paled in comparison to the comic and anime booths.  A considerable amount of space was also given to table-top gaming, LAN parties, and other competitive gaming.


Momocon Indie Games
Me entering the Indie Games portion of the Momocon convention floor


Momocon Indie Games The first games that I saw had playable demos on small screens and laptops.  I didn’t see anyone playing the laptop games.  It just seems sort of weird to sit down and start playing on a laptop that isn’t your own.  One laptop with nobody playing isn’t horrible, but when you have four empty computers sitting there it sort of gives the impression that there’s something wrong with your game.  I would recommend just having your game on one system, and if you draw a crowd, then you can always setup additional systems as needed later.  Having too many systems also makes the booth look cluttered.

One problem I saw with many booths was putting a picture of a controller with the button commands on a poster.  That is about as bad as old Playstation 1 games that would display a controller with the commands during a loading screen.  If the controls are not intuitive, then control hints should be provided in the game.


Momocon Indie Games
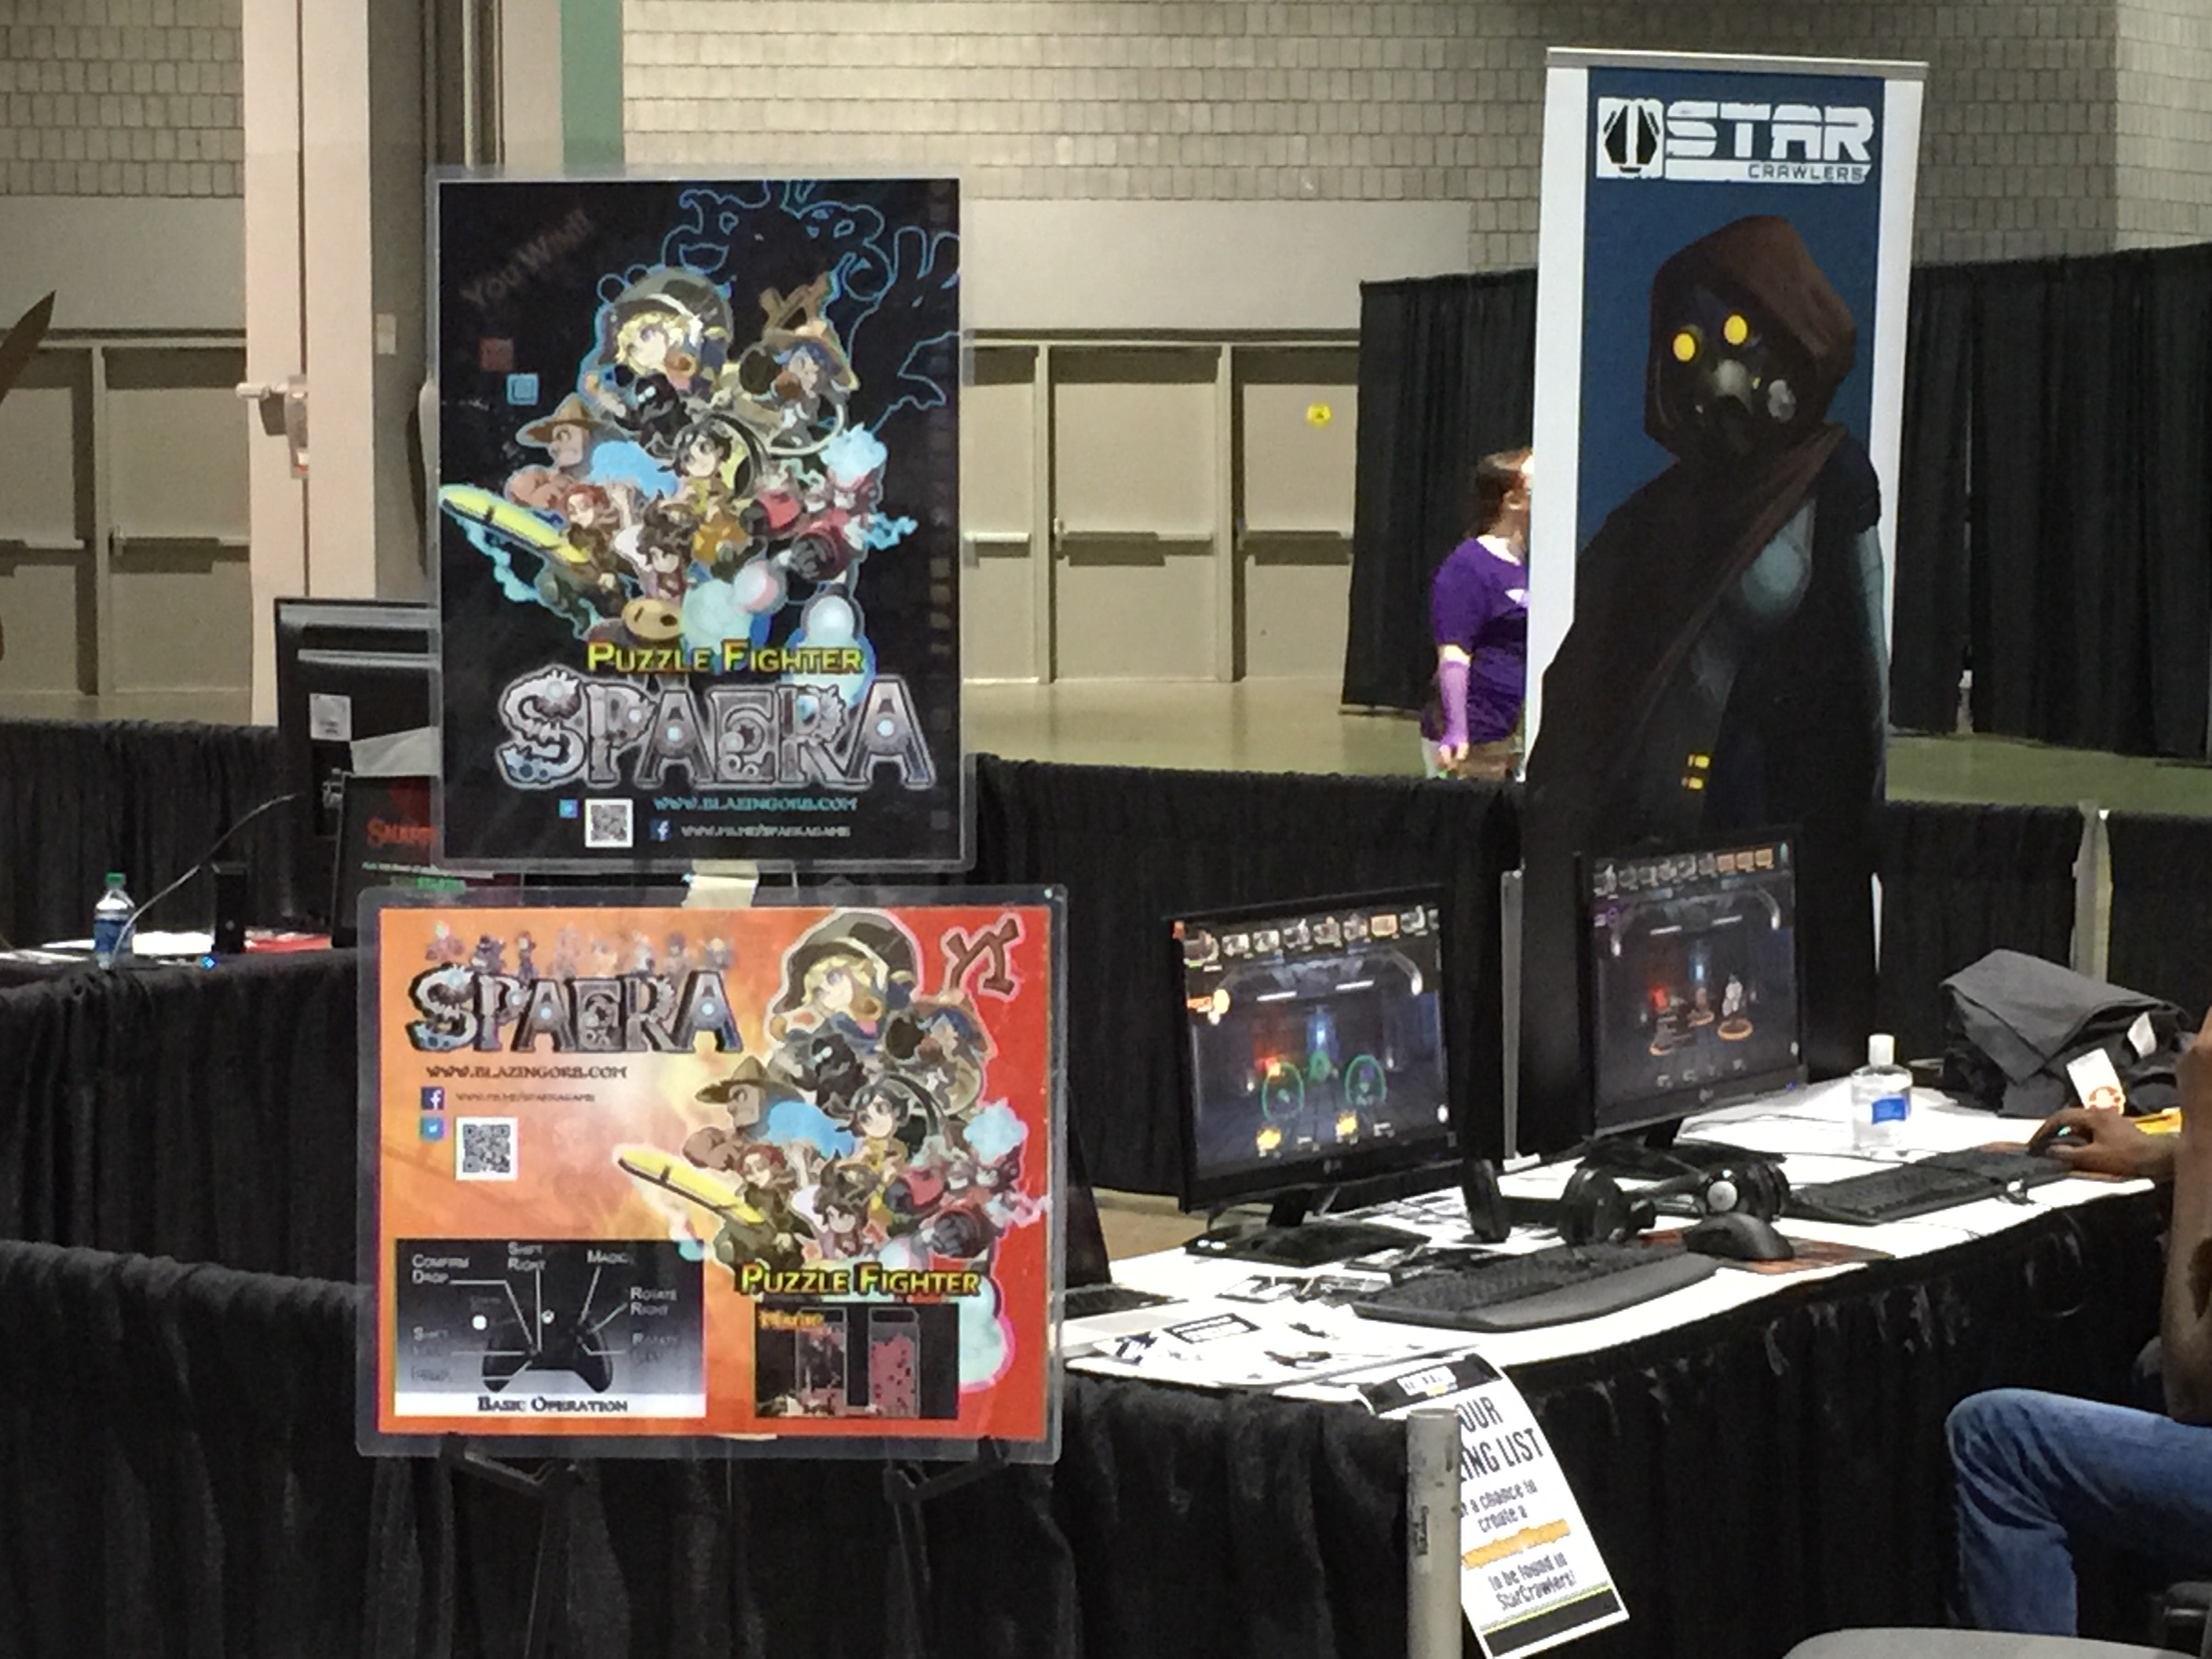
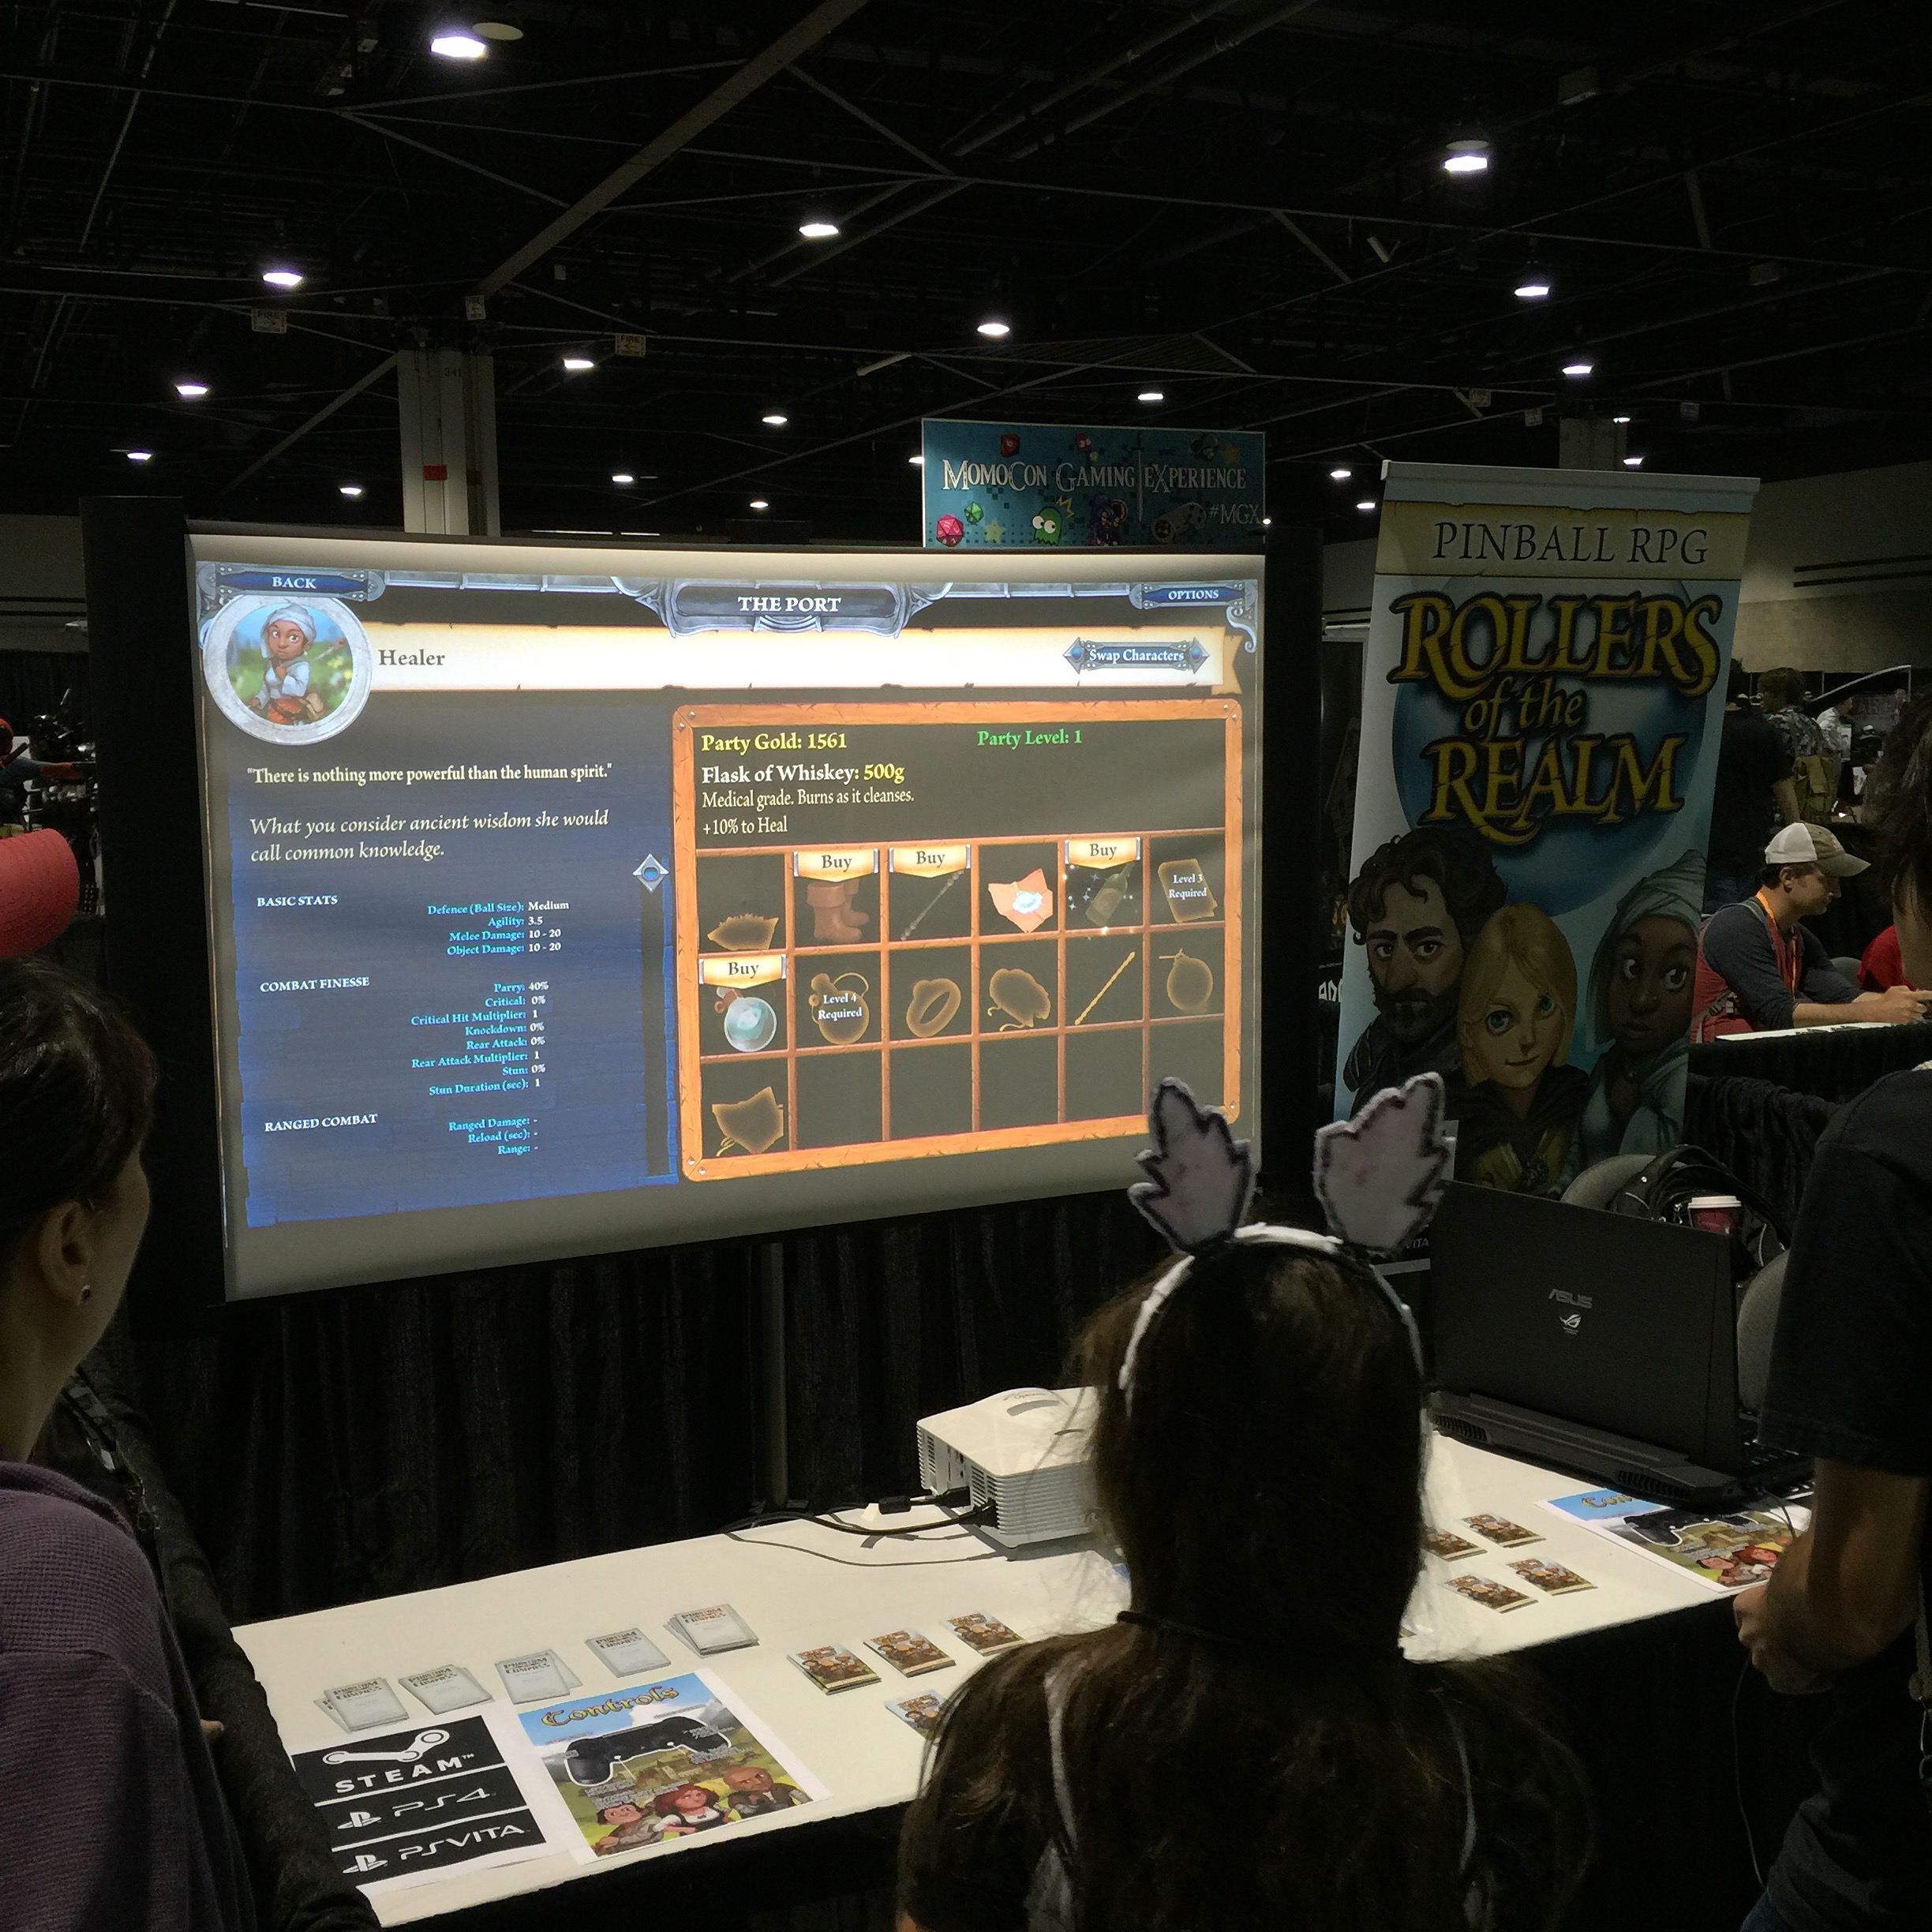
This game was very popular and had an impressive display.  I could immediately see from one of their posters that the game was a cross between pinball and RPG.  I really liked the scroll banners, which were displayed at most of the indie game booths.  A quick search on the Staples website shows that you can have these custom banners made for as little as $40 and up to $70 for the larger sized banners.

This game was displayed with a projector onto a screen.  Subconsciously, I think our brains try to convince us that things that are displayed on bigger screens are better, just based on the larger display.  After all, in these days of HD and 4K television displays, people still go to the movie theater to get that “big screen” experience.


Momocon Indie Games
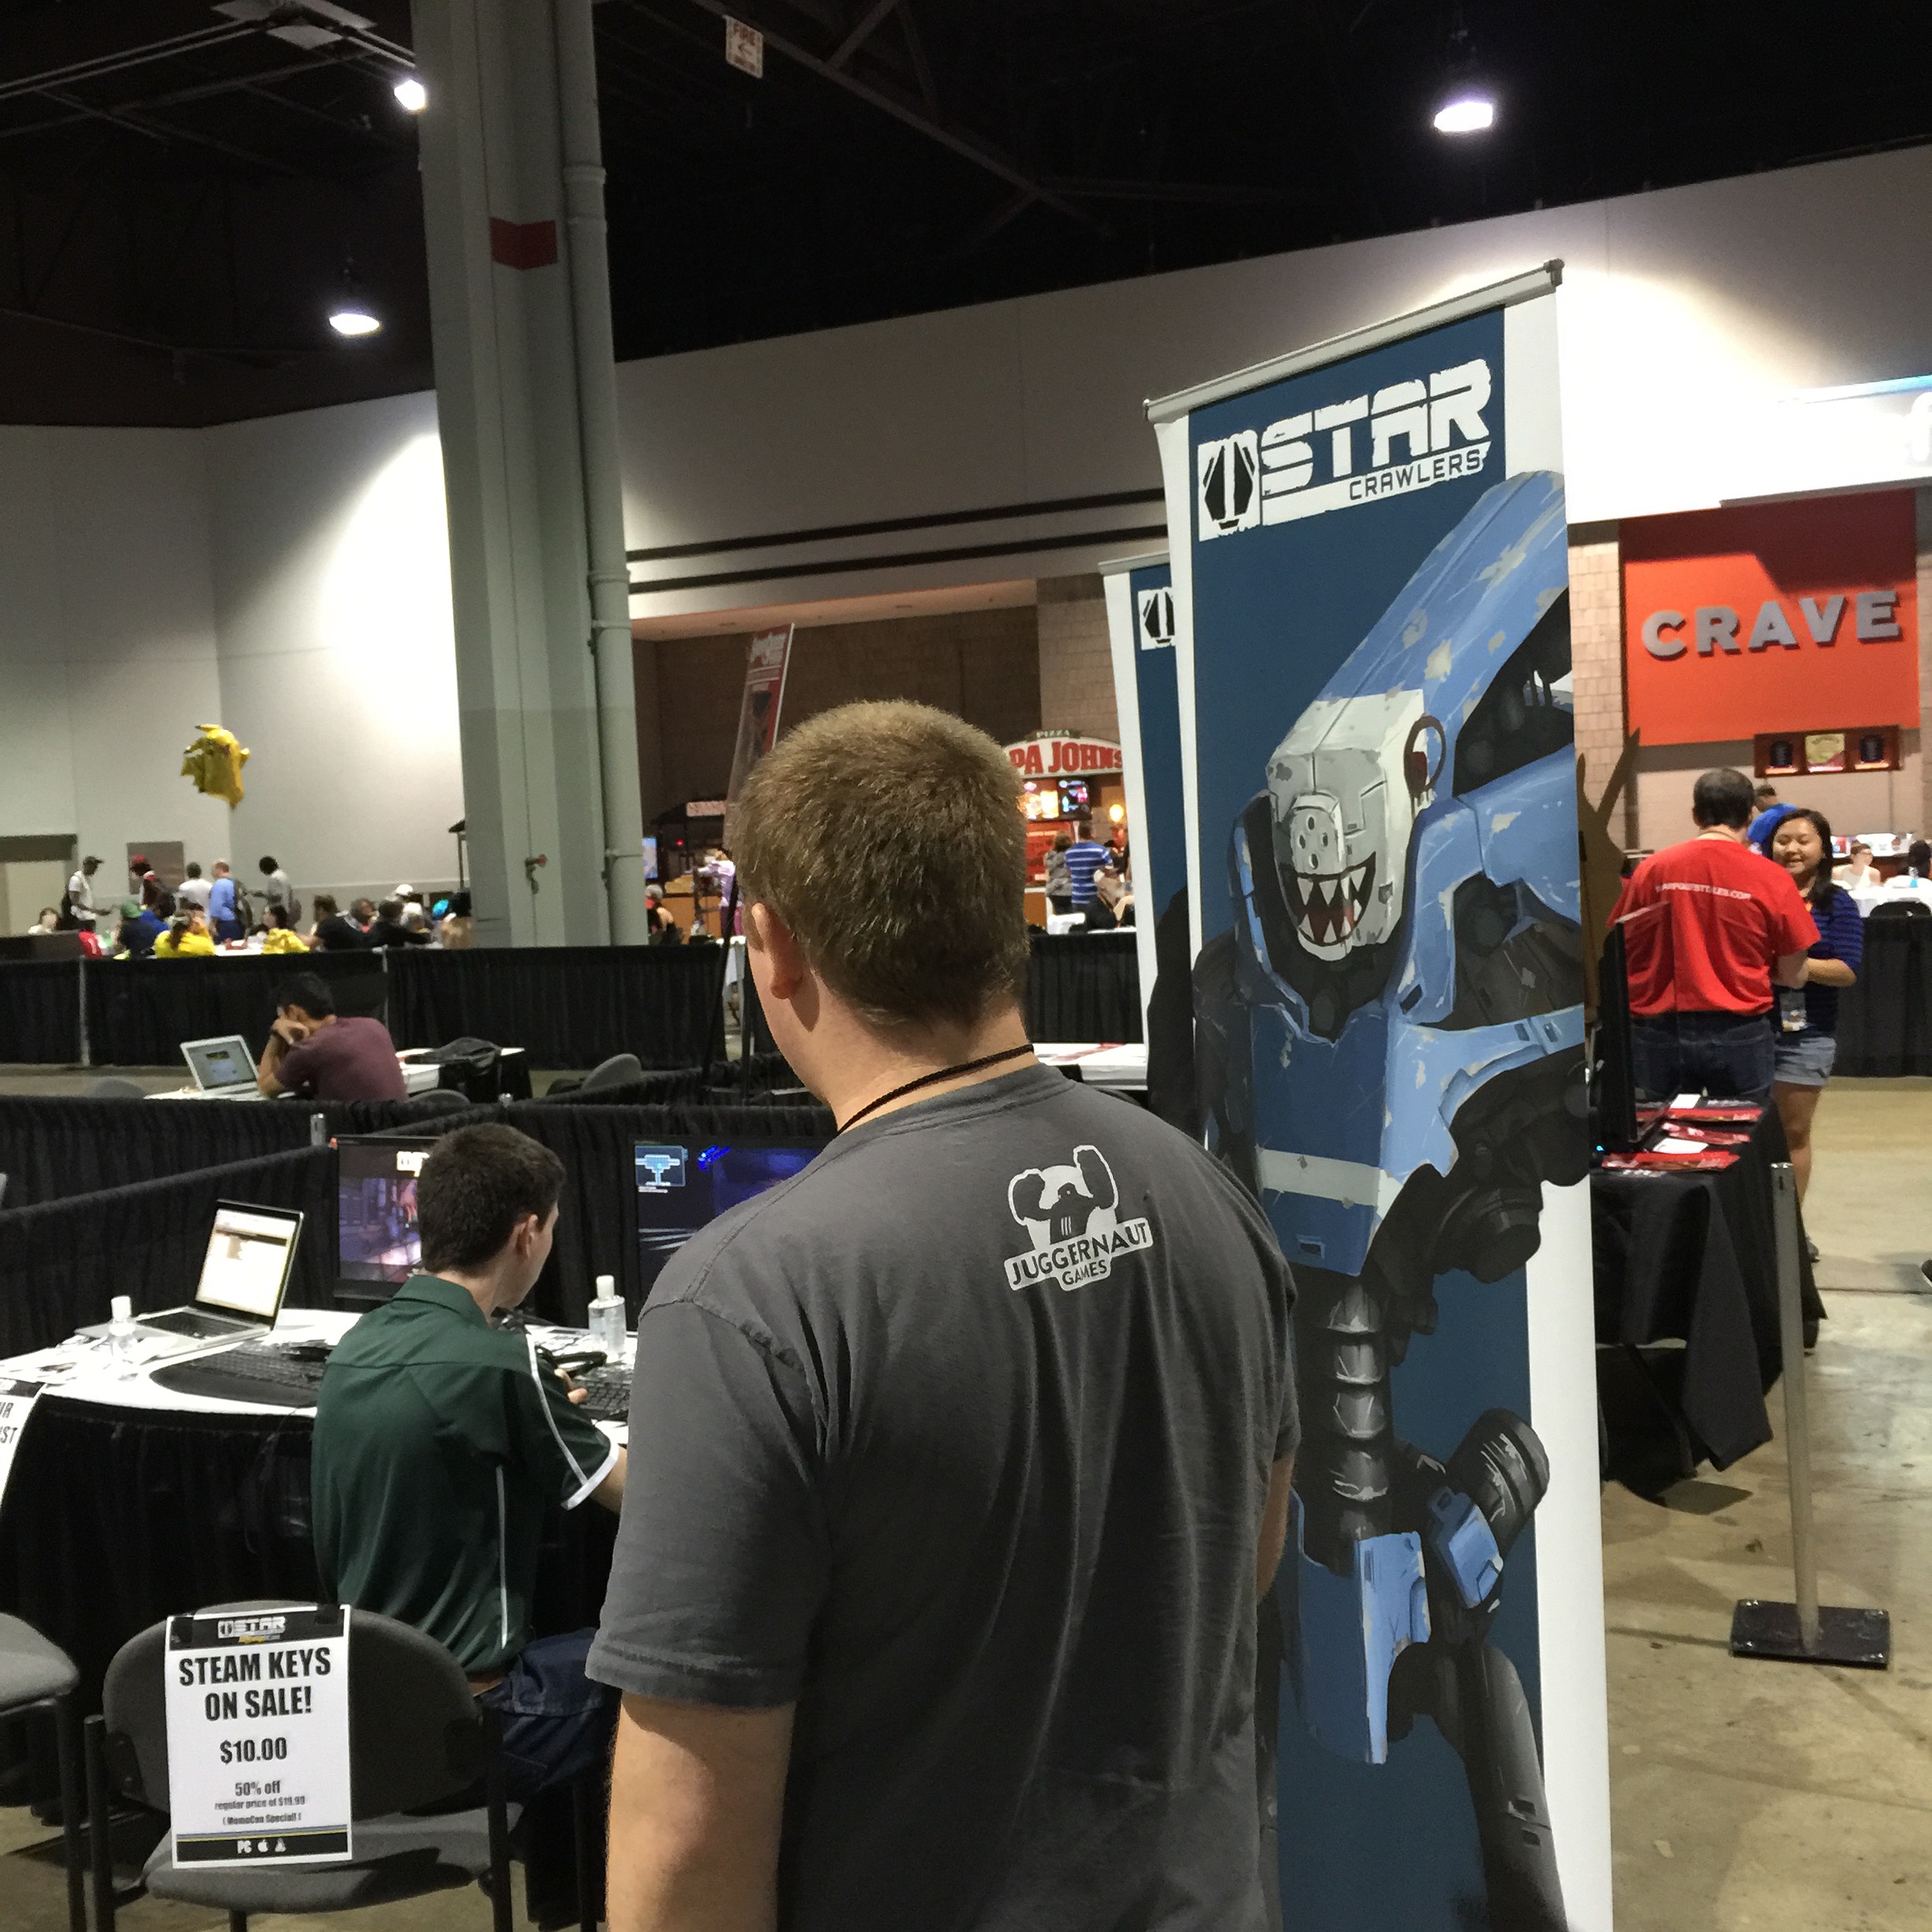
For this game, I liked that they had signs offering Steam codes at a discount for those who wanted them.  It gives the player an incentive to buy the game there at the convention.  Most players will probably not even remember the name of your game when they get home, just because people are bombarded by so much information on the convention floor.  Honestly, I can’t remember the name of a single game that I saw, but I do remember the mechanics and look and feel of each of the games.  This team also had other goodies like T-Shirts for sale promoting their game which is another good way to promote your game.


Momocon Indie GamesThis was another popular indie game booth.  One of the team members approached me and gave me a business card with their information.  I think a critical part to running a booth is interacting with the onlookers, even if they are just casually passing by your booth.  I would definitely recommend greeting everyone, because you never know who could be a potential customer.


Momocon Indie Games
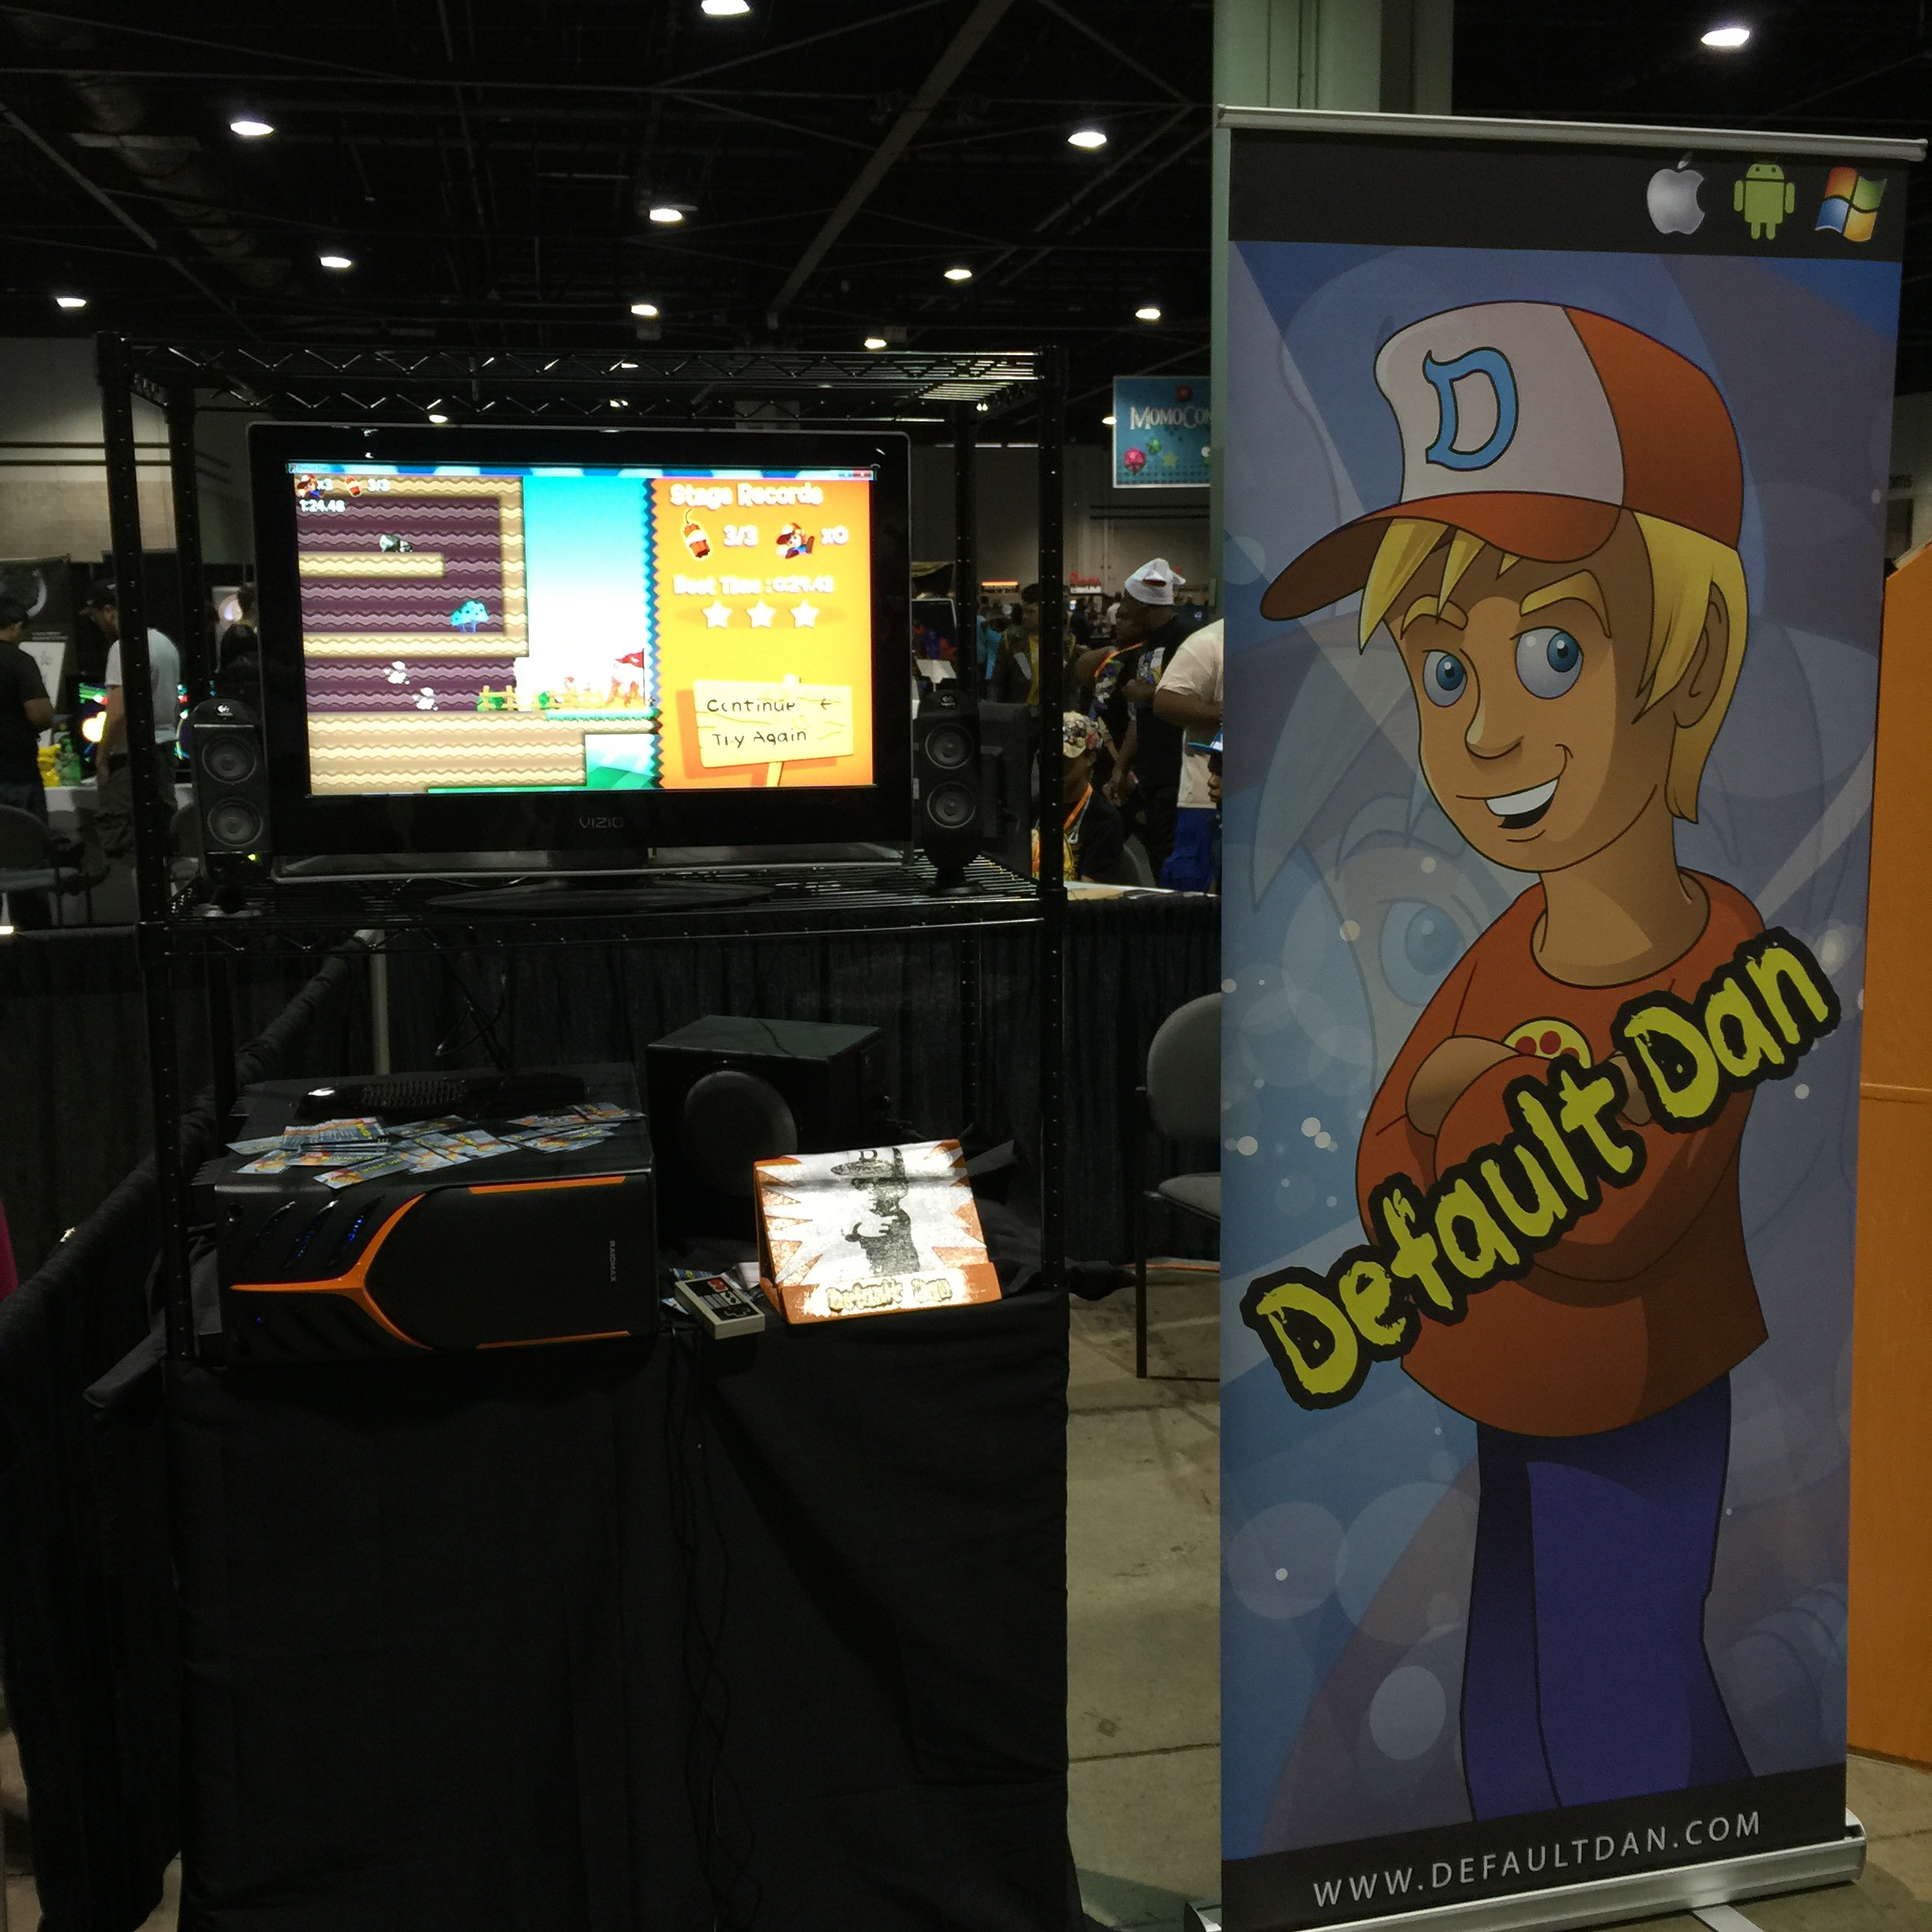
This game definitely didn’t get any love while I was there.  I played it for about a minute, but couldn’t get past the first set of spikes due to a very tricky jump.  A game demo should make the player want to continue playing and not frusterate the player.  The other problem was that there wasn’t any team members running the booth.  To be fair, the people running the booth may have went to lunch or on a restroom break.  However, if I was paying $350 for a booth on the convention floor, I would want someone there at all times.


Momocon Indie GamesI liked the booths that had a company logo or game art on the front of their table.  It just makes the booth look more interesting than just having a plain cloth over the table.  I would keep the swag giveaways simple to just one or two items.  Having ten different giveways makes your table look like a kid’s toybox.


Momocon Indie Games
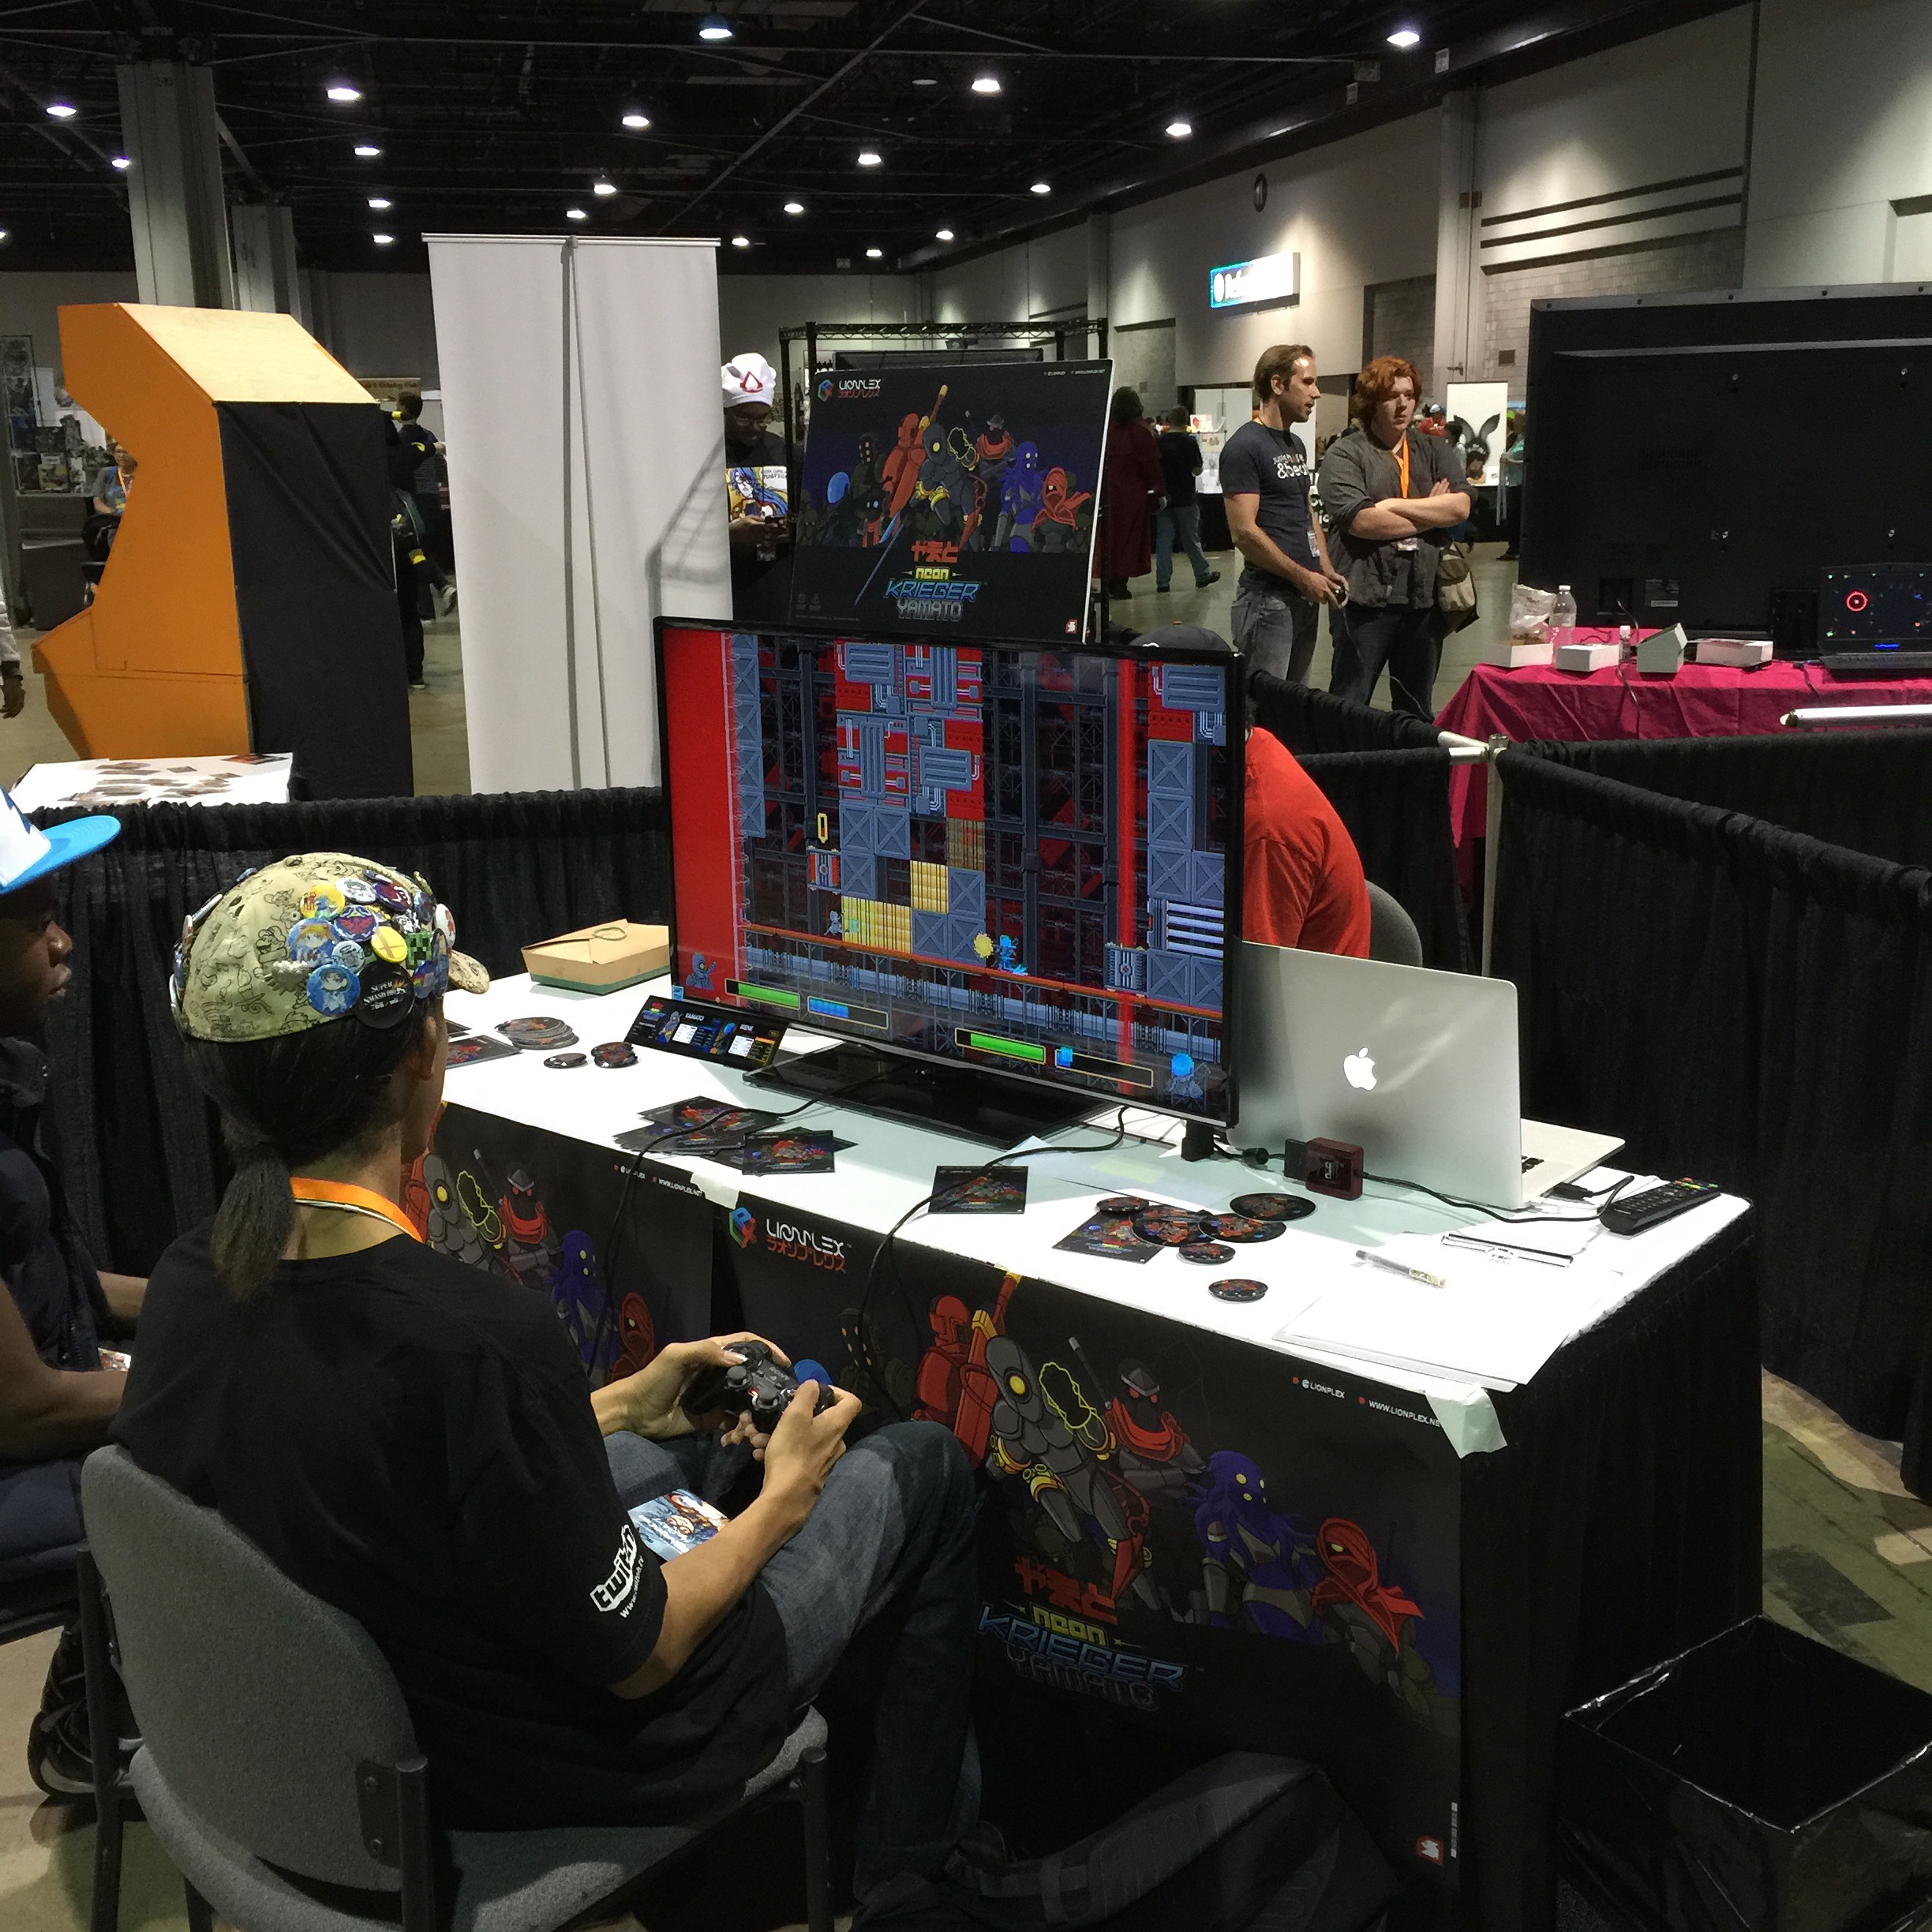
This shooter seemed to be popular with players.  However, you can barely see the name of the game on the display on top of the screen.  It would also be nice if there was some indication of which platforms the game will be released.  Is it PC only?  Is it coming to Steam?  Will it be on the Playstation 4 or XBox One consoles?


Momocon Indie Games 
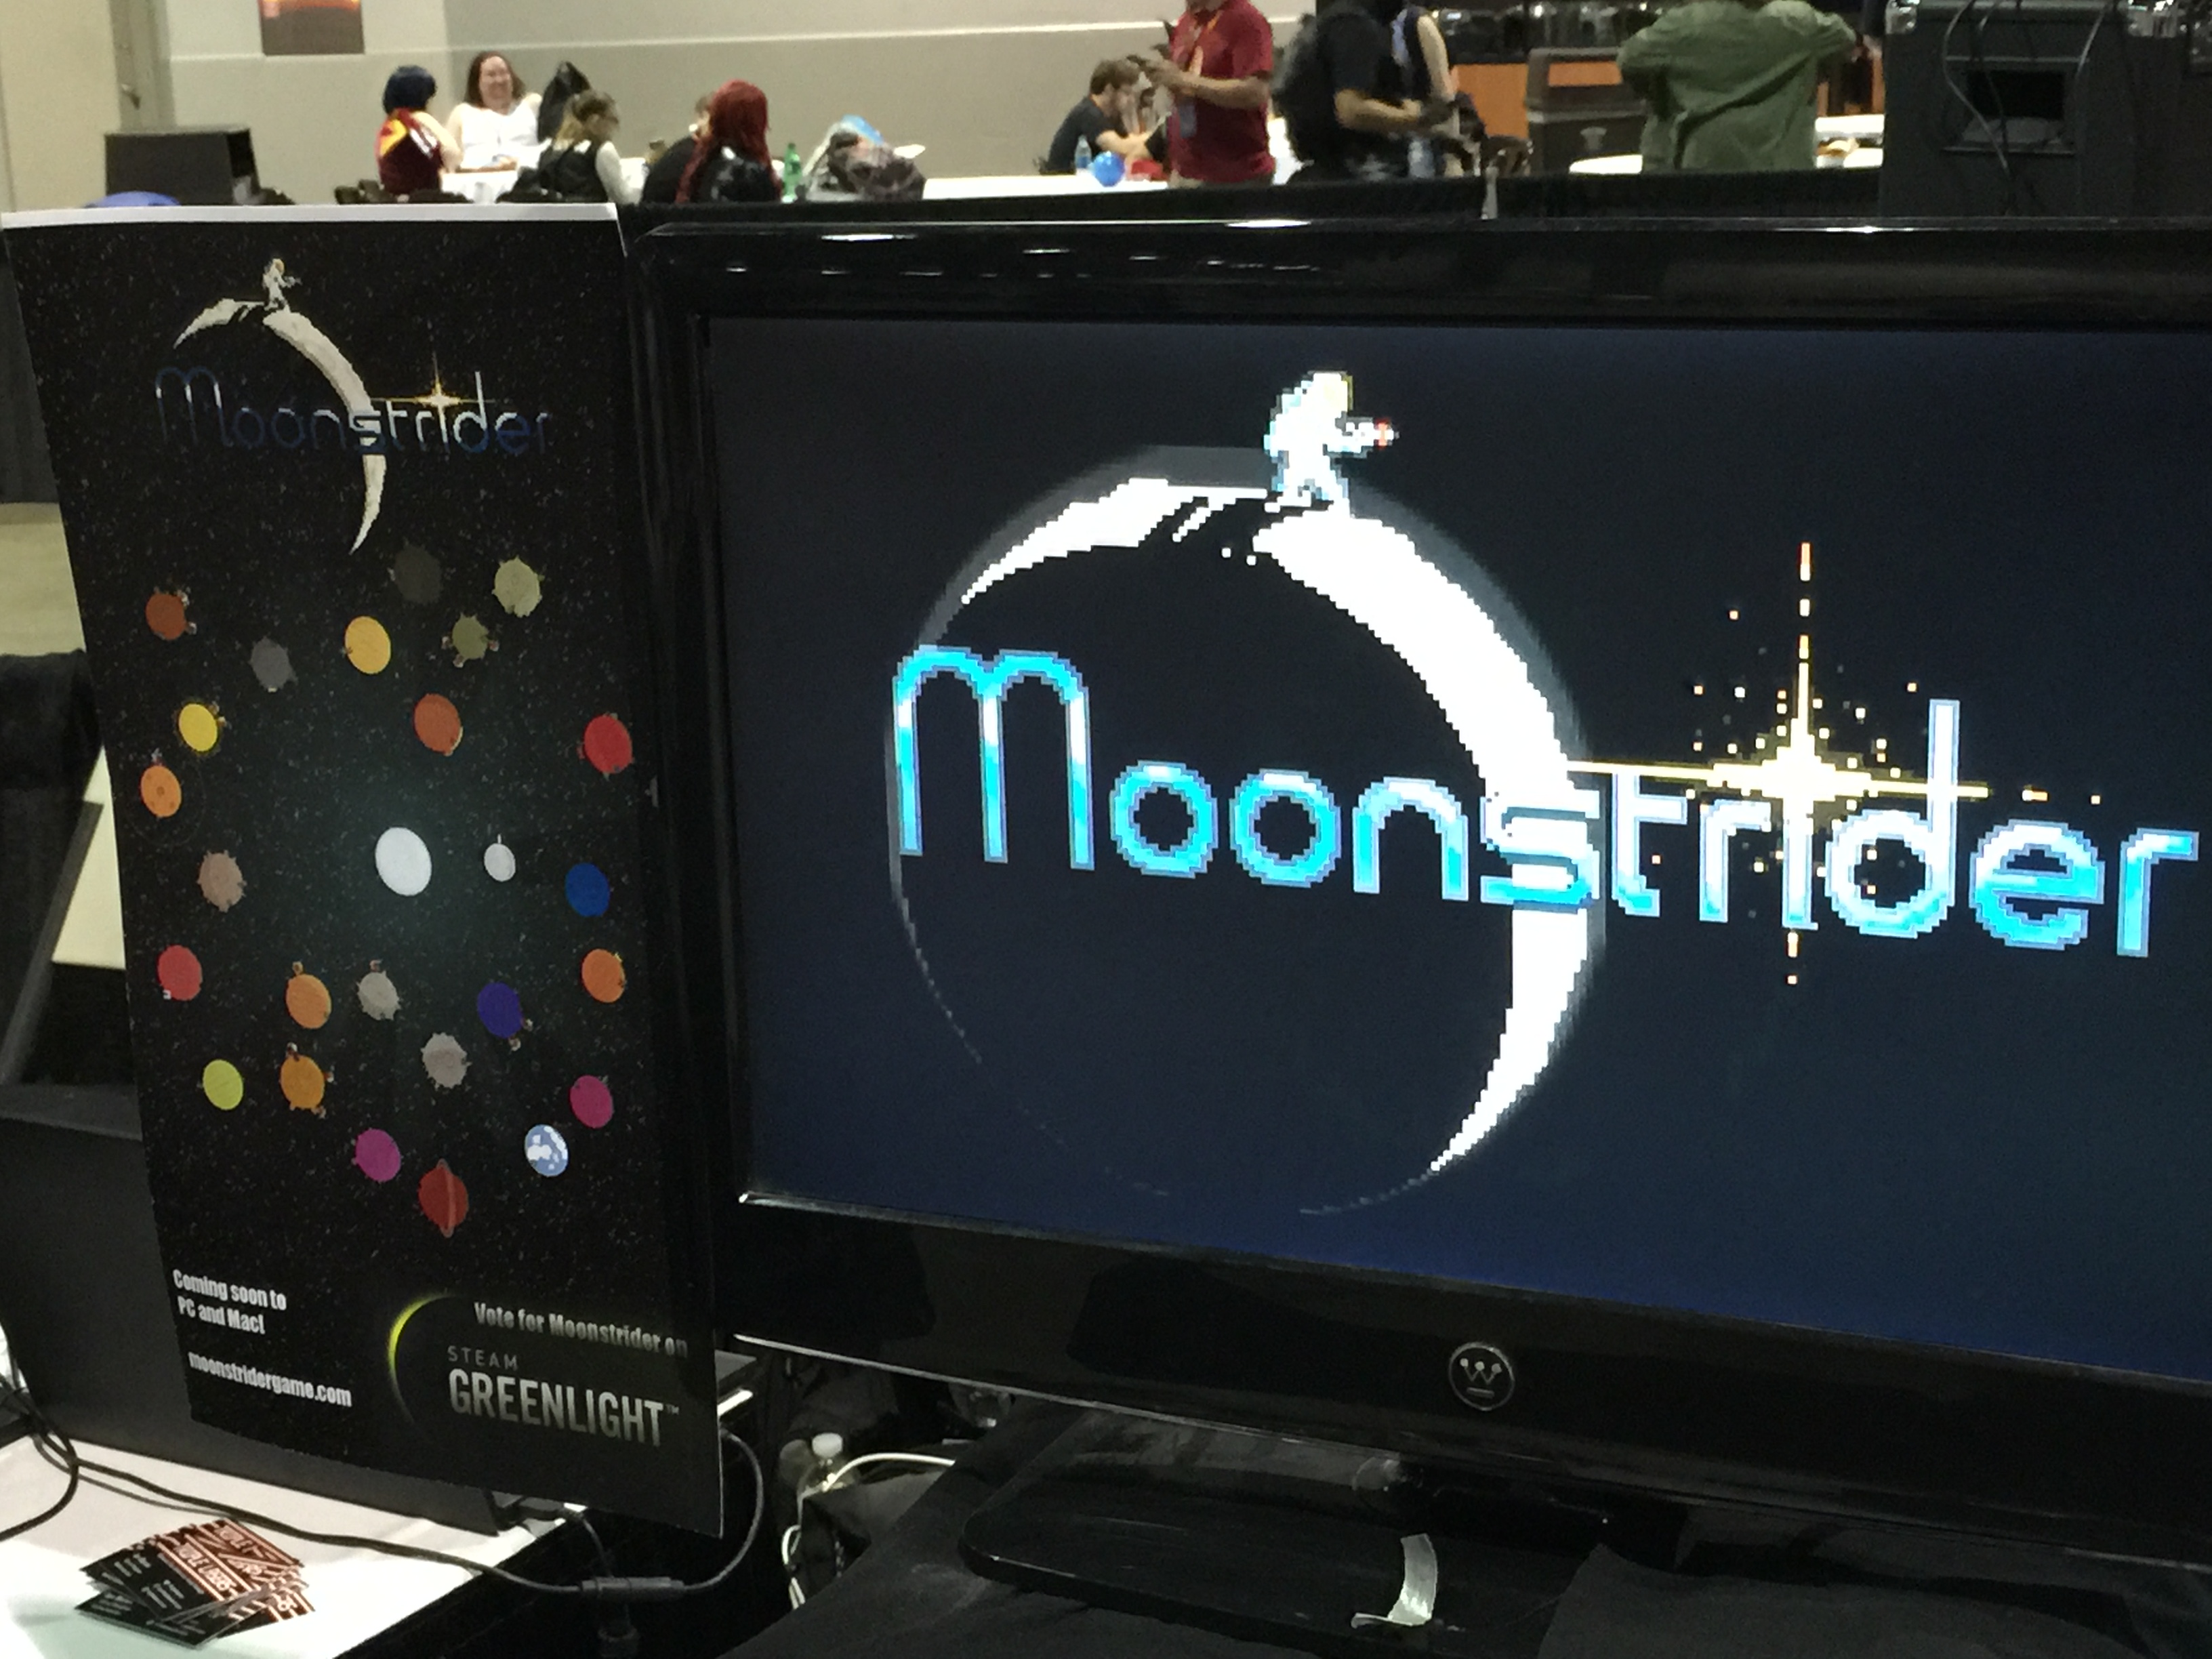
I talked to the developer of this game for a few minutes.  He was friendly and did a good job of describing his game and answering my questions.  The Greenlight display on the banner is a nice touch, so players will know to vote for the game if they want it on Steam.  The graphics looked simple, but it had some very unique mechanics of jumping from planet to planet in a Super Mario Galaxy style, but in 2D.


Momocon Indie GamesWhen I came back to this game, activity had picked up quite a bit with multiplayer games in progress.  A live multi-player demo definitely sells the party atmosphere aspect of your game.  However, the demo should also contain a single player mode just for those gamers on the floor by themselves.  From the banner that I saw earlier, I never would have known that this was a puzzle game, which made me think that the banner was for the booth adjacent to it.


Momocon Indie Games
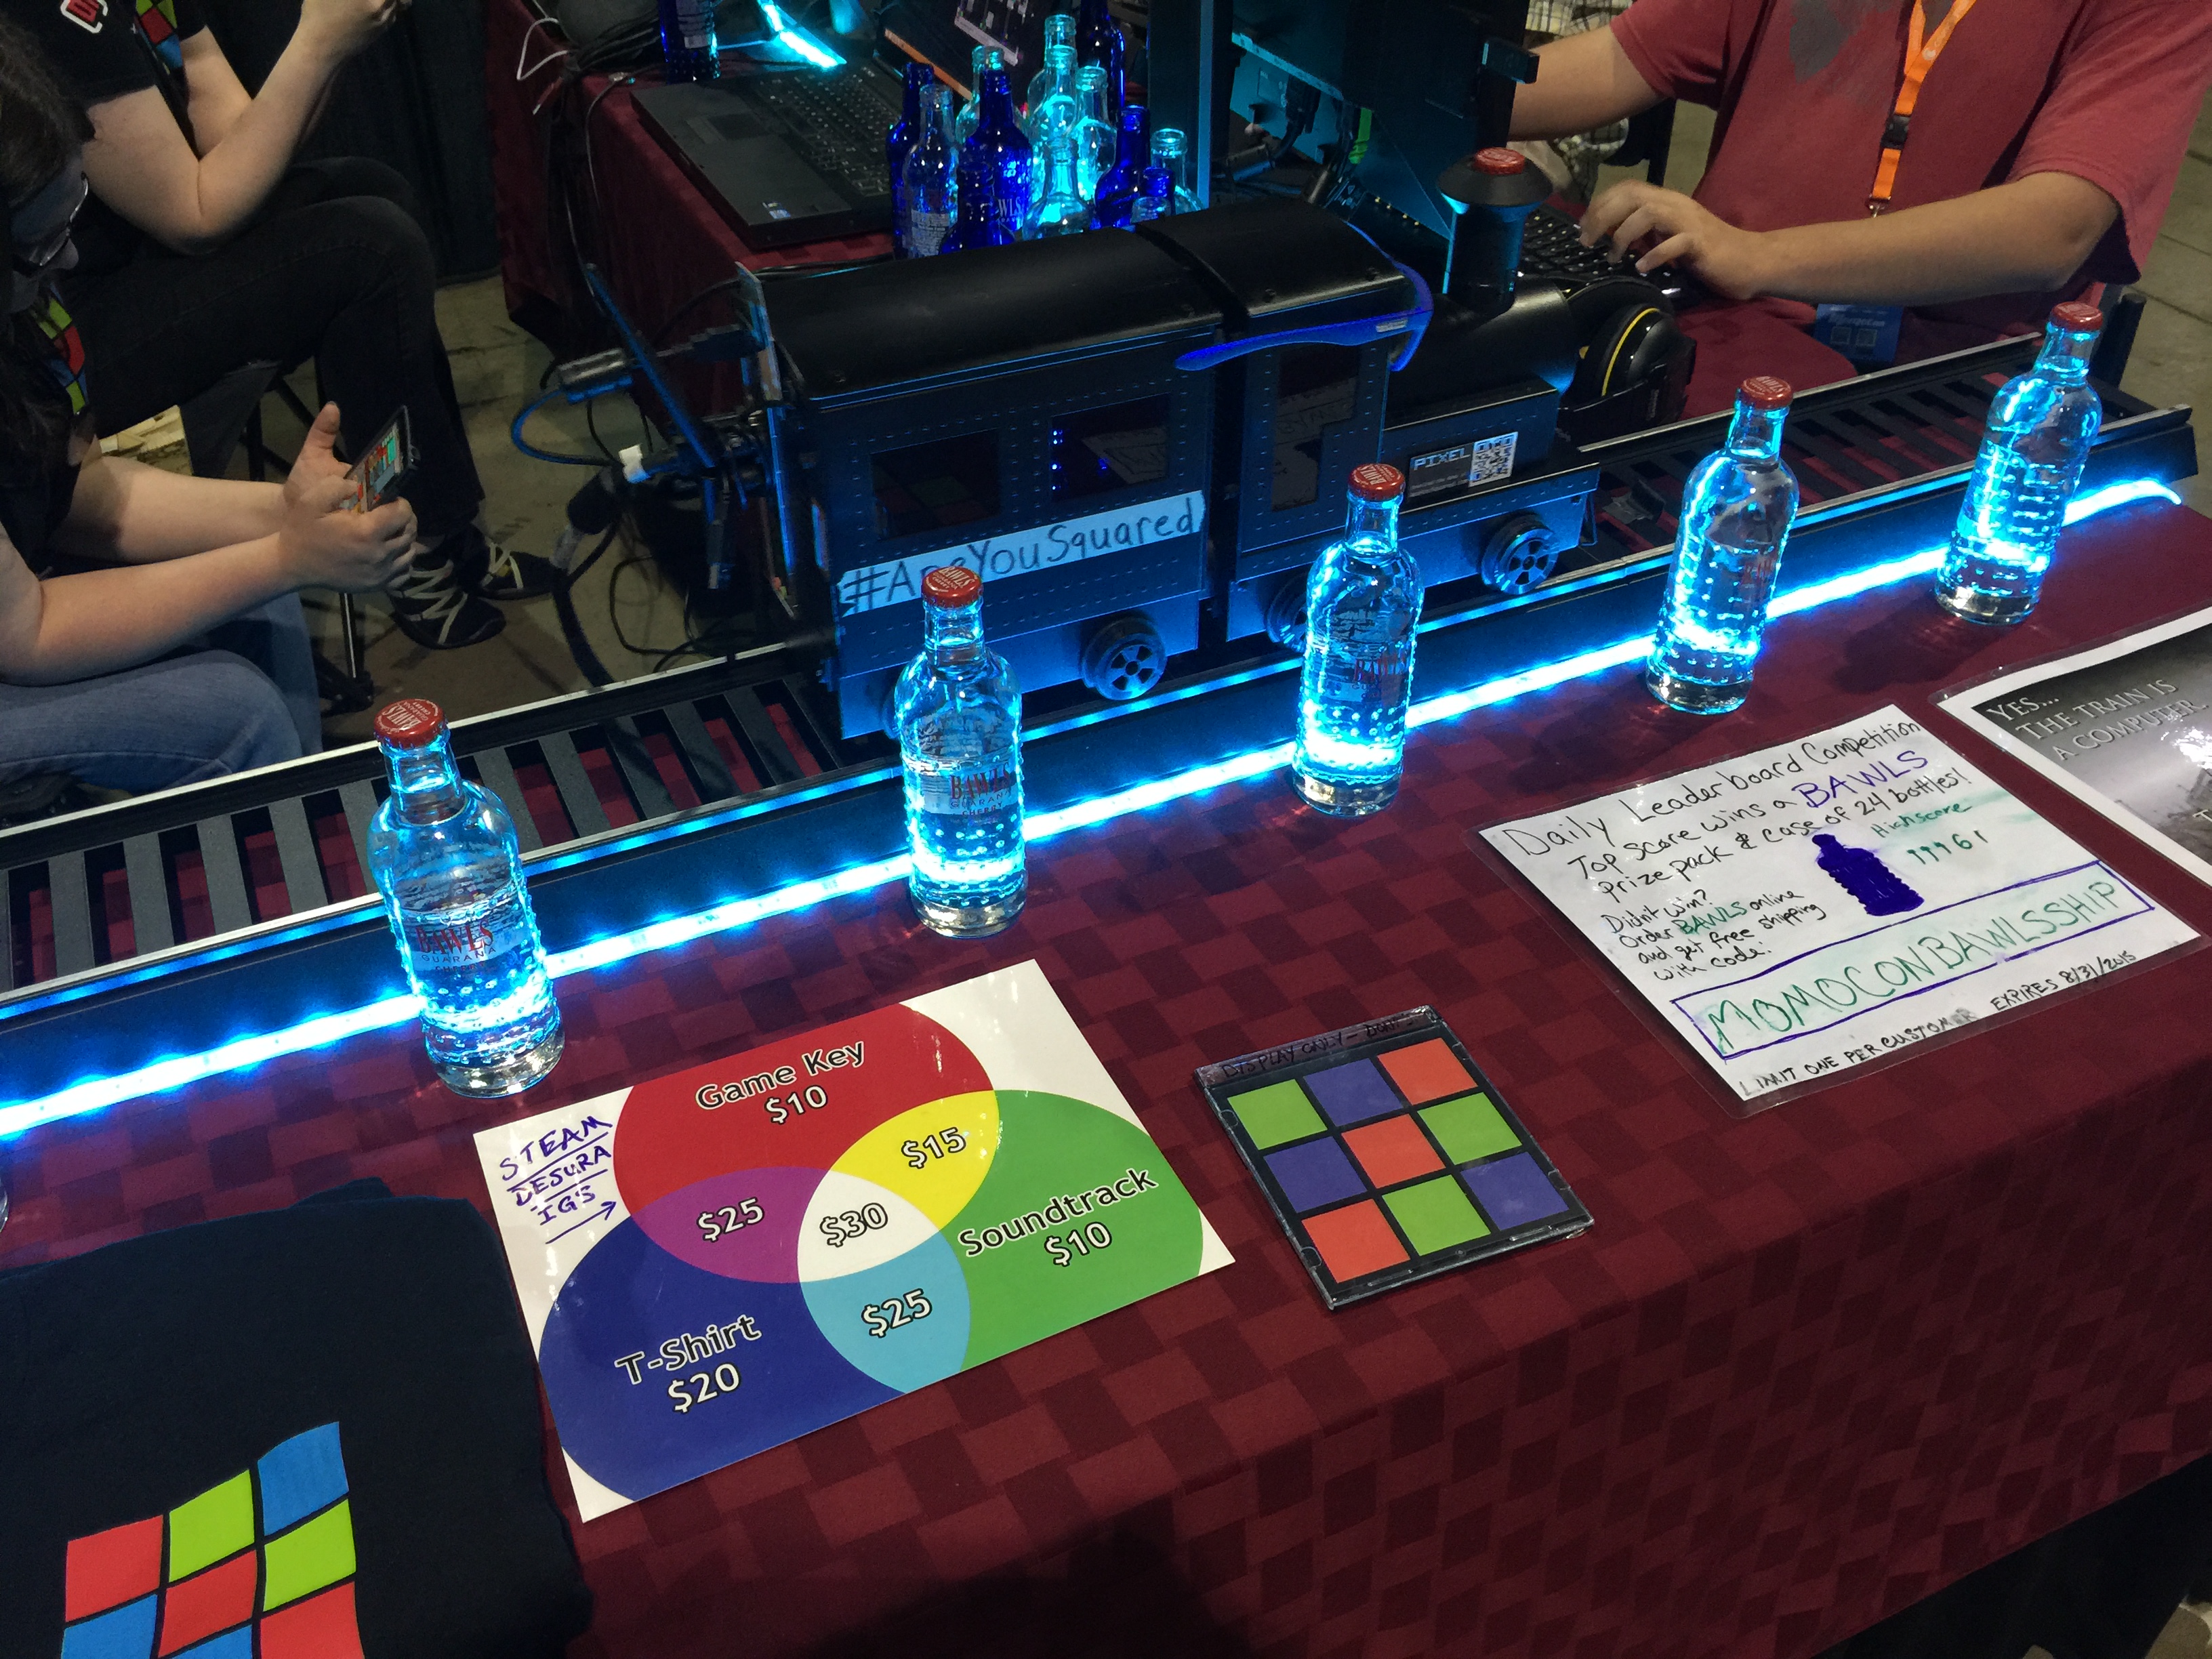
This display was definitely unique, with a computer on a small train running on a track.  One of the posters advertised this as the fastest computer in the world, moving at something like 0.3 miles per hour.  Of course, fastest in their definition is distance over time instead of computations per second.  Pretty lights are always a nice touch, but I didn’t understand the point of the bottles.  Are they running a concession stand from their game booth?  I could also never tell which game this was actually promoting.  It really reminded me of 90’s beer commercials, where the entire advertisement would have nothing at all to do with the actual product.


Momocon Indie Games
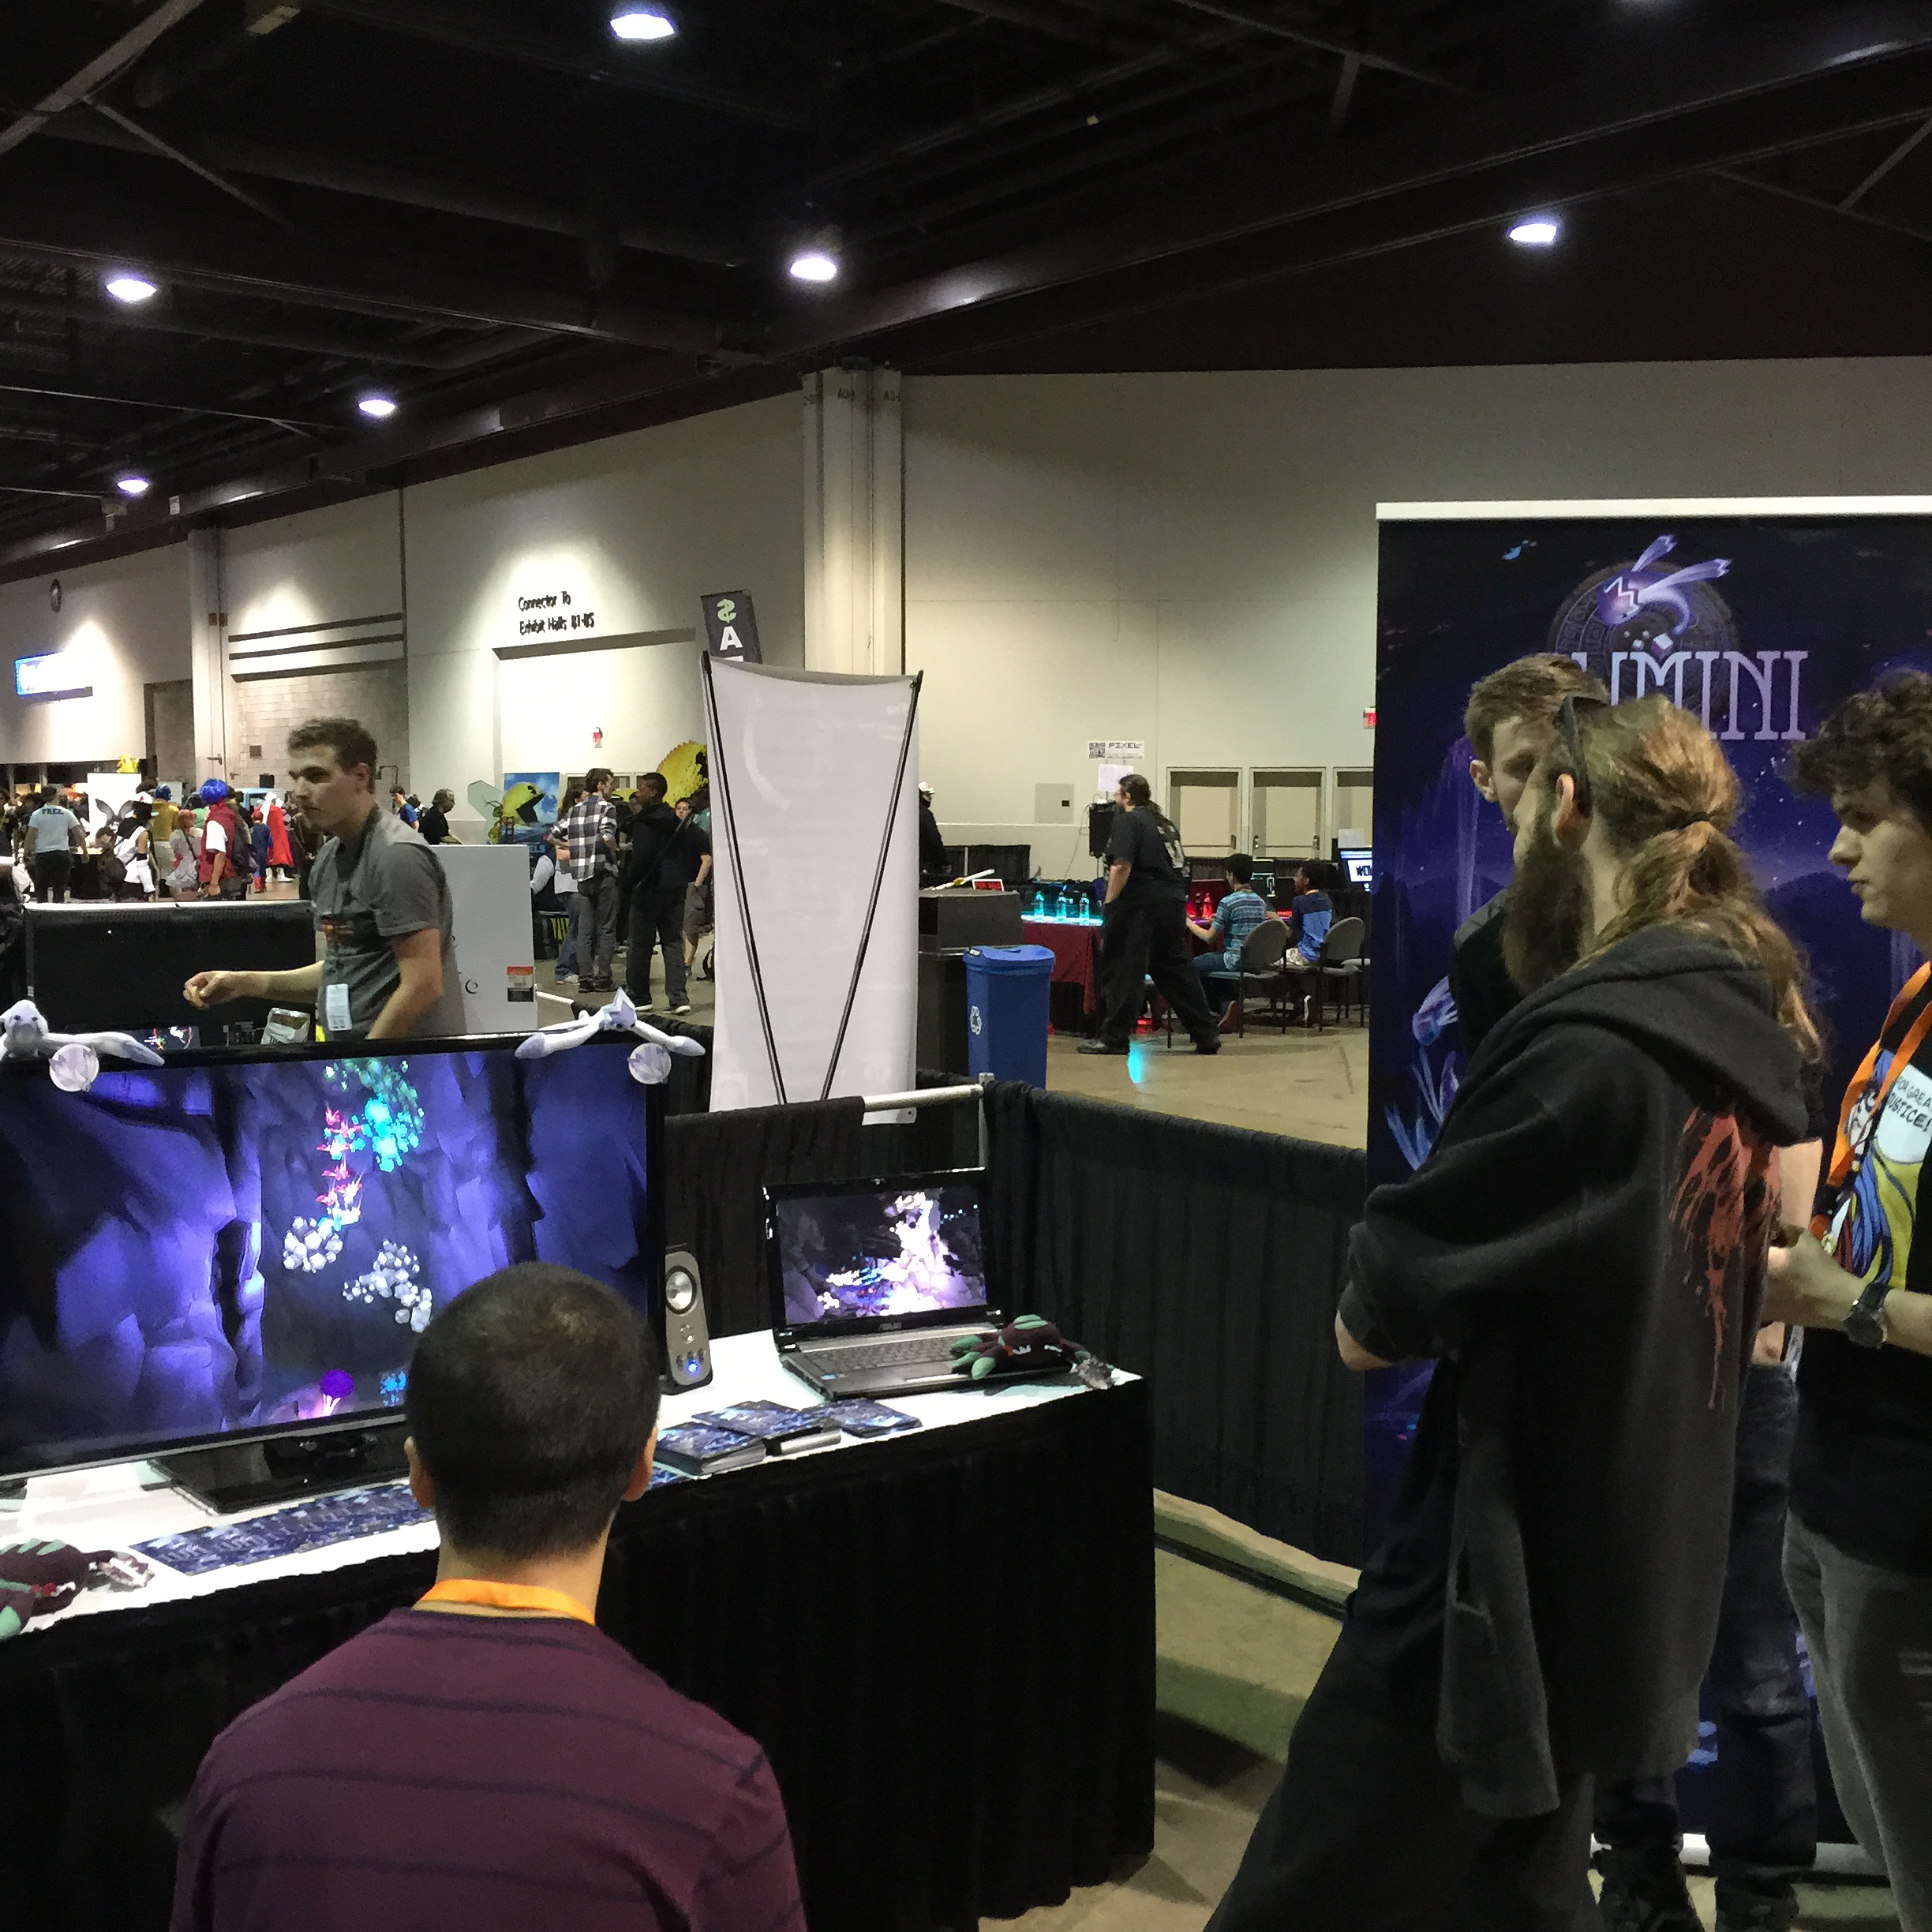
This was another shooter which had nice graphics, but there wasn’t anything that really compelled me to play the game.  I’ll give them credit for having a consistent and professional looking theme.  I would have had the game’s name displayed on a poster above or next to the screen, because as you can see in the picture bystanders can block the banner art.  The people who designed the original arcade cabinets put the name of the game in the front of the cabinet above the player’s head for a reason.


Momocon Indie GamesWhile some may think that business cards are outdated, I think they are essential for a successful booth.  I talked with one of the developers, and asked if he had a Twitter account or website so I can find out more about his game.  Since he had a business card, I didn’t have to hand him my phone to enter it.  Also, please don’t write down your website URL with a pen on a sheet of paper, especially if it is something like www.geocities.com/Neighborhoods/SiliconValley/mycoolgame.html.  These are the two cards that I received from developers at the show, which I think are good examples.  Keep the amount of information on the card simple, with just your name, email, Twitter handle, and website.


Momocon Indie Games
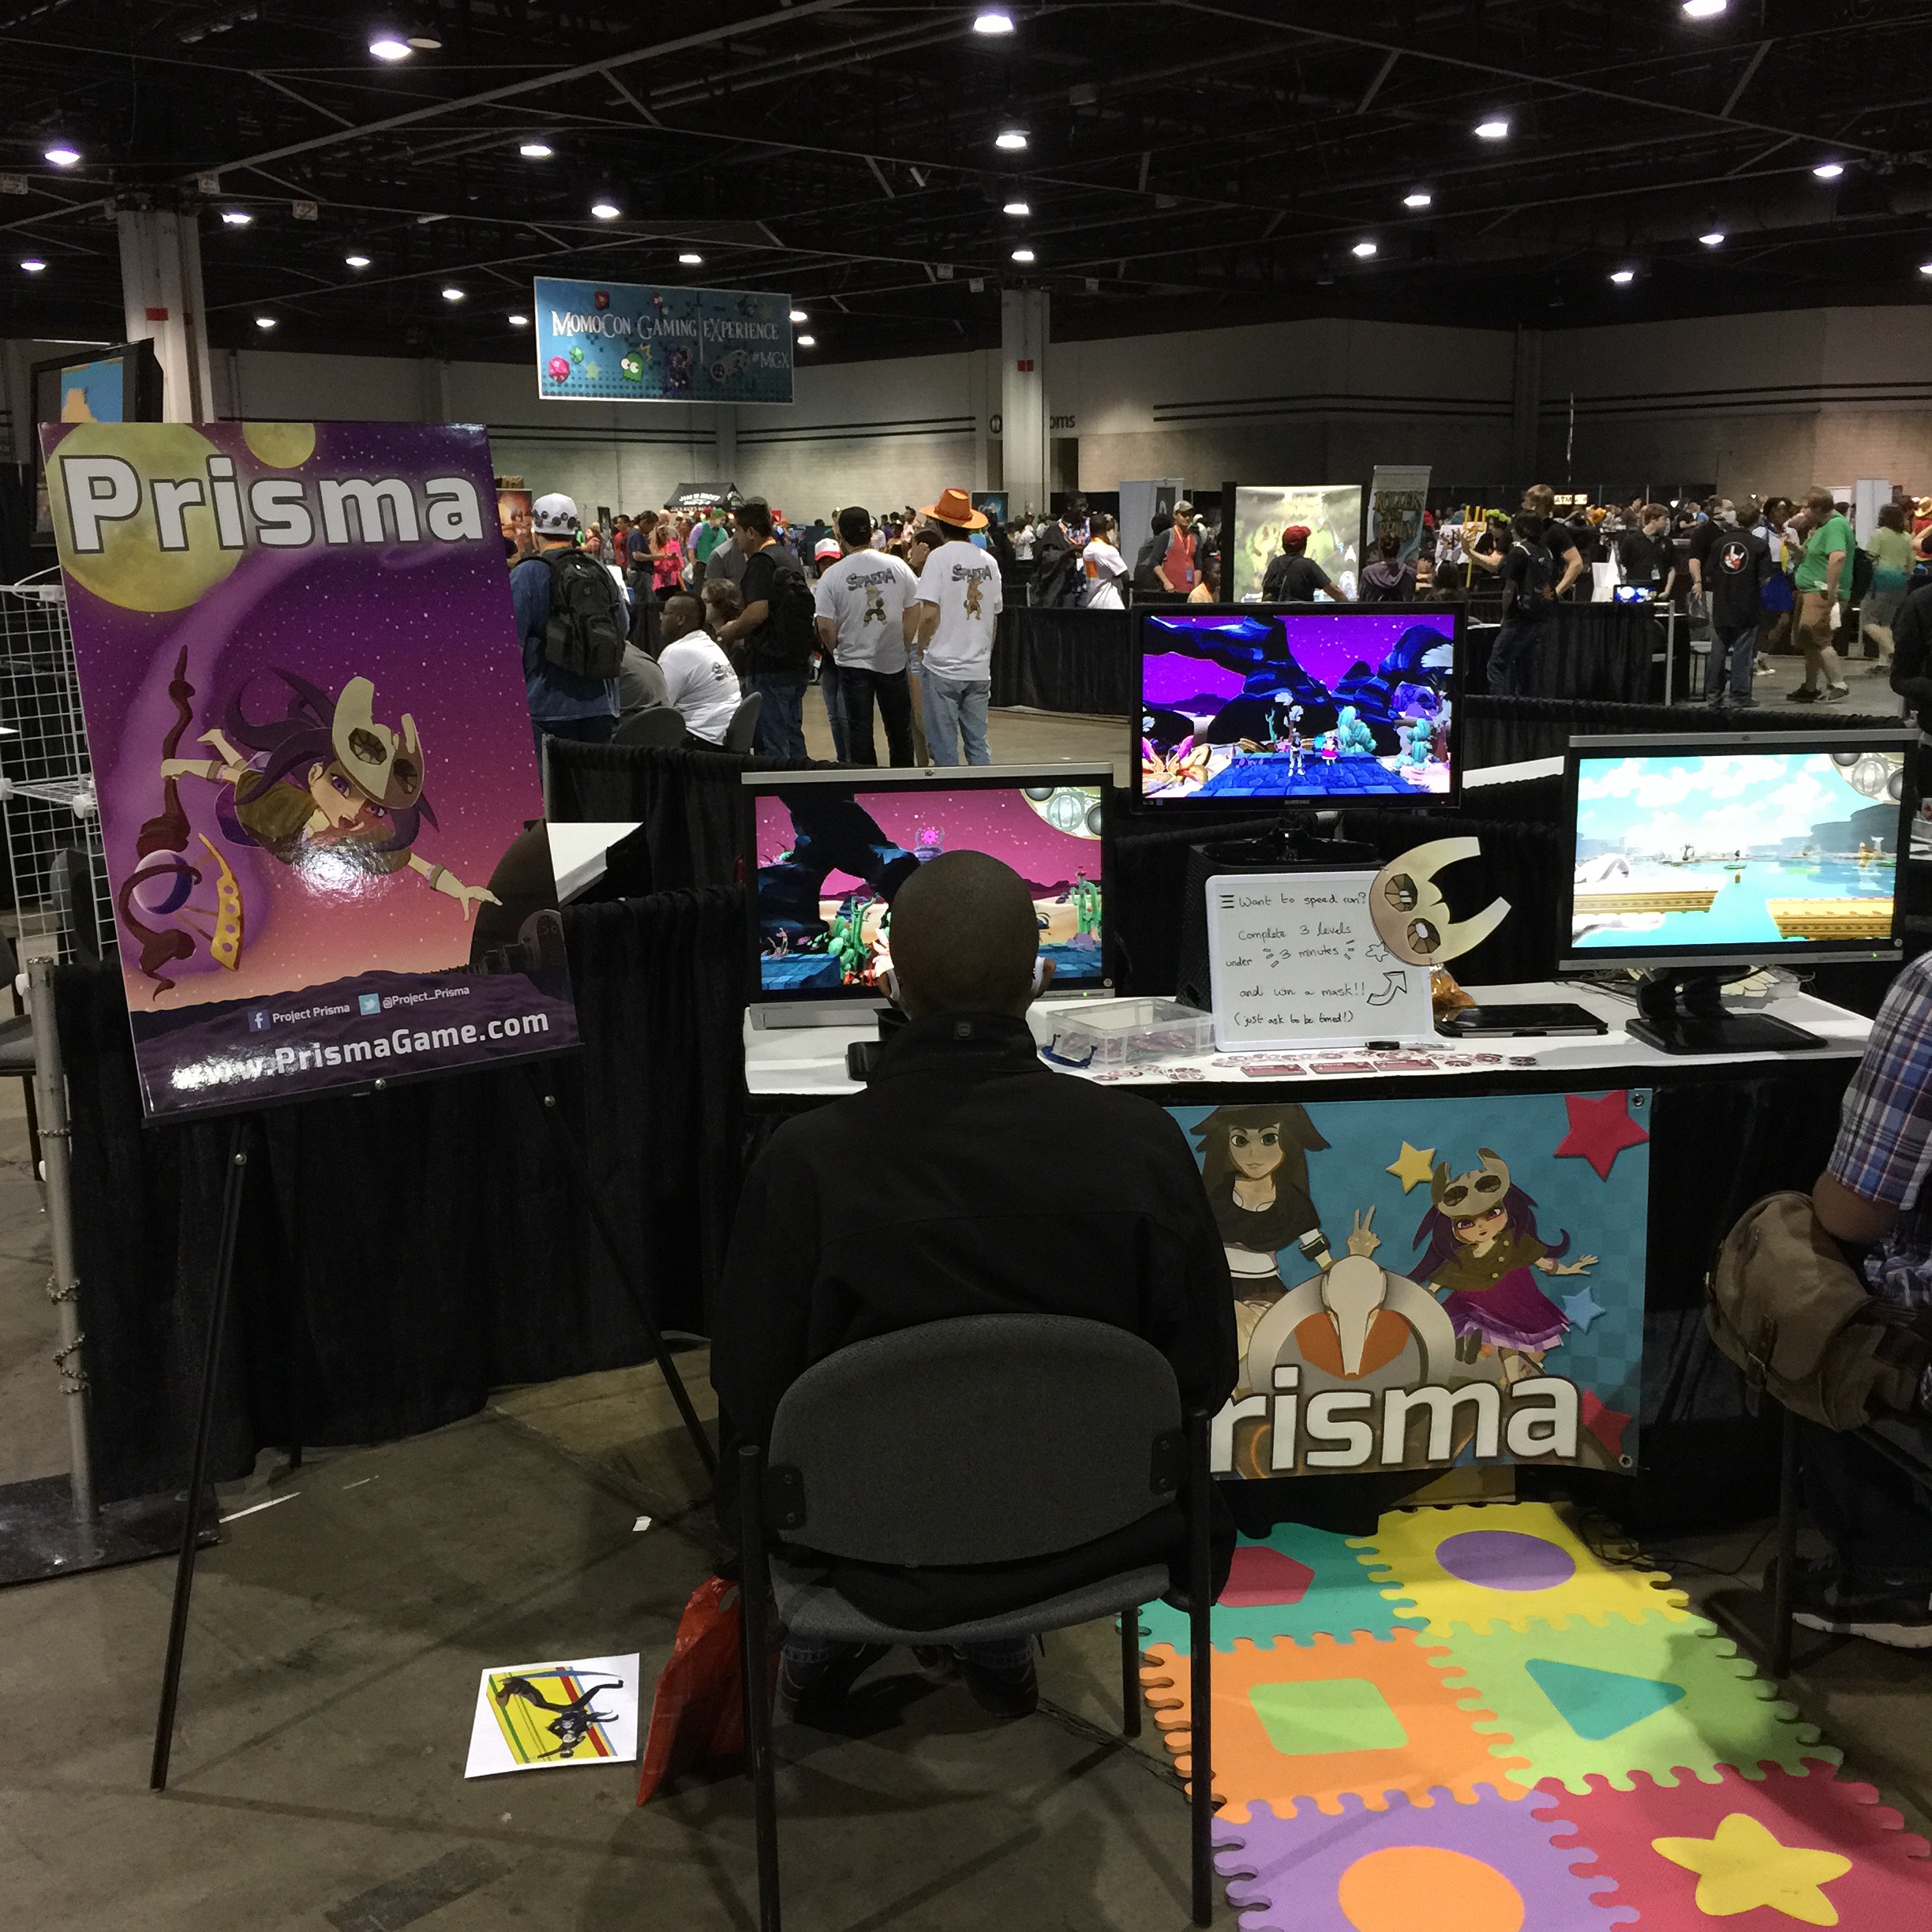
I liked the simplicity of this booth.  Just show the name of the game, because that’s what you want people to remember.  The colorful floormat and game art on the front of the booth also help it stand out from the others.


Momocon Indie GamesI liked this display for what appears to be a gaming movie, but there wasn’t anyone there to tell me more about the movie.  Is it an indie movie?  Will it be released in theaters or digital only?  This display just seemed like an orphaned child sitting in the corner alone.


Two other booths, not pictured here, did not have playable demos.  Personally, I think it is almost essential that you have a working demo in order to be taken seriously.  One booth had a screen showing people playing their game.  Honestly, I did like seeing the recorded player reactions as they were playing the game.  However, it was impossible to tell if those emotions were genuine since there was no playable game to try for myself.  The other booth just had a pre-rendered animation sequence that was kept on a loop.  It really didn’t tell me what the game was about or why I should be interested in it.


In conclusion, I will admit that I’ve never run a booth before aside from helping at the Georgia Tech booth in a high school college drive years ago.  I probably can’t appreciate everything that goes into running a booth at this time, but I hope to have a booth at a major convention one day.  That’s one of the reasons why I wrote this post, so I can come back at a later date and remember what I thought did and didn’t work at indie game booths from the perspective of a regular attendee on the convention floor.


Unreal Engine First Impressions

Breakout in Unreal Engine

I’ve been using Unity3D to develop games for almost three years now, ever since Ludum Dare 26. With the recent announcement that Unreal Engine 4 is free for all developers, I decided to give it a try for this MiniLD #58. The theme for this jam is Pong, but it really isn’t an exciting game for one player, so I decided to make Breakout/Arkanoid game since I’ve never created a game of that type before.  I am still implementing the ball and paddle mechanics of a standard Pong game.

The Unreal Engine puts some unnecessary screens on startup, since it requires the Epic Games Luncher to be started before running the Unreal Engine. It’s similar to the Blizzard Battle.net launcher for World of Warcraft, Starcraft and other games. I really just see this as a way of advertising their other games. That’s fine if I’m playing games, but I really don’t want to be reminded about the latest FPS from Epic whenever I’m starting my game project.

The Unreal Engine is very similar to the Unity Editor, and they actually have a really good guide for people coming from a Unity background. They also have many default bare-bones project templates that will get up you and running with a skeleton game of your choosing, such as first person, flying, puzzle, side scroller, and twin stick shooter. This reminded me a lot of the templates provided by Stencyl, which provides many common behaviors by default.

Unreal Engine project templates
Unreal Engine provides many project templates

I chose the Rolling template, since it gave me a basic sphere that could be rolled around on a plane.  I created three walls made out of stretched cubes, similar to the EarthBall game that I created some time ago.  Then I made a paddle out of a cube.  To add controls to the paddle, I had to edit the BluePrint, which is similar to PlayMaker’s FSM for Unity.  You add various actions to your blueprint and connect them together according to the input and output types.  Fortunately, Unreal Engine makes it easy to determine which type is required using a color coding system.  Booleans are red, integers and green, vectors and yellow and so forth.

To move my paddle around, first I had to make my paddle aware of physics by enabling “Simulate Physics” under the Physics section on the details tab.  This was fairly simplistic, and much easier than Unity’s method of using RigidBodies and trying to figure out the right collision type to use.  Then  in my BluePrint I created a state flow which responded to to InputAxis MoveRight which uses Add Impluse to move the paddle.  This is analogous to Unity’s GetAxis(“Horizontal”) method and AddForce method.  The Auto Receive Input property for the paddle also had to be set to the appropriate player (zero).

Moving BluePrint
Moving an object using BluePrint


The paddle was now moving, but it would fall over when the ball hit it.  Unreal Engine provides the option to lock an axis for an object, similar to how Unity allows a RigidBody to be constrained on the X, Y, and Z axises.  Unfortunately, Unreal Engine only allows the object to be constrained on one axis, whereas I would like for my paddle to only have movement on one axis and locked on the other two.  Another annoyance with the default project is that it sets everything up with the X axis going into the screen, which is very frustrating.  The Z axis is up, which makes it similar to Blender, which is the tool that I use for creating most of my models.

Since the ball would just sit stationary without any force, I modified the ball BluePrint to apply a small force towards the paddle area on every frame.  Unreal Engine provides a state called Event Tick which is executed on every frame.  So connecting that state to an Add Impulse action made the ball move as needed.  Unity has the ability to change the direction of gravity in the project settings, so making a force towards the paddle area can be achieved by  simply increasing the gravity force towards the paddle.  The magnitude of gravity can be changed in Unreal Engine using the Override World Gravity setting, but it only affects it directly upwards or downwards.

The next step was to detect a collision between the ball and the paddle, because the paddle does not apply any natural force to propel the ball away.  In the ball’s BluePrint, there is a special action called Event Hit, which is activated whenever the ball collides with another object.  This works in a similar fashion to Unity OnCollisionEnter method.  You get a reference to the object that it collided with it as Other.  I checked to see if the other object’s name was the name of the paddle BluePrint, and if it matches a force is applied away from the paddle.  I’m not sure what the force scale is in Unreal Engine, but I had to apply a force of 2 million to get any noticeable effect.  I also used a random value between -1 million and +1 million as a horizontal force, otherwise the ball would reflect straight outwards, perpendicular to the paddle, which would not be very exciting.  I think in most ball and paddle games, the angle which the ball is reflected is based on the position on the paddle where the ball is hit.  If I have the time, I will add that feature later.

Collision detection BluePrint
Collision detection using BluePrint


The next obstacle to tackle is bricks to be destroyed.  I made a simple brick from a cube, which does nothing.  Using the paddle collision process, I was able to destroy the brick when the ball collides with it.  There is a Destroy Actor action which takes an object (the same one supplied as an output from Event Hit) which removes the object from the game.  In Unreal Engine, GameObjects are called Actors, but some Actors may be Pawns.  From what I understand, Pawns are just special actors that can be moved like the player’s character and enemies.

Next, I duplicated my brick multiple times, to give the player multiple targets to destroy with the ball.  Unfortunately, the ball did not destroy the new bricks when it collided.  This was because the GetName property of the brick returned a different name for every brick with a unique identifier applied at the end.  I spent some time trying to get the tagging method to work, which is the way I would solve that problem in Unity.  However, BluePrint doesn’t seem to recognize any of the tags set on an object in it’s details.  It’s a shame because Unity only allows one tag to be defined for a GameObject.  Unreal Engine lets you specify as many tags as you want, but they just don’t work with BluePrint which makes them essentially useless to me.

Too bad this doesn't actually work
Too bad this doesn’t actually work

After some trial and error, I found that I could use the GetClass function in BluePrint and compare that with the Brick BluePrint, and then destroy the brick if it is a match.  The Branch logic block is a nice feature of BluePrint, which is something that I wish was included in PlayMaker for Unity.  Sometimes I just don’t want to create a whole new event for comparing two values.

As far as the camera goes, I’m still confused about how it works.  In the template, it is a child of a SpringArm on the ball.  The SpringArm is supposed to keep an object locked at a set distance from the object.  I prefer having the camera as a separate object, and in Unity PlayMaker’s SmoothCameraFollow action always makes handling the camera a snap.

I do like the Kill Z in World Settings, which destroys any objects which fall below a certain Z value.  This is something that has to be done manually for every GameObject in Unity.

Breakout in Unreal Engine
Unreal Engine 4 Editor

When building the game, Unreal Engine provides options for creating Android, iOS, HTML, Linux, and Windows packages.  However, most of these don’t work out of the box, and it only makes packages for Windows 64-bit.  I’m not sure if I need a system running Windows 32-bit just to create a package for that platform.

There is a convoluted process for building an HTML5 app, which requires the installation of some tool called emscripten and Python 2.7, along with editing a configuration file.  Their page lists the HTML5 build as experimental and only works with 64-bit browsers.  The first time that I tried it my build died with an error before completion.  I tried it again later, and it successfully created a folder with five Javascript files, some data files, and an HTML file.  After about a half minute of loading, the game started playing in my FireFox web browser.  This was running the web files from my local system.  Subsequent attempts to load the game didn’t always work, but it seemed like pressing the ClearStoredGame button at the bottom of the page helped at times.  If they work out the bugs, I would definitely consider using Unreal Engine for the full Ludum Dare, since web games are more accessible to players.

During my few hours of Unreal Engine development tonight, the program has crashed twice which is not a good sign.  The editor does save your progress periodically, as you will see the notifications popup in the lower right corner.  During the first crash, I had to Ctrl-Alt-Delete and kill the process in task manager, which required me to start over from scratch.


Unreal Engine running in a web browser

Overall, it feels like an Unreal Engine was specifically developed with first person shooters and similar games in mind.  The collision detection actually feels really tight, whereas sometimes Unity has the problem of fast moving objects going though walls (even with continuous dynamic collision detection, which results in having to muck with physics skin properties).  I like the BluePrint development interface, as long as I don’t have to get into the C++ code.  I had to write C++ years ago, and it just was not a very elegant language in my opinion.  That may be due to my learning Java first, and C Sharp is essentially Microsoft’s platform dependent version of Java.  There is an Unreal Marketplace option available, but I haven’t had the chance to check it out yet.  I’m guessing that it is similar to Unity’s Asset store, where you can buy models, effects, and other assets for your game.

Creating My First NES Game

For this mini-LD challenge, I decided to try to create a game for the original 8-bit Nintendo Entertainment System (NES). This was the first game console that I ever owned as a kid, so creating a game for it was something that I had always wanted to do.

Unfortunately, to create an NES game, everything has to be written in assembly. When I was at Georgia Tech working on my computer science undergraduate degree, I did have one project where I had to write assembly code for an emulated MIPS system. The emulator was called SPIM (MIPS spelled backwards), and it looks like it is still available for download today. While writing assembly is not completely foreign to me, it definitely is not one of my favorite things to do. However, it was my only option for creating an NES game, and it was a nice refresher since I had not written any assembly code in years.

Getting a 4x4 tile sprite moving around on the screen
Running NES assembler to get a sprite to move on the screen in the NES emulator

The good news is that I found a great series of tutorials on the basics of creating a NES game written by bunnyboy at NintendoAge. He also has a wide variety of NES homebrew games available on his site, and an adapter for sale which allows compiled NES games to be played on actual NES hardware using a flash drive.

I started by working through weeks 1 to 5 of the “Nerdy Nights” tutorials. The first tutorial is the basics of binary and hexadecimal number systems. The second tutorial goes over the architecture of the NES, and provides a barebones example of an NES game with assembly code and example CHR ROM dump. I liked this incremental example approach, which allowed me to just to get something to compile and run, before tackling things like sprites and sounds. I tried a few different NES emulators, but FCEUX seemed to be the one that most people recommended these days. It was also available for download from the Ubuntu software center, so the installation was simple. However, the program that is used to compile the NES assembly code called NESASM3 is only offered as a Windows executable, so I had to install Wine to run it. After the setup was complete, I was successfully able to generate a .NES file, which ran in my NES emulator. However, it only displayed a blank screen, but it didn’t crash which was a start.

In the third tutorial, it goes into the details of the 6502 assembly code, which is the instruction set used by the NES assembler. It has all of the standard operators that you would expect, like “load” and “store” for writing to registers and memory. The NES is a fairly simplistic system, which only has three registers which are the Accumulator, Register X, and Register Y. The instruction set also has simple math functions like “add” and “subtract”, and control operators like “jump” and “branch”. The example of this lesson gave enough to get started to change the color of the screen based on the selected palette value. I tested by changing the screen color to different combinations of red, green, and blue by modifying the binary code of the byte which controls the screen color.

The fourth tutorial made things a little more interesting, as it taught me how to display a sprite to the screen and change its colors by modifying the color palette values. The color code chart at the top of the page was a very helpful reference. The fifth tutorial shows how to display even more sprites, and how to move them around on the screen using the controller. The example code just shows how to detect input from the A and B buttons, so I extended that code to detect all buttons on the NES controller. The test for the other buttons are just detected by additional “loads” from the from the address of the controller port ($4016). It also only moved the sprite in the left and right direction, so by writing to the sprite’s Y memory location, I was able to make the sprite move vertically when the up and down buttons are pressed on the virtual D-pad. The example only moved one “tile” of the sprite, so I extended the assembly code so that it moved all four tiles together.

In order to make the sprites for my game, I used a program called YY-CHR. It is another Windows executable, but it also runs well under Ubuntu using Wine. The only issue that I encountered was that I was not able to create a bitmap in Gimp, and then copy and paste it into YY-CHR. Therefore, I created my own “hand drawn” smiley face sprite, which is made up of four 8×8 pixel tiles.

I quickly discovered that writing everything in assembly was going to be a real pain. Therefore, I started writing a simple script that would read some parameters out of a file. Since this is going to be simple, I decided to write the script in Ruby. First, I took the 6502 assembly that I wrote and broke it into five pieces: the header (which doesn’t change), controls (player input), palette, sprites, and footer (also doesn’t change). I put each section of assembly into its own text file, and the main nesc.rb script just reads the contents of those files, and then calls NESASM3.exe at the end. I tested my script, and it successfully compiled an .NES image which I could play in my FCEUX emulator.

However, that isn’t very interesting since it always just compiles into the same game. As a starting point, I created a game.xml file, and defined four colors which define the four colors of the current palette. In the included nes_palette.rb file, I started defining colors based on the tutorial table, and stored those color constants and the corresponding hex values into a Hash. Then, in another script which reads the game.xml file using REXML and XPath, I stored the user’s defined palette colors in array. Then the palette code just looks up those values in the Hash to get the correct hex values to write palette data using the .db directive. Finally, I added a <palette> tag to contain these <color> elements.


Changing the palette colors of a sprite using user defined values in an XML file


I expanded my XML file specification format by adding a <player> tag for player attributes. The first player attribute I added was <speed>, which controls how fast the player moves around on the screen. This is currently a hexadecimal value, which is either added or subtracted (ADC / SBC) from from the x and y memory locations of the player’s tiles. In my original code, it only moved one of the player’s tiles, however with my Ruby compiler script I was able to create a simple loop to apply the add or subtract to each tile in the player sprite. In my user input code, I made a hash table of the user defined values so that it can be passed around to each of the functions. One issue I had was sometimes the tiles would not move at the correct speed. I found that this was because I was not clearing the carry flag. CLC must be called before every ADC, and SEC must be called before every SBC.

Creating a simple sprite in YY-CHR

Now that I had a way to display a sprite to the screen, I needed a way to change the sprite displayed on the screen. I created a simple rocketship sprite which is four tiles in YY-CHR and saved it to gatechgrad.chr. In my game.xml file, I created a new tag element called <spritesheet>, which holds the name of the CHR file containing the sprites to use for the game. I updated my nesc_userinput.rb script to store this value into the userOptions hash table, which is passed to the new nesc_footer.rb which generates the 6502 assembly to read the data from that CHR file. The NESASM3 assembler will throw a compile time error if the CHR file name is invalid.

While making these updates, I created a Makefile which simply recompiles everything (ruby nesc.rb; wine NESASM3 temp.asm) whenever the game.xml file is updated.

game.xml which defines various properties of the NES game

In the game.xml file, I added a new <sprite> tag inside of the <player> tags, and the <sprite> tag contains multiple <tile> tags which have “row” and “col” as attributes and the tile number (in hexadecimal) as text. I updated the nesc_userinput.rb again to load all of these values into the user option hash table. That data then gets used by the nesc_sprites.rb file to write the assembly for the sprite data. After this was completed, I was successfully able to change which tiles composed the player sprite through the game.xml file. It is interesting that most sprites for NES games use sequential tiles, where the head may be tiles 0 and 1, body 2 and 3, and feet 4 and 5. This makes the reads sequential, but it is more difficult to edit a sprite sheet that way since the head, body, and feet are all of the same tile row. For my game, I just specified 0 and 1 ($00 and $01) as the top part of my ship and 16 and 17 ($10 and $11) as the bottom, that way the sprite is easily editable in the sprite sheet.

The next step is to get the ship shooting. I added a new bullet tile to the spritesheet using YY-CHR. In the nes_sprites.rb script, I added a new line to load the bullet sprite. Then I increased the loop counter in the header to read the new sprite by increasing the CPX value to #$30. This should actually load 12 tiles, since each tile is defined by 4 bytes (x, attributes, tile index, y). In the controller code, under the ReadA: label, which is executed when the A button is pressed, I set bullet’s x and y location values to the position of the spaceship. I used the values of the first spaceship tile, to make things simple for now. After the control handling code, I added a section to add (CLC/ADC) the bullet speed to the x position of the bullet. Now, the bullet’s position will fly from left to right on the screen. In the game.xml file, I added a <bullet> tag which contains <speed> containing the speed of the bullet in hexadecimal, just like the player speed. This value is read and used to determine the bullet speed in the game.

Unfortunately, when the bullet reaches the right edge of the screen, it will loop back to the left side. Also, if the A button is repeatedly pressed, the one bullet will reset back to the location of the spaceship. I created a variable in the assembly code to hold the “alive” flag. When the A button is pressed, I load a 1 (LDA #$01) and store it in the alive flag. In the UpdateBullets section, I load the bullet alive flag and compare it with 1 (CMP #$01) and jump to the end of the section if it is not equal (BNE). This will make the bullet stop if it is not alive. Using this reference I learned how to check if a value is greater than or less than a number by using the BCC and BCS (“branch carry clear” and “branch carry set”) instructions. Using BCC, if the bullet’s x location is less than 240 (#$F0) then it will jump to the end of the section, otherwise it will set the alive flag to zero. I used 240 instead of 255, due to the values looping back around to zero when value exceeds the 255 limit for a byte. As long as the bullet speed is less than 15 there should be no problems. There are techniques for checking if the summed value exceeds 255, which is used for 16-bit numbers, so I will investigate that later. To fix the other bullet position reset problem when A is repeatedly pressed, after the A button is read I simply loaded the bullet alive flag, compared it with one and jumped to the end if it is equal.

Displaying player ship, missile, enemy ship, and score on the game screen.

The next step was to get an enemy on the screen. I used YY-CHR to create a new enemy ship sprite on my spritesheet, which is another four tile sprite. I added a new <enemy> tag to my XML file, which contains all of the properties of the enemy. In the Ruby code, I added an array to hold all of the enemies, and an Enemy class which contains the memory locations of the X and Y position of the enemy. I also defined an “alive” flag variable for the enemy, so that I can set it to dead when it is destroyed. In the future, I could also add a life value, if the enemy takes multiple hits to be killed. To get the enemy moving, I just simply keep subtracting the ship’s speed value to the x location variable, so the enemy will continually keep moving toward the left side of the screen. This isn’t really impressive, but at least it’s moving which gives the game a bit of a challenge. When the ship’s “alive” flag is set to zero (#$00), then the enemy ship stops moving.

Displaying text in the game is done by writing the text tiles to background name table. For my spritesheet, “0” starts at tile $00 and goes up to “9” at tile $09. The letter “A” starts at tile $0A and goes up to “Z” at $23. The letter mappings can be seen in the PPU viewer of FCEUX. Using the technique explained in the tutorial, I was able to display the score up to six digits at the top of the screen. I created a Hash in the script to map all of the letters to the equivalent tile numbers. It may be possible to write a function to do this conversion, but I will leave that to do later.

I separated all of the object code into its own Ruby script, which held the memory locations of all of the tiles for each of the objects. The update code for each of the objects was also moved to another script containing update subroutines. In the update script, the locations of the tiles are set based on the location of the object, plus an offset which is added based on the tile’s row and column in the sprite.

Next, I added collision detection between the bullet and the enemy ship. This was accomplished through a series of CMP, BCS, and BCC statements which check to see if the bullet’s x and y position are within the enemy sprite. I subtracted 4 from the left and top bounds of the enemy ship, so that a collision is detected when the bullet’s x or y is equal to the enemy ship’s x or y, since there is no “greater than or equal to” operator. When the bullet collides with the enemy ship, the bullet alive variable is set to #$00. Then JSR is called to execute the code to increment the player’s score. This collision code just checks to see if the bullet’s x, y location is inside the enemy ship rectangle to make things simple. Modifying the code to do rectangle/rectangle would complicate things too much for this simple game.

The next step was to get a simple sound to play when a bullet is shot, which I got working by following this tutorial. This just plays a simple beep, and I modified it so that it doesn’t continually play by enabling the length counter and setting it to 0001.

Two enemies on screen with six digit score

I added a second enemy by adding to the enemy array defined in the object script, and set the appropriate address values for the x, y, and tile index values. For now, I just duplicated all of the bullet collision and enemy movement code for the second enemy. I added a new “gametime” varaible that gets incremented on every NMI interrupt break. When the gametime variable is equal to #$FF, then both enemies are set to alive and their y position are set back to a position on screen. This gives the appearance of new enemy ships spawning.

In order to have a game over state, I added a new variable to track the player’s lives. Whenever the player’s ship collides with an enemy ship, a new subroutine is called which subtracts one from the player’s lives, and set the game state to “GAME OVER” if the number of lives are equal to zero.

Using my sprite editor, I created a title graphic for the game. However, I quickly found that it isn’t so easy to change all of the background tiles on the screen at once. I tried a few things, but I had little luck. After digging around on some forums, I found that it really isn’t possible to update the entire background in one update, like updating the screen in modern game programming environments. One poster said that it’s only possible to update 3 rows or columns in one update, or the game will start to slow down. For now I’m leaving the title screen out, but I’m hoping to eventually get it working in the game.

spacedude05
Title screen… to be added… hopefully.

Overall, I’m happy with what I was able to accomplish in a relatively short period of time. I’ve decided to give a 20 minute Lightning Talk on the process of creating a NES game using 6502 assembly at the CodeStock technical conference in Knoxville next month (July 2014).

Download and play Space Dude here

Resources:

Nerdy Nights at NintendoAge

NesDev : Wiki, NES Coding Competition, NES Tech FAQ

Programming M.C. Kids